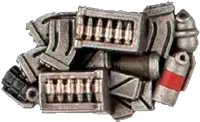
1X AMMO CACHE
Whether stockpiles deliberately set out for warriors to access quickly, or the abandoned munitions of the slain, these caches can prove vital for a swift reload in the heat of battle.
Before the battle, you can set up one of your Ammo Cache
markers wholly within your territory. Friendly operatives can perform the following
mission action during the battle.
AMMO RESUPPLY0AP
One of your Ammo Cache markers the active operative controls is used during this turning point.
Until the start of the next turning point, whenever this operative is shooting with a weapon from its datacard, you can re-roll one of your attack dice.
An operative cannot perform this action while within control range of an enemy operative, if that marker isn’t yours, or if that marker has been used this turning point.
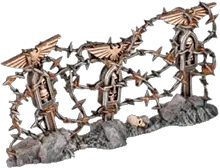
1X RAZOR WIRE
Spooled rapidly out and affixed to jutting posts, razor wire acts as an easily deployed barrier and a painful deterrent to enemy operatives seeking to attack along particular routes.
Razor wire is
Exposed and Obstructing terrain. Before the battle, you can set it up wholly within your territory, on the killzone floor and more than 2" from other equipment terrain features, access points and
Accessible terrain.
Obstructing: Whenever an operative would cross over this terrain feature within 1" of it, treat the distance as an additional 1".
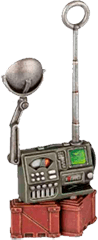
1X COMMS DEVICE
Communications devices can be swiftly hijacked and employed to coordinate operations or call in support during a firefight.
Before the battle, you can set up one of your Comms Device
markers wholly within your territory. While a friendly operative controls this marker, add 3" to the distance requirements of its
SUPPORT rules that refer to friendly operatives (e.g. ‘select one friendly operative within 6"’ would be 9" instead). Note that you cannot benefit from your opponent’s Comms Device markers.
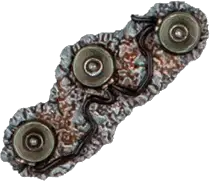
1X MINES
The battlefields of the 41st Millennium are plagued by myriad types of mine, from simple frag charges to monofilament web-snares and microplasma charges. Ultimately, all serve a similar, horrible purpose.
Before the battle, you can set up one of your Mines
markers wholly within your territory and more than 2" from other markers, access points and
Accessible terrain. The first time that marker is within an operative’s
control range, remove that marker and inflict D3+3 damage on that operative.
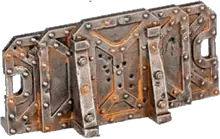
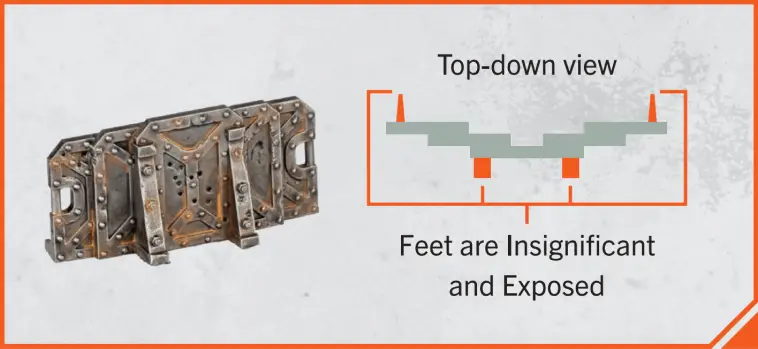
2X LIGHT BARRICADES
Designed to be lugged into place and then deployed by operatives and combat engineers, these barriers are proof against small arms fire.
Light barricades are
Light terrain, except the feet, which are
Insignificant and
Exposed. Before the battle, you can set up any of them wholly within your territory, on the
killzone floor and more than 2" from other equipment terrain features, access points and
Accessible terrain.
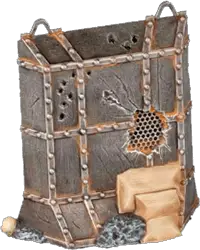
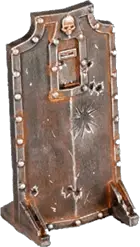
1X HEAVY BARRICADE
A redoubtable slab of plasteel and adamantine, this layered protective barrier provides shelter amidst the fiercest firefights.
A heavy barricade is
Heavy terrain. Before the battle, you can set it up wholly within 4" of your drop zone, on the
killzone floor and more than 2" from other equipment terrain features, access points and
Accessible terrain.
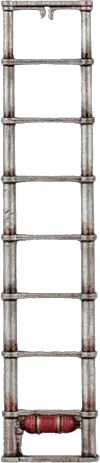
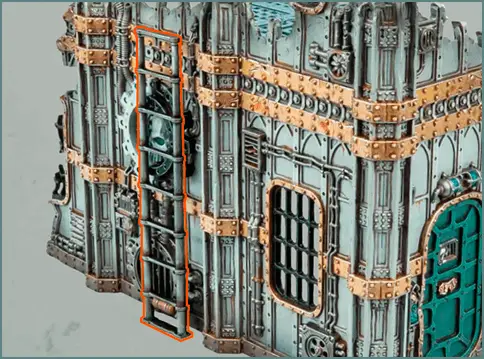
2X LADDERS
Carried into battle in their compacted forms, these ladders provide a rapid route of ingress to strongholds, or access to vital vantage points.
Ladders are
Insignificant and
Exposed terrain. Before the battle, you can set up any of them as follows:
- Wholly within your territory.
- Upright against terrain that’s at least 2" tall.
- More than 2" from other equipment terrain features.
- More than 1" from doors and access points.
Once per action, whenever an operative is
climbing the terrain feature a ladder is placed against, treat the vertical distance as 1" if the ladder is within that operative’s
control range during that entire climb
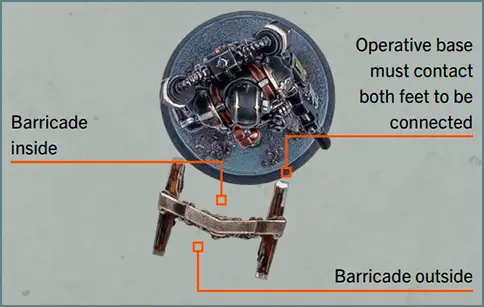
1X PORTABLE BARRICADE
A suppression shield with armoured feet that provides mobile cover.
A portable barricade is
Light, Protective and Portable terrain, except the feet which are
Insignificant and
Exposed. Before the battle, you can set it up wholly within your territory, on the
killzone floor and more than 2" from other equipment terrain features, access points and
Accessible terrain.
Protective: While an operative is in
cover from this terrain feature, improve its Save stat by 1 (to a maximum of 2+).
Portable: This terrain feature only provides cover while an operative is connected to it and if the shield is
intervening (ignore its feet). Operatives connected to the inside of it can perform the following unique
action during the battle.
MOVE WITH BARRICADE 1AP
The same as the Reposition action, except the active operative can move no more than its Move stat minus 2" and cannot climb, drop, jump or use any kill team’s rules that remove it and set it back up again (e.g. HEARTHKYN SALVAGER FLY, MANDRAKE SHADOW PASSAGE).
Before this operative moves, remove the portable barricade it’s connected to. After it moves, set up the portable barricade so it’s connected again, but the portable barricade cannot be set up within 2" of other equipment terrain features, access points or
Accessible terrain. If this is not possible, the portable barricade is not set up again.
This action is treated as a Reposition action. An operative cannot perform this action while within
control range of an enemy operative, or during the same
activation in which it performed the
Fall Back or
Charge action.
UTILITY GRENADES
From neuro-suppressant psybombs to smoke-belching chemical charges, grenades of this sort can suppress the enemy and be the difference between life and death.
When you select this equipment, select two utility grenades (2 smoke, 2 stun, or 1 smoke and 1 stun). Each selection is a unique
action your operatives can perform, but your kill team can only perform that action a total number of times during the battle equal to your selection.
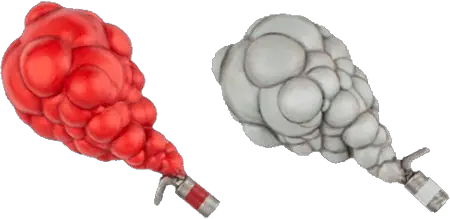
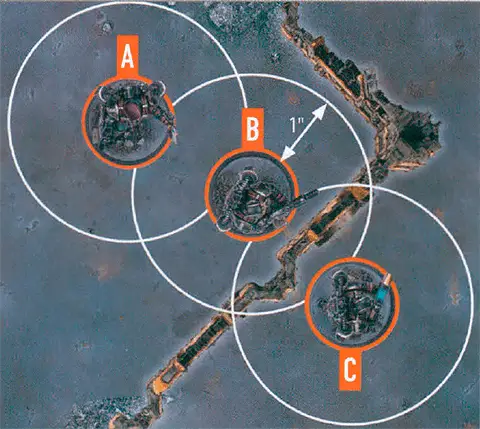
SMOKE GRENADE 1AP
Place one of your Smoke Grenade
markers within 6" of this operative. It must be
visible to this operative, or on
Vantage terrain of a terrain feature that’s visible to this operative. The marker creates an area of smoke 1" horizontally and unlimited height vertically from (but not below) it.
While an operative is wholly within an area of smoke, it’s
obscured to operatives more than 2" from it, and vice versa. In addition, whenever an operative is shooting an enemy operative wholly within an area of smoke, weapons with the
Piercing 2 or
Piercing Crits 2 weapon rule have the
Piercing 1 or
Piercing Crits 1 weapon rule (respectively) instead, unless they’re within 2" of each other
In the
Ready step of the next
Strategy phase, roll one D3. Remove that Smoke Grenade marker after a number of activations equal to that D3 have been completed or at the end of the turning point (whichever comes first).
An operative cannot perform this action while within control range of an enemy operative, or if you have reached the total number of times your kill team can perform it.
STUN GRENADE 1AP
Select one enemy operative
visible to and within 6" of this operative. That operative and each other operative within 1" of it takes a stun test. For an operative to take a stun test, roll one D6: on a 3+, subtract 1 from its APL stat until the end of its next
activation.
An operative cannot perform this action while within control range of an enemy operative, or if you have reached the total number of times your kill team can perform it.
EXPLOSIVE GRENADES
A variety of offensive grenades are employed by the forces of the 41st Millennium. These range from simple fragmentation grenades to plasma and gravitic concussion grenades, while even more exotic devices are used to crack open enemy armour.
When you select this equipment, select two explosive grenades (2 frag, 2 krak, or 1 frag and 1 krak). Each selection is a ranged weapon your operatives can use, but your kill team can only use that weapon a total number of times during the battle equal to your selection.
| NAME | ATK | HIT | DMG |
| Frag grenade | 4 | 4+ | 2/4 |
WR |
Range 6", Blast 2", Saturate |
| NAME | ATK | HIT | DMG |
| Krak grenade | 4 | 4+ | 4/5 |
WR |
Range 6", Piercing 1, Saturate |
BREACHING CHARGE
This explosive device can blast a tactical insertion point through even the most formidable bulkhead or bunker wall.
Once per battle, when a friendly operative performs the Breach action, you can use this rule. If you do, that operative can perform that action for 1 less AP (to a minimum of 1AP) as though it had the word ‘breach marker’ on its datacard.

 Universal Equipment