
The Missions
This section comprises three mission packs that provide you with multiple formats in which to conduct battles in the killzone, including head-to-head, cooperative/solo and multiplayer missions. 1
1 Books
| Book | Kind | Edition | Version | Last update |
| Warhammer 40,000 Kill Team: Core Book | ||||
| Warhammer 40,000 Kill Team: Core Book | Rulebook | 3 | February ’26 | February 2026 |
PRELIMINARY OPS MISSION PACK
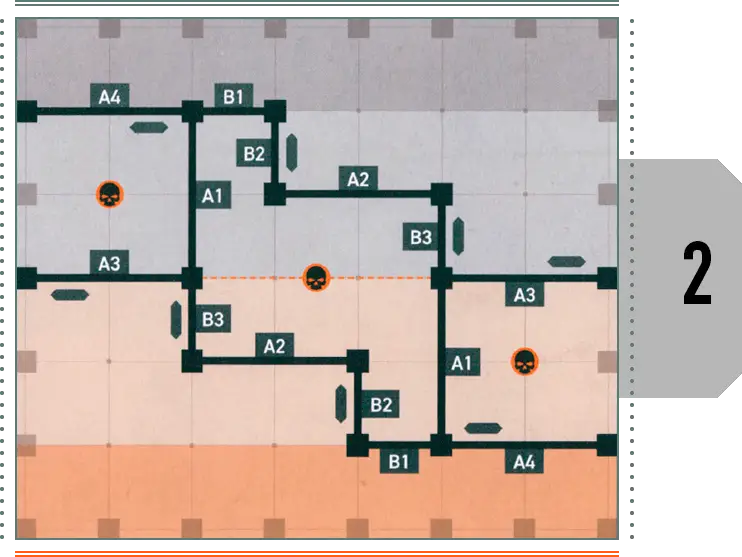
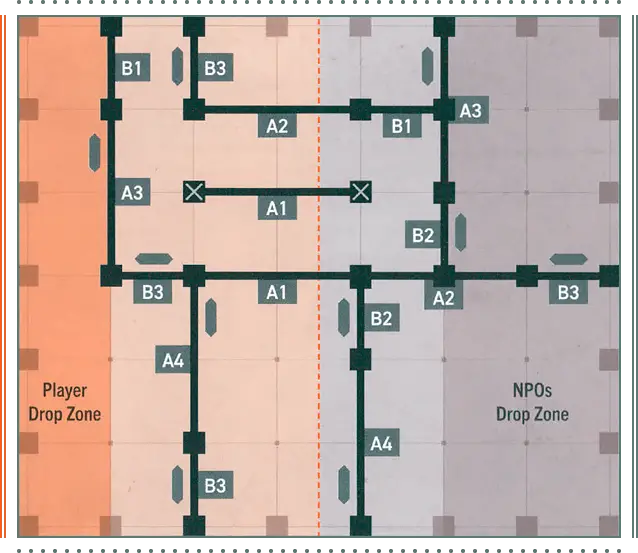
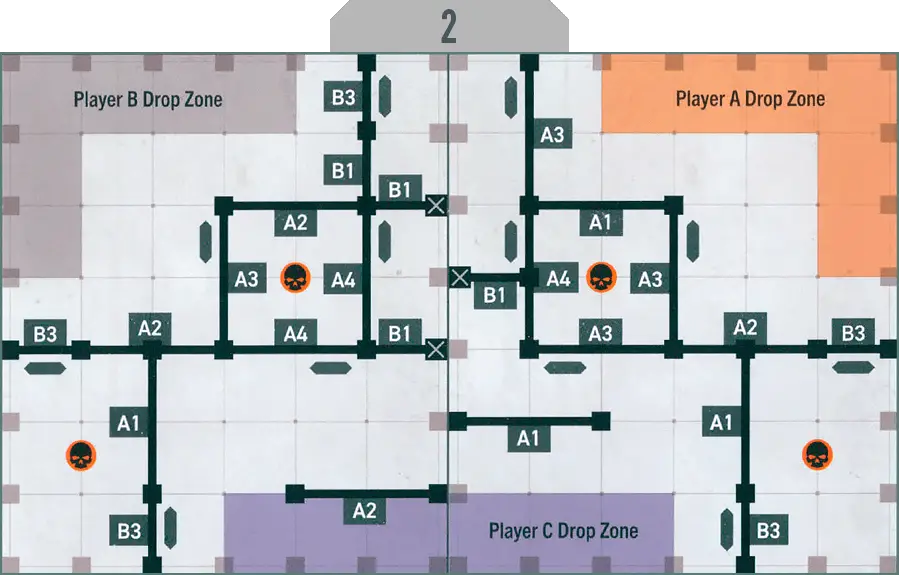
This is a player vs player (PvP) mission pack for head-to-head gameplay. It’s ideal for players who are learning the game or a new kill team, but still want to test themselves in a balanced, competitive format. When players are ready, the Approved Ops mission pack (available separately) is the next step, and provides the most up-to-date and in-depth PvP gameplay experience. The game sequence and map keys for this mission pack are found on Appendix page.Set Up
The player with initiative rolls one D6: on a 1-3, use map 1; on a 4-6, use map 2.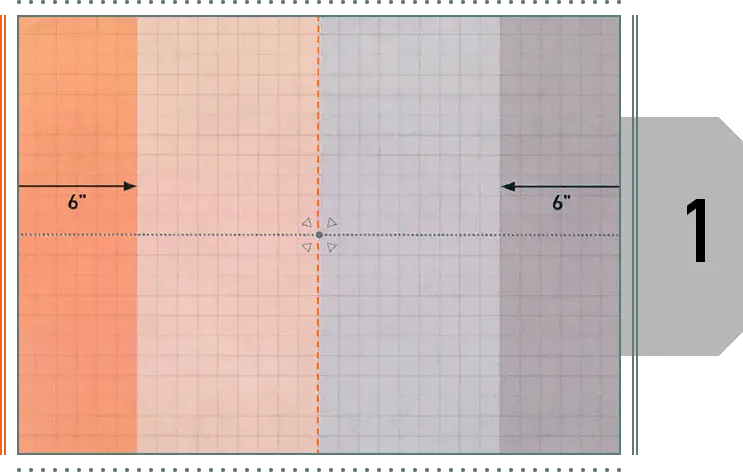
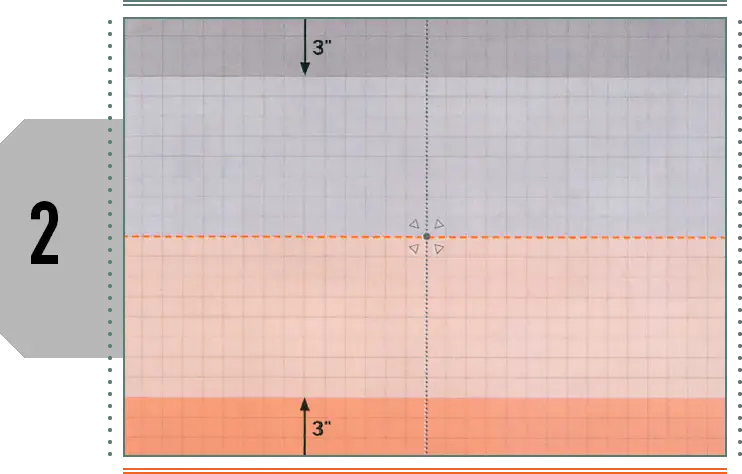
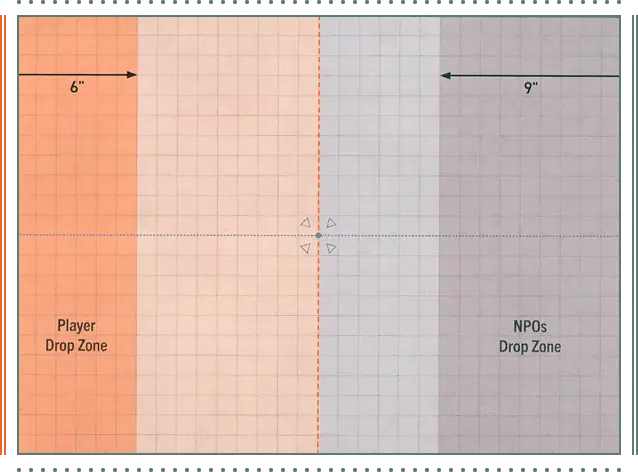
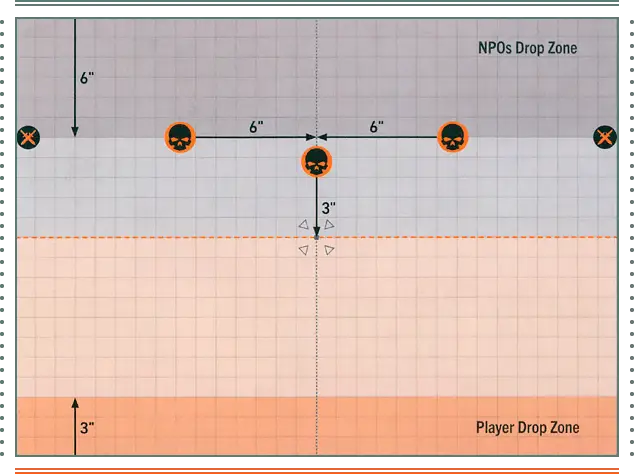
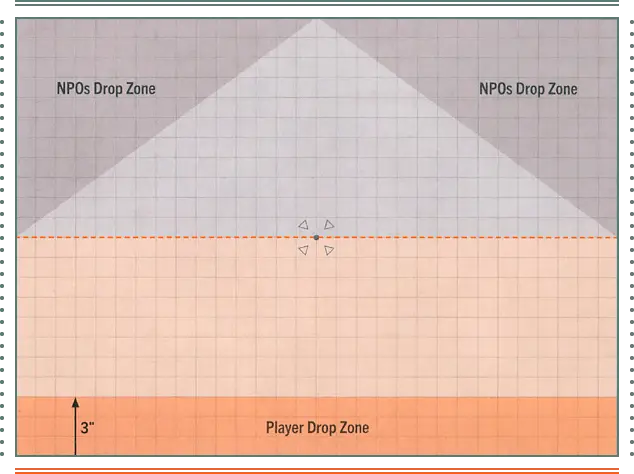
The player without initiative places one objective marker on the centreline, more than 2" from neutral killzone edges. Then, each player places one objective marker, Starting with the player who has initiative. They must be wholly within different territories, within 3" of the centreline, more than 5" from other objective markers and more than 2" from neutral killzone edges.
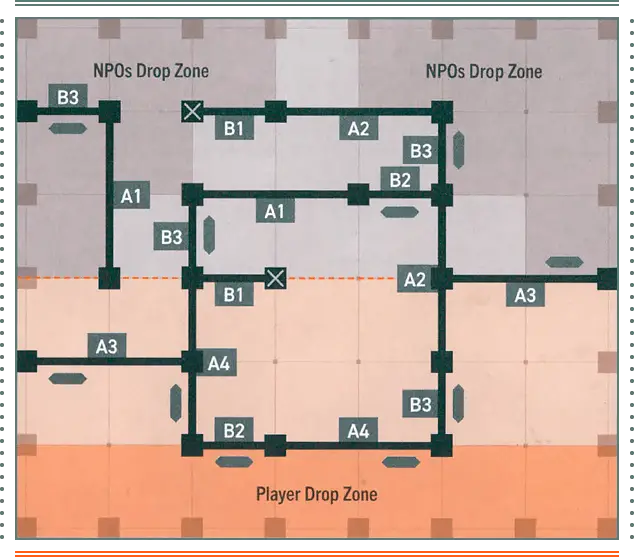
Killzone: Gallowdark
If you are using Killzone: Gallowdark, roll one D6 and use the map that corresponds to the result (re-roll results of 5-6). Note that objective markers are already placed on these maps.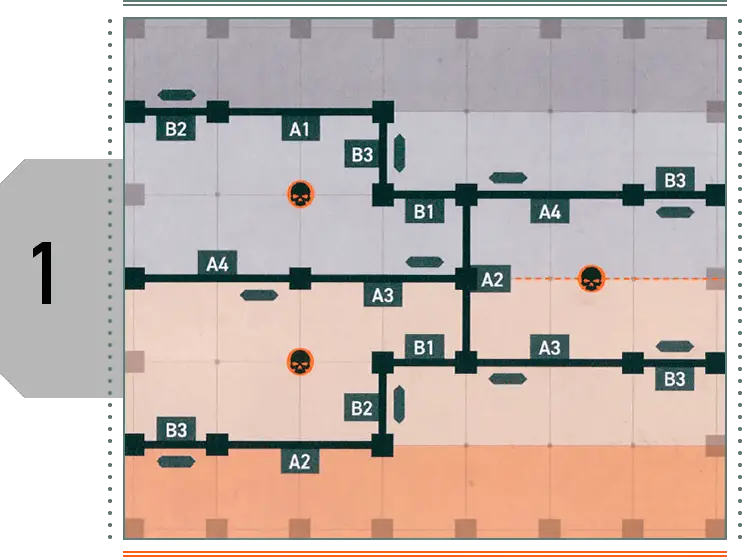
Operations
Players must attempt to score Victory points (VP) from two operations: kill op and crit op. The battle ends after four turning points, and the player with the most VP is the winner.Kill Op
Every enemy operative represents an elite warrior of great value to your foe. Each one gunned down, dismembered or eviscerated is another small victory in and of itself.
Victory Points
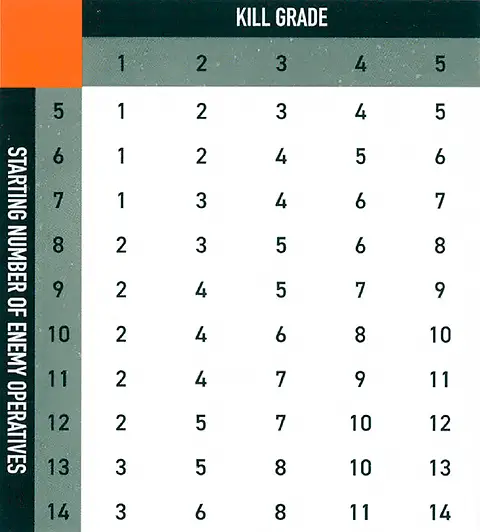
You start without a kill grade. As enemy operatives are incapacitated, your kill grade goes up until it reaches 5.- Whenever you move to a new kill grade, you score 1VP.
- At the end of the fourth turning point, if your kill grade is higher than your opponent’s, you score 1VP.
The table below shows how many enemy operatives must be incapacitated to reach each kill grade. The row you use is determined by the starting number of enemy operatives.
For example, if the starting number of enemy operatives was eight, two enemy operatives must have been incapacitated to reach kill grade 1, and then another one (totalling three) to reach kill grade 2.
Crit Op
The player with initiative rolls one D3. The players use the crit op that corresponds to the result.1. Secure
Heavy ordnance or a rapid advance previously neutralised the area. Move in its wake to secure the killzone.
SECURE1AP
- If any objective markers are secured by your kill team, you score 1VP.
- If more objective markers are secured by your kill team than your opponent’s kill team, you score 1VP.
2. Loot
A larger force has hastily withdrawn from the killzone. Seize the supplies and intelligence left behind.
LOOT1AP
3. Transmission
Firing coordinates, urgent reports or strategic updates must be transmitted back to base, but it is vital this information remains classified.
INITIATE TRANSMISSION1AP
- If friendly operatives control any transmitting objective markers, you score 1VP.
- If friendly operatives control more transmitting objective markers than enemy operatives do, you score 1VP.
JOINT OPS MISSION PACK
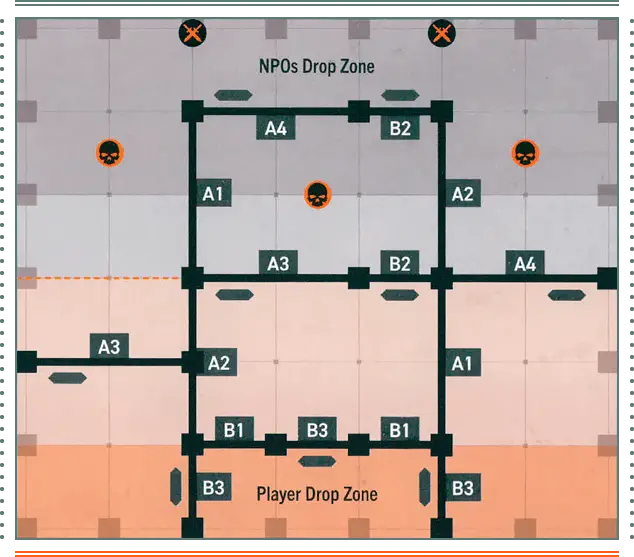
This is a player vs environment (PvE) mission pack that provides cooperative or solo gameplay. It’s ideal for introducing new players to the game as you will work together to achieve victory and aid your partner as they learn the game. It’s also ideal for players without an active community to play solo and gain experience in the game. In either case, this is intended as an introductory mission pack, and future PvE mission packs will expand the concept further. If playing cooperatively, you are still one ‘player’. This means you don’t double your CP, equipment selections, etc.; you must manage them between you. The game sequence and map keys for this mission pack are found on Appendix page.Mission
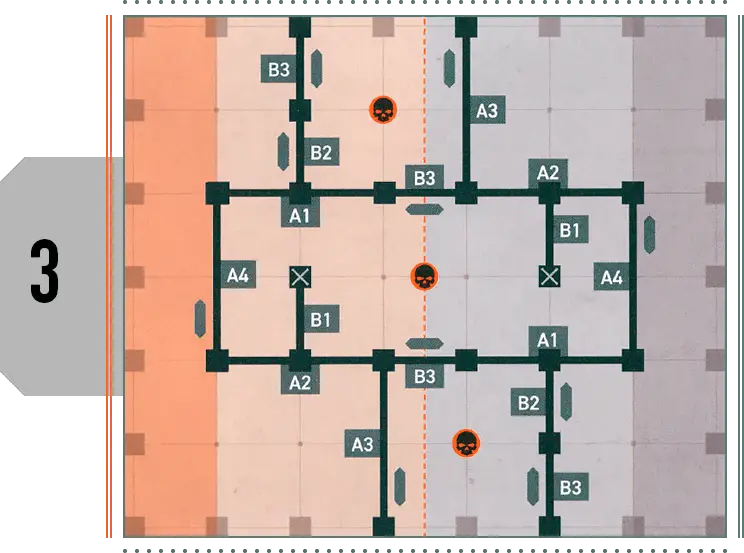
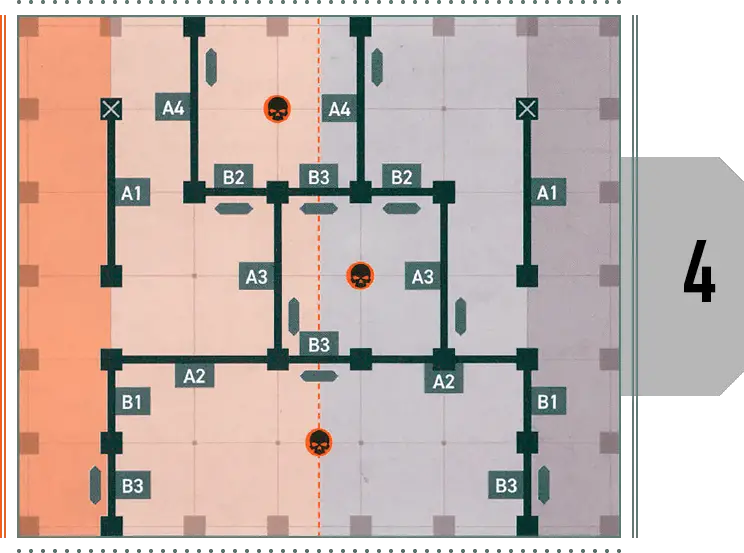
Below, you will find three missions. Each mission has two maps, one for Killzone: Gallowdark, and one for any killzone that isn’t close quarters. To randomly determine a mission, the players roll one D3 and consult the table below. Alternatively, they can play through each mission in order.Kill Team Selection
The players use one kill team. If you are playing solo, simply select your kill team as normal. If you are playing cooperatively, either select a kill team as normal and split the operatives between you, or take half of any kill team each. If it’s an odd number, round up (or down for more of a challenge). If you’ve taken separate teams, remember that some rules specify certain operatives through keywords, so one kill team’s rules won’t necessarily interact with another’s.Your kill team will fight against procedurally generated non-player operatives (known as NPOs). Unlike your highly trained operatives, NPOs are standard soldiers from their army — sentries, frontline troops, guards, etc. As such, you don’t select a kill team for them. Instead, you select the appropriate datacards. Alternatively, you can create your own datacards to accurately reflect their stats using existing kill teams as a guide — just ignore rules that wouldn’t be appropriate for standard soldiers.
Each mission specifies how many NPOs you should include, determined by their combined Wounds stat. To increase or decrease the difficulty, simply increase or decrease this number as appropriate.
Initiative
When rolling off to decide who has initiative, roll one dice for the NPOs and one dice for the solo/co-op kill team. If the NPOs win the roll-off, they will always choose to have initiative.Behaviour
Below, you will find NPO behaviours. NPOs have a behaviour in their name that determines what they do.- Each behaviour will specify what order they have when activated.
- Whenever an NPO would perform an action (including when counteracting), perform the first action it can do from its behaviour. If it cannot do any, it’s expended (or pass, in the case of counteracting).
Equipment
When selecting equipment for NPOs, use options from the Kill Team Upgrade: Equipment Pack (light barricades, ammo pile, etc.) and set them up as feels appropriate.Gambit Step
In the Gambit step, NPOs will always pass.NPO Behaviours
 Brawler
This operative will move towards the enemy to fight them, but will seek cover on the way.
When activated, if this NPO can perform either of its first two actions during that activation, give it an Engage order. If it cannot, give it a Conceal order.
1. Fight.
2. Charge the closest enemy operative via the shortest possible route.
3. Reposition towards the closest enemy operative, to cover if possible (a subsequent Dash action can fulfil this, if able).
4. Dash towards the closest enemy operative, to cover if possible.
 Marksman
This operative will move to an ideal position to shoot the enemy.
When activated, if this NPO can perform the Shoot action during that activation, give it an Engage order. If it cannot, give it a Conceal order.
1. Fall Back to cover. If possible, to a location where there’s a valid target that isn’t obscured. If not, where there’s an objective marker visible to this NPO.
2. Shoot.
3. Reposition to cover. If possible, to a location where there’s a valid target that isn’t obscured, if not, where there’s an objective marker visible to this NPO (a subsequent Dash action can fulfil these, if able).
4. Dash to cover. If possible, to a location where there’s a valid target that isn’t obscured, if not, where there’s an objective marker visible to this NPO.
Threat Principle
When making decisions for NPOs, use the threat principle: go with the option that’s worst for you. This can determine which ready NPO activates, how an NPO moves, shoots and fights, how to resolve their dice, etc. There are a few examples below (containing decisions in order of priority) that you can use as a guide, but if one option feels worse for you, go with that. If you still cannot decide, randomly choose one.1. Can perform the Fight or Shoot action (as determined by its behaviour), and is the most threatening to do so (e.g. it has a better weapon, is more likely to incapacitate an enemy operative, etc.).
2. Is not in cover from a player’s operative.
3. Is closer to a player’s operative.
1. Not obscured.
2. Not in cover.
3. An objective marker within its control range.
4. Closest.
5. Wounded.
6. Ready.
1. Wounded.
2. An objective marker within its control range.
3. Ready.
NPO Datacards
| ||||||||||||||||||||||||||||||||||||||||||||||||||||||||||||


| ||||||||||||||||||||||||||||||||||||||||||||||||||||||||||||||||||||||||||||||||||||||||||

| ||||||||||||||||||||||||||||||||||||||||||||||||||||||||||||
| ||||||||||||||||||||||||||||||||||||||||||||||||||||||||||||||||||||||||||||||||
| ||||||||||||||||||||||||||||||||||||||||||||||||||||||||||||||||||||||
| ||||||||||||||||||||||||||||||||||||||||||||||||||||||||||||||||||||||||||||||||
Breach
An enemy facility has been identified as a vital command post, supply base or other strategic asset that must be eliminated. With your operatives assembled, you must now secure entrance to the site.
If all the players’ operatives are incapacitated, the battle ends and the players lose.
Sabotage
Having forced passage into the enemy facility, it now falls to your operatives to locate and sabotage key systems and strategic assets while eliminating the waves of enemy soldiers rushing to defend them.
Reinforcements: Each strategy phase, if half the NPOs are incapacitated, they call in reinforcements as a STRATEGIC GAMBIT. Randomly select two incapacitated NPOs (excluding Heavy NPOs) or one incapacitated Heavy NPO. Set them up with a Conceal order and in cover (if possible) within 3" of a Reinforcement marker.
 Reinforcement marker
SABOTAGE1AP
If all the players’ operatives are incapacitated, the battle ends and the players lose.
Escape
The facility burns. Vital enemy assets have been annihilated thanks to your operatives’ efforts. With vengeful foes closing in from all sides, now is the time to make good your escape.
Reinforcements: Each strategy phase, if half the NPOs are incapacitated, they call in reinforcements as a STRATEGIC GAMBIT. Randomly select two incapacitated NPOs (excluding Heavy NPOs) or one incapacitated Heavy NPO. Set them up with a Conceal order and in cover (if possible) wholly within the NPOs drop zone, within 6" of a killzone edge and more than 6" from player operatives.
MULTIPLAYER OPS MISSION PACK
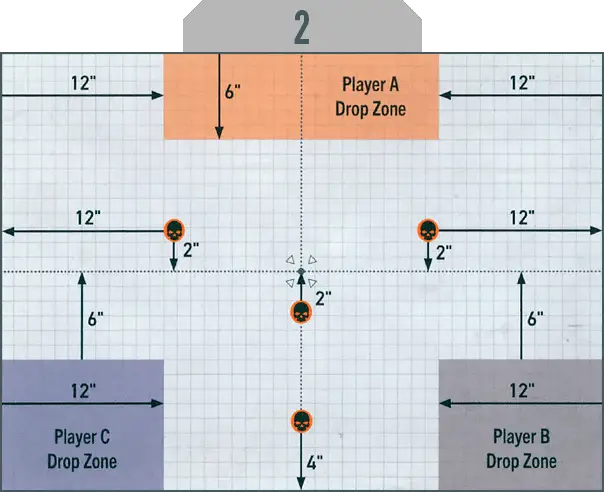
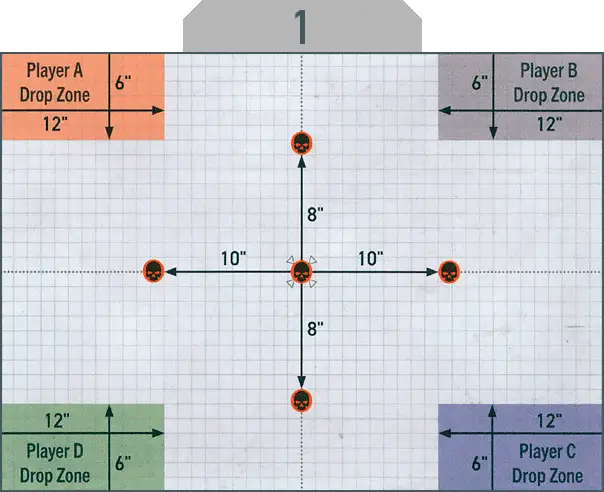
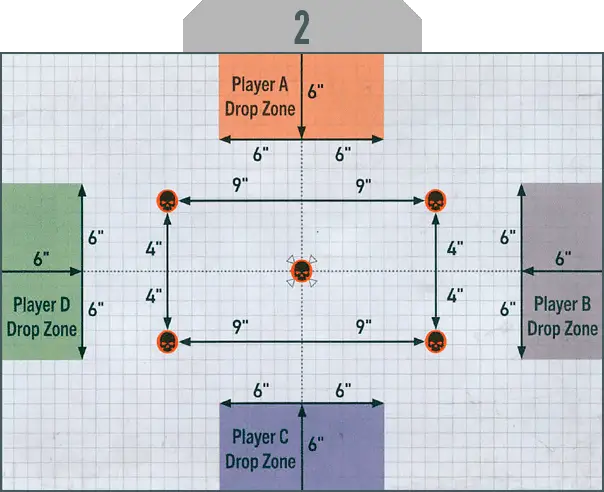
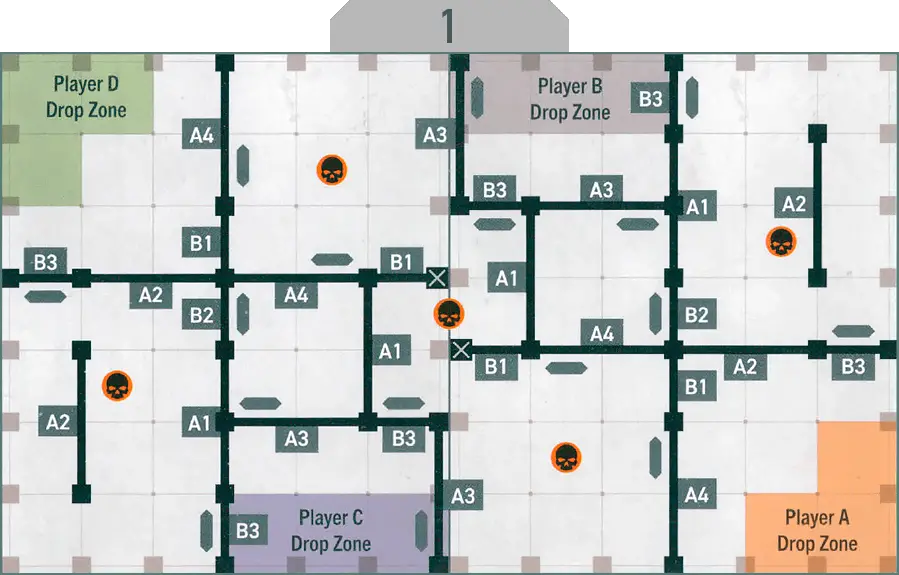
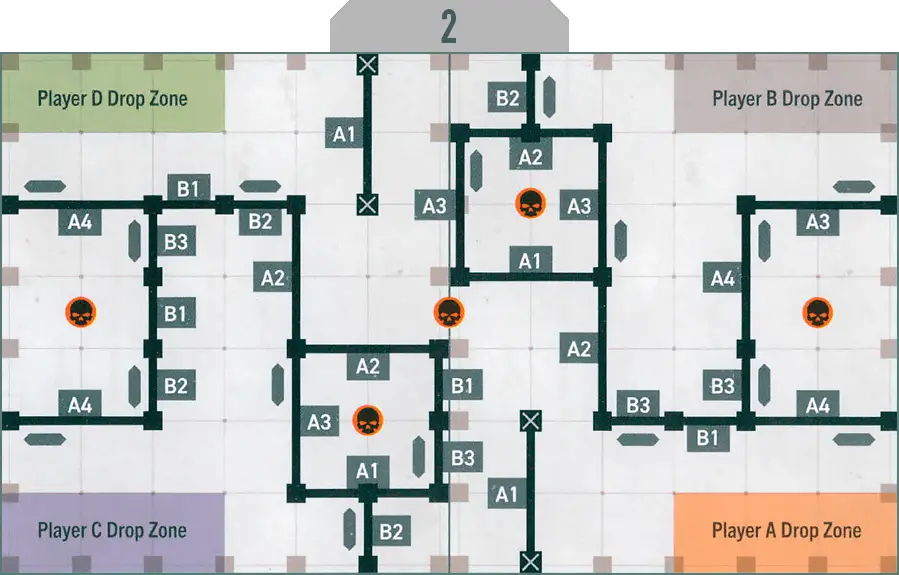
This is a mission pack for three or four player games. It’s ideal for a group of friends who want to play a game together. All other players are enemies, so expect plenty of carnage and destruction. This mission pack requires two samesized game boards combined along the long edge to create a larger killzone. The game sequence and map keys for this mission pack are found on Appendix page.Set Up
Using the set of maps appropriate to the number of players, the first player (see player order below) rolls one D6: on a 1-3, use map 1; on a 4-6, use map 2.Player Order
Whenever you would determine initiative, establish player order instead. All players roll one D6. The player with the highest result is first, the player with the second highest result is second, and so on. If two or more players are tied, those players keep rolling until an order is established between them.Whenever you would do something starting with the player with initiative, do it in player order instead. For example, select drop zones, set up kill teams and activate in the Firefight phase in player order, starting with the player who is first.

Killzone: Gallowdark
If you are using Killzone: Gallowdark, use the set of maps below appropriate to the number of players. The first player (see player order) rolls one D6: on a 1-3, use map 1; on a 4-6, use map 2.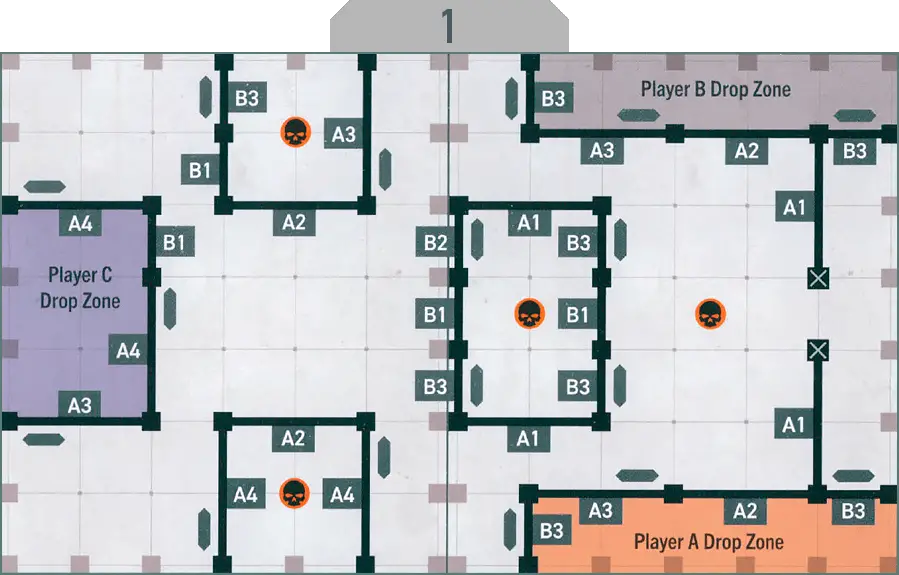
Operations
Players must attempt to score Victory points (VP) from two operations: elimination op and crit op. The battle ends after four turning points, and the player with the most VP is the winner.Elimination Op
As multiple kill teams push into the same region of contested territory, the gunfight becomes a battle of swift and savage attrition. The commander who thins the enemy ranks while safeguarding their own operatives will soon achieve tactical supremacy.
Victory Points
At the end of each turning point after the first, rank each player that incapacitated enemy operatives during that turning point. You score a number of VP as shown on the table below.
|
lf players are tied on a rank, they share the rank at the higher end of that tie. For example, if four players incapacitated enemy operatives during the turning point, and two of them incapacitated the second most, they would both be ranked second. The remaining player would be ranked fourth.
Crit Op
The first player rolls one D3. The players use the crit op that corresponds to the result.1. Secure
Heavy ordnance or a rapid advance previously neutralised the area. Move in its wake to secure the killzone.
SECURE1AP
2. Loot
A larger force has hastily withdrawn from the killzone. Seize the supplies and intelligence left behind.
LOOT1AP
3. Transmission
Firing coordinates, urgent reports or strategic updates must be transmitted back to base, but it is vital this information remains classified.
INITIATE TRANSMISSION1AP
While an operative has fewer than its starting wounds remaining, it’s wounded. While it has fewer than half its starting wounds remaining, it’s also injured. Subtract 2" from the Move stat of injured operatives and worsen the Hit stat of their weapons by 1.
‘Incapacitated’ and ‘removed from the killzone’ are separate. Some rules take effect when an operative is incapacitated, but before it’s removed.
Control range between operatives is mutual, therefore operatives are within each other’s control range if one of them is visible to and within 1" of the other.
The terrain is within both operative B and C’s control range.
Because of the terrain, operative B is not visible to operative C, and vice versa, therefore they are not within each other’s control range.
- When you’ve finished with your operative’s activation, that operative is expended. While expended, an operative is not ready.
Operate Hatch1AP
|

Shoot1AP
Charge1AP
|
Fight1AP
Reposition1AP
Dash1AP
Fall Back2AP
|

- You can draw an imaginary, unobstructed straight line (known as a Visibility line) 1 mm wide from the head of the active operative’s miniature to any part of the miniature of the intended target (not its base).