
Appendix
KILLZONE MAP KEY


Killzone: Gallowdark Map Key
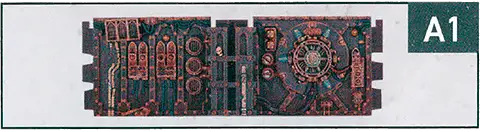
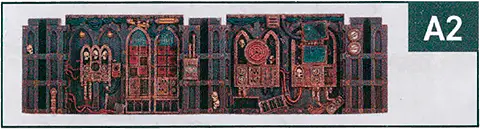
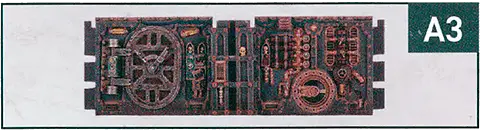
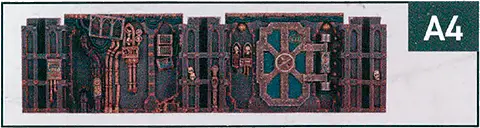


") Killzone: Tomb World Map Key
Killzone: Tomb World Map Key


DEBRIS


GAME SEQUENCE
1. SET UP THE BATTLE
- Each player selects a kill team for the battle.
- Determine a mission pack and mission.
- Set up terrain features and ensure their types are specified.
- Roll-off — the winner decides who has initiative. In the Multiplayer Ops mission pack, establish player order for initiative.
- Set up objective markers. Other than in Killzone: Bheta-Decima, all objective markers must be set up on the killzone floor.
- Each player selects a different drop zone, starting with the player with initiative.
2. SELECT OPERATIVES
- Each player secretly selects their operatives for the battle, adhering to the selection requirements in their kill team’s rules. They then reveal their selections simultaneously.
- Each player secretly selects up to four equipment options. Each option cannot be selected more than once per player. They then reveal their selections simultaneously.
- Each player gains 2CP.
3. SET UP OPERATIVES
- Each player alternates setting up an item of equipment that’s set up before the battle (ladders, etc.), starting with the player with initiative. Note it’s item by item, not option by option.
- Each player alternates setting up one third of their kill team (rounding up), starting with the player with initiative. When a player sets up an operative, it must be wholly within their drop zone and must be given a Conceal order.
4. PLAY THE BATTLE
- In the first turning point, the players roll-off and the winner decides who has initiative. If it’s a tie, the player who didn’t have initiative during set up decides (this takes precedence over roll-offs and ties).
- In the Multiplayer Ops mission pack, establish player order for initiative.
5. END THE BATTLE
- The battle ends when the mission specifies. If one player has no operatives in the killzone but the battle hasn’t ended, the other player(s) play out each remaining turning point until it does.
- The player with the most VP is the winner. If all the players are tied, it’s a draw. In the Joint Ops mission pack, the mission’s victory condition will specify how to determine the winner.
WEAPON RULES
Weapon rules apply whenever a friendly operative uses a weapon that has them. Common weapon rules can be found below, and you may find rare weapon rules in your kill team’s rules. Weapons gain no benefit from having the same weapon rule more than once, unless the weapon rule has an x, in which case select which x to use. If a friendly operative is using a weapon that has multiple weapon rules that would take effect at the same time, you can choose the order they take effect.Accurate x
You can retain up to x attack dice as normal successes without rolling them. If a weapon has more than one instance of Accurate x, you can treat it as one instance of Accurate 2 instead (this takes precedence over x rules).Balanced
You can re-roll one of your attack dice.Blast x
The target you select is the primary target. After shooting the primary target, shoot with this weapon against each secondary target in an order of your choice (roll each sequence separately). Secondary targets are other operatives visible to and within x of the primary target, e.g. Blast 2" (they are all valid targets, regardless of a Conceal order). Secondary targets are in cover and obscured if the primary target was.Brutal
Your opponent can only block with critical successes.Ceaseless
You can re-roll any of your attack dice results of one result (e.g. results of 2).Devastating x
Each retained critical success immediately inflicts x damage on the operative this weapon is being used against, e.g. Devastating 3. If the rule starts with a distance (e.g. 1" Devastating x), inflict x damage on that operative and each other operative visible to and within that distance of it. Note that success isn’t discarded after doing so — it can still be resolved later in the sequence.Heavy
An operative cannot use this weapon in an activation or counteraction in which it moved, and it cannot move in an activation or counteraction in which it used this weapon. If the rule is Heavy (x only), where x is a move action, only that move is allowed, e.g. Heavy (Dash only). This weapon rule has no effect on preventing the Guard action.Hot
After an operative uses this weapon, roll one D6. If the result is less than the weapon’s Hit stat, inflict damage on that operative equal to the result multiplied by two. If it’s used multiple times in one action (e.g. Blast), still only roll one D6.Lethal x+
Your successes equal to or greater than x are critical successes, e.g. Lethal 5+.Limited x
After an operative uses this weapon a number of times in the battle equal to x, they no longer have it. If it’s used multiple times in one action (e.g. Blast), treat this as one use.Piercing x
The defender collects x less defence dice, e.g. Piercing 1. If the rule is Piercing Crits x, this only comes into effect if you retain any critical successes.Punishing
If you retain any critical successes, you can retain one of your fails as a normal success instead of discarding it.Range x
Only operatives within x of the active operative can be valid targets, e.g. Range 9".Relentless
You can re-roll any of your attack dice.Rending
If you retain any critical successes, you can retain one of your normal successes as a Critical success instead.Saturate
The defender cannot retain cover saves.Seek
When selecting a valid target, operatives cannot use terrain for cover. If the rule is Seek Light, operatives cannot use Light terrain for cover. Whilst this can allow such operatives to be targeted (assuming they’re visible), it doesn’t remove their cover save (if any).Severe
If you don’t retain any critical successes, you can change one of your normal successes to a critical success. The Devastating and Piercing Crits weapon rules still take effect, but Punishing and Rending don’t..Shock
The first time you strike with a critical success in each sequence, also discard one of your opponent’s unresolved normal successes (or a critical success if there are none).Silent
An operative can perform the Shoot action with this weapon while it has a Conceal order.Stun
If you retain any critical successes, subtract 1 from the APL stat of the operative this weapon is being used against until the end of its next activation.Torrent x
Select a valid target as normal as the primary target, then select any number of other valid targets within x of the first valid target, but not within control range of friendly operatives, as secondary targets, e.g. Torrent 2". Shoot with this weapon against all of them in an order of your choice (roll each sequence separately).MARKER/TOKEN GUIDE


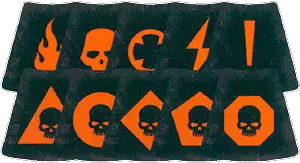
Use these to track rules effects for which you don’t have a specific token.
TAC OPS:
These markers are used with the Approved Ops mission pack (available separately).

RECON MARKER

SEEK & DESTROY MARKER

SECURITY MARKER

INFILTRATION MARKER
GRENADE TOKENS:


 AMMO PILE MARKER
 COMMS DEVICE MARKER
 MINE MARKER
 SMOKE GRENADE MARKER
 Use this generic side of the marker when you don’t have a specific marker for something.
 OBJECTIVE MARKERS
 INITIATIVE TOKEN
FRAG
KRAK
STUN
Roll-off
lf a rule requires a roll-off, both players roll one D6 and whoever has the highest wins the roll-off. If there’s a tie, roll-off again.
Killzone Floor
The killzone floor is the lowest level of the killzone (i.e. the game board). Anything that’s on a marker that’s on the killzone floor is also on the killzone floor.
Shoot1AP
Shoot with the active operative by following the sequence below. The active operative’s player is the attacker. The selected enemy operative’s player is the defender.
An operative cannot perform this action while it has a Conceal order, or while within control range of an enemy operative.
Charge1AP
The same as the Reposition action, except the active operative can move an additional 2".
It can move, and must finish the move, within control range of an enemy operative. If it moves within control range of an enemy operative that no other friendly operatives are within control range of, it cannot leave that operative’s control range.
An operative cannot perform this action while it has a Conceal order, if it’s already within control range of an enemy operative, or during the same activation in which it performed the Reposition, Dash or Fall Back action.
Counteract
When you would activate a ready friendly operative, if all your operatives are expended but your opponent still has ready operatives, you can select an expended friendly operative with an Engage order to perform a 1AP action (excluding Guard) for free. Each operative can only counteract once per turning point. That operative cannot move more than 2", or must be set up wholly within 2" if it’s removed and set up again, while counteracting (this is not a change to its Move stat, and takes precedence over all other rules). Counteracting is optional, so you can choose not to. In either case, activation alternates back to your opponent afterwards.Counteracting isn’t an activation, it’s instead of activating. This difference is important; for instance, it means action restrictions won't apply.
|

Precedence
Some rare rules will conflict with each other, so it must be established which takes precedence. In order of priority, a rule takes precedence if:1
2
3
4
5
6
If a rule on a datacard says ‘this operative can perform two Shoot actions during its activation’, this takes precedence over the core rules for action restrictions, as per precedence priority 3.
Visible
For an intended target to be Visible, the following must be true:- You can draw an imaginary, unobstructed straight line (known as a Visibility line) 1 mm wide from the head of the active operative’s miniature to any part of the miniature of the intended target (not its base).
In the rare instance that bases or parts of the active operative’s miniature prevent an intended target from being Visible to the active operative, such as when the active operative is directly below or above the intended target, treat those bases and parts as being invisible.
Some rare rules will require you to select a point that is Visible (e.g. a point on the killzone). In such circumstances, you must be able to draw an imaginary, unobstructed straight line 1mm wide from the head of the active operative’s miniature to the point you would select.
|

Valid Target
Some rules require you to select a valid target for an operative. This is most common when an operative is shooting, but some rare rules require it too.
|

Damage
When damage is inflicted on an operative, reduce their wounds by that amount. An operative’s starting number of wounds is determined by its Wounds stat (see datacards). If an operative’s wounds are reduced to 0 or less, it’s incapacitated, then removed from the killzone. Some rules allow an incapacitated operative to perform a free action before being removed from the killzone. Such an operative cannot perform more than one free action (excluding Place Marker) in this instance, and that operative’s player decides the order of any of its rules that occur before it’s removed from the killzone (taking precedence over the player with initiative deciding).While an operative has fewer than its starting wounds remaining, it’s wounded. While it has fewer than half its starting wounds remaining, it’s also injured. Subtract 2" from the Move stat of injured operatives and worsen the Hit stat of their weapons by 1.
Keep track of each operative’s remaining wounds with dice, tokens or by writing it down.
‘Incapacitated’ and ‘removed from the killzone’ are separate. Some rules take effect when an operative is incapacitated, but before it’s removed.
‘Incapacitated’ and ‘removed from the killzone’ are separate. Some rules take effect when an operative is incapacitated, but before it’s removed.
Dash1AP
The same as the Reposition action, except don’t use the active operative’s Move stat — it can move up to 3" instead. In addition, it cannot climb during this move, but it can drop and jump.
An operative cannot perform this action while within control range of an enemy operative, or during the same activation in which it performed the Charge action.
Blast x
The target you select is the primary target. After shooting the primary target, shoot with this weapon against each secondary target in an order of your choice (roll each sequence separately). Secondary targets are other operatives visible to and within x of the primary target, e.g. Blast 2" (they are all valid targets, regardless of a Conceal order). Secondary targets are in cover and obscured if the primary target was.Devastating x
Each retained critical success immediately inflicts x damage on the operative this weapon is being used against, e.g. Devastating 3. If the rule starts with a distance (e.g. 1" Devastating x), inflict x damage on that operative and each other operative visible to and within that distance of it. Note that success isn’t discarded after doing so — it can still be resolved later in the sequence.Piercing x
The defender collects x less defence dice, e.g. Piercing 1. If the rule is Piercing Crits x, this only comes into effect if you retain any critical successes.Punishing
If you retain any critical successes, you can retain one of your fails as a normal success instead of discarding it.Rending
If you retain any critical successes, you can retain one of your normal successes as a Critical success instead.Control Range
Many rules relate to control range such as moving, fighting and using cover. Something is within an operative’s control range if it’s visible to and within 1" of that operative.Control range between operatives is mutual, therefore operatives are within each other’s control range if one of them is visible to and within 1" of the other.
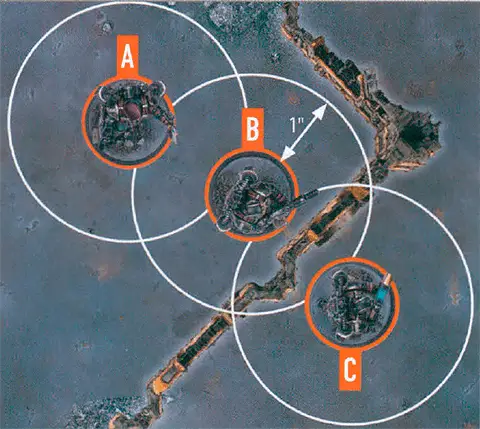
The terrain is within both operative B and C’s control range.
Because of the terrain, operative B is not visible to operative C, and vice versa, therefore they are not within each other’s control range.
Imagine control range as an area of interaction the operative has with things close to it.