
Core Rules
Books
| Book | Kind | Edition | Version | Last update |
| | ||||
| | Rulebook | 10 | 1.6 | July 2025 |
| | ||||
| | Rulebook | 10 | July 2025 | July 2025 |
Introduction
Warhammer 40,000 is a tabletop war game in which players command armies of Citadel miniatures and attempt to defeat their opponent through a mixture of skill, tactics and luck. Storytelling is at the core of Warhammer 40,000, with the rules designed to bring to life the epic conflicts between the forces of Mankind, aliens and daemons in the grim darkness of the far future. The purpose of the game is for all players to have an enjoyable shared experience, putting their tactical skills to the test while admiring the spectacle of amazing miniatures clashing on fantastic battlefields. In this spirit, good sportsmanship and politeness are at the heart of the game.
Games of Warhammer 40,000 are won by scoring more Victory points than your opponent through achieving various objectives, from recovering vital relics to capturing enemy strongholds or eliminating the opposing Warlord.
An introduction to the essential rules terms and concepts that underpin every Warhammer 40,000 battle.
THE BATTLE ROUND
From manoeuvring your army to unleashing thunderous firepower and brutal assaults, the action in Warhammer 40,000 unfolds in a series of battle rounds in which each player takes a turn.
DATASHEETS AND UNIT ABILITIES
Every Warhammer 40,000 unit has a datasheet, reflecting the characteristics and abilities they can draw upon in battle.
STRATEGIC RESERVES AND STRATAGEMS
From well-timed Strategic Reserves to deftly executed Stratagems, gifted generals make use of all the tactical advantages at their disposal.
TERRAIN FEATURES
Warhammer 40,000 battles are fought across all manner of grim and perilous landscapes, often strewn with ruins, wreckage and other obstacles your forces must navigate while they fight.
MUSTER YOUR ARMY
Use these steps before battle to organise your warriors and war machines into a formidable fighting force.
MISSIONS
Before committing your forces to war, you must first establish your strategic goals and the nature of the battlefield to be fought over. This section presents the essential steps involved in preparing for any kind of Warhammer 40,000 battle.
HINTS AND TIPS
Some sections feature Hints and Tips, covering topics like dice-rolling practices and how to ensure you don’t damage your models while moving them around the battlefield. Note that these are not rules, they are simply pieces of advice you may find useful to apply to your own games.
SUMMARIES
Some rules in the sections ahead include bullet-pointed summaries for quick reference purposes. Note that these are not comprehensive, and you should always consult the full rules if you are unsure.
- Unit: One or more models from the same datasheet.
- Friendly Models/Units: All models/units from the same army.
- Enemy Models/Units: All models/units from your opponent’s army.
CORE CONCEPTS
This section introduces various rules terms that you will find throughout the Core Rules and beyond. These key concepts form the basis of the Warhammer 40,000 rules, and are essential for every kind of battle.
Missions
To play a game of Warhammer 40,000, you must first select a mission. The mission will tell you how to muster your armies, create your battlefield and deploy your forces on the tabletop. It will also tell you any special rules that apply to the battle, and (most importantly!) what you need to do to win. You can find out more about missions here.Armies
Each player in a game of Warhammer 40,000 commands an army of Citadel miniatures, hereafter referred to as models. The mission you have selected will guide you as to how big your army should be.- Army: All of the models under your command.
Units
Models move and fight in units. A unit can have one or more models from a single datasheet (see below). Models and units from the same army are said to be friendly in relation to each other. Models and units from your opponent’s army are referred to as enemy models and units. If a rule affects ‘models’ or ‘units’ without specifying that they are friendly or enemy, that rule affects all models or all units, regardless of whose army they are in.- Unit: One or more models from the same datasheet.
- Friendly Models/Units: All models/units from the same army.
- Enemy Models/Units: All models/units from your opponent’s army.
Datasheets
The rules you will need to use your models in games are presented on datasheets. Each unit has a datasheet; you will need the datasheets for all the units from your army. You can find out more about datasheets here.Keywords
All datasheets have a list of keywords, separated into Faction keywords and other keywords. Faction keywords can be used to help you decide which models to include in your army, but otherwise both sets of keywords are functionally the same. In either case, keywords appear in KEYWORD BOLD. Keywords are sometimes linked to (or ‘tagged’ by) a rule. For example, a rule might say that it applies to INFANTRY units. This means it only applies to units that have the INFANTRY keyword on their datasheet. The pluralisation (or otherwise) of keywords does not affect which units the rule in question applies to.Redeployments
Rules that allow players to redeploy certain units after both armies are deployed (e.g. HURON BLACKHEART’s Red Corsairs ability) are always resolved after the Deploy Armies step (or, if you are playing a Crusade battle, after the Deploy Crusade Armies step), and before the Determine First Turn step, before determining who has the first turn. When a player uses such a rule, they remove that unit or units from the battlefield, then deploy them again using all the normal rules (for example, if all the models in one of these units have the Infiltrators ability, that unit’s player can set that unit up using that ability). Players alternate resolving any such rules, starting with the Attacker.Engagement Range
Engagement Range represents the zone of threat that models present to their enemies. While a model is within 1" horizontally and 5" vertically of an enemy model, those models – and their units – are within Engagement Range of each other.Models cannot be set up or end a Normal, Advance or Fall Back move within Engagement Range of any enemy models. If for any reason a model cannot meet this condition, that model is destroyed.
- Engagement Range: Within 1" horizontally and 5" vertically.
- Models cannot be set up or end a Normal, Advance or Fall Back move within Engagement Range of any enemy models.
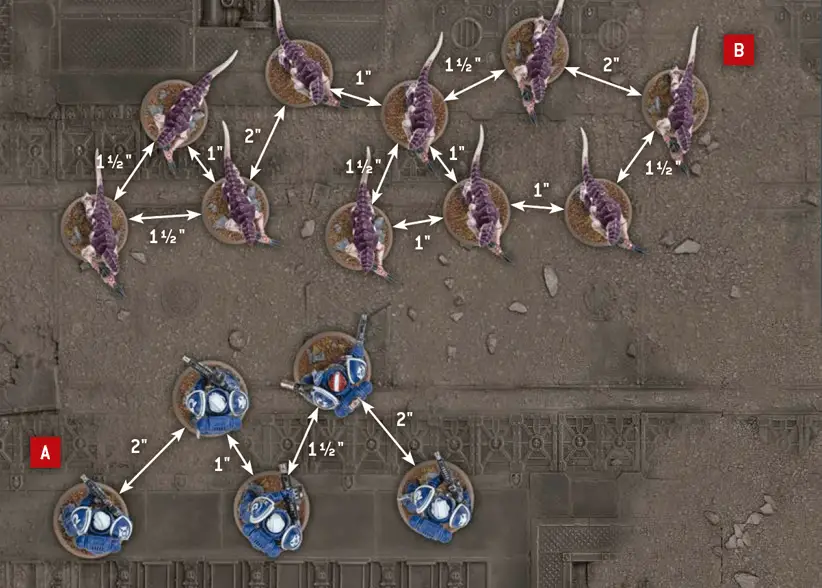
Unit Coherency
If for any reason a model cannot be set up in Unit Coherency, or cannot be set up following any restrictions stated by other rules (e.g. while setting up using the Deep Strike ability), that unit cannot be set up. If a unit cannot end a move in Unit Coherency, it cannot make that move and its models are returned to their previous positions.
At the end of every turn, each player must remove models, one at a time, from any of the units from their armies that are no longer in Unit Coherency, until only a single group of models from each of those units remains in play and in Unit Coherency. Models removed in this way count as having been destroyed, but they never trigger any rules that apply when a model is destroyed.
- Unit Coherency: Within 2" horizontally and 5" vertically of:
- One other model from the same unit (in units of 2-6 models).
- Two other models from the same unit (in units of 7+ models).
- At the end of every turn, if a unit is not in Unit Coherency, the controlling player must remove models until that unit is in Unit Coherency again.
|
Battlefield
Battles of Warhammer 40,000 are fought on rectangular battlefields. This can be any surface upon which the models can stand – a dining table, for example, or the floor. Your mission will guide you as to the size of battlefield required.Terrain Features
The scenery on a battlefield can be represented by models from the Warhammer 40,000 range. These models are called terrain features to differentiate them from the models that make up an army. Terrain features are set up on the battlefield before the battle begins. You can find out more about terrain features here.Unless the mission you are playing instructs you otherwise, you should feel free to create an exciting battlefield using any terrain features from your collection.
Measuring Distances
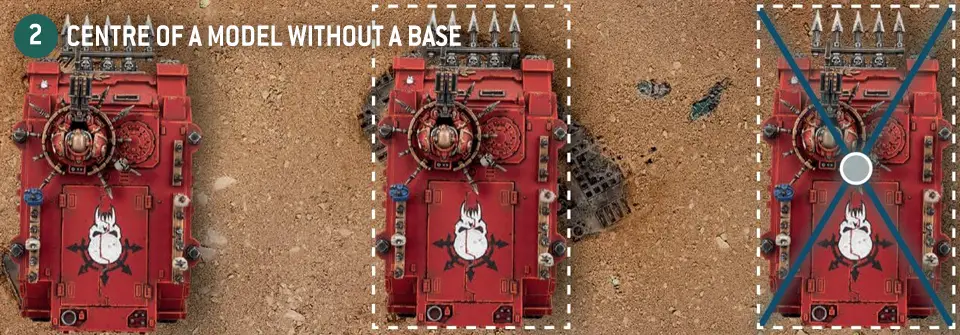
Distances in Warhammer 40,000 are measured in inches ("). You can measure distances whenever you wish.When measuring the distance between models, measure between the closest points of the bases of the models you’re measuring to and from. If a model does not have a base, measure to the closest point of any part of that model instead.
If a rule says it applies ‘within’ a certain distance, it applies at any distance that is not more than the specified distance. For example, within 1" means any distance that is not more than 1" away.
Hints and Tips
Wobbly Models
Sometimes you may find that a particular terrain feature makes it hard for you to place a model exactly where you want to. If you delicately balance a model in place, it is very likely to fall as soon as someone nudges the table, leaving your painted model damaged or even broken. In cases like this, provided it is still physically possible to place the model in the desired location, you may find it helps to leave a model in a safer position, provided both players agree and know its ‘actual’ location. If, later on, an enemy model is shooting the model, you will have to hold it back in place so that visibility can be determined.Determining Visibility
Warhammer 40,000 uses true line of sight to determine visibility between models. To check this, get a ‘model’s perspective’ view by looking from behind the observing model. For the purposes of determining visibility, an observing model can see through other models in its unit, and a model’s base is also part of that model.Model Visible
If any part of another model can be seen from any part of the observing model, that other model is visible to the observing model.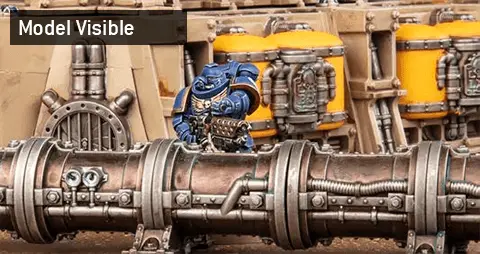
Unit Visible
If one or more models in a unit is visible to the observing model, then that model’s unit is visible to the observing model.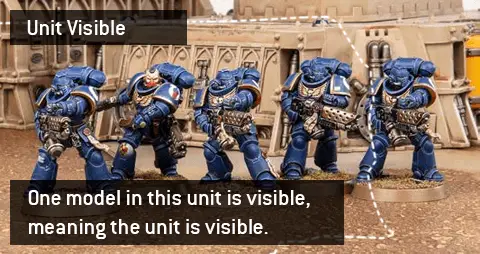
Model Fully Visible
If every part of another model that is facing the observing model can be seen from any part of the observing model, then that other model is said to be fully visible to the observing model, i.e. the observing model has line of sight to all parts of the other model that are facing it, without any other models or terrain features blocking visibility to any of those parts.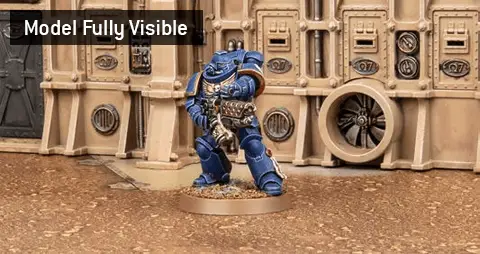
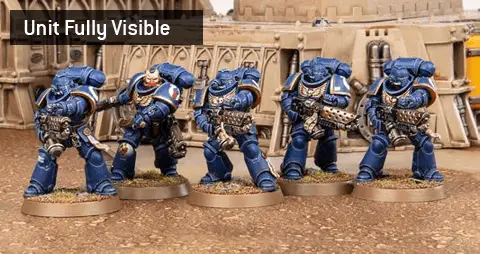
Unit Fully Visible
If every model in a unit is fully visible to an observing model, then that unit is fully visible to that observing model. For the purposes of determining if an enemy unit is fully visible, an observing model can see through other models in the unit it is observing.- Model Visible: If any part of a model can be seen, it is visible.
- Unit Visible: If any model in a unit is visible, that model’s unit is visible.
- Model Fully Visible: If every facing part of a model can be seen, it is fully visible.
- Unit Fully Visible: If every model in a unit is fully visible, that unit is fully visible.
Dice
In order to fight a battle, you will require some six-sided dice (often abbreviated to D6). Some rules refer to 2D6, 3D6 and so on – in such cases, roll that many D6 and add the results together.If a rule requires you to roll a D3, roll a D6 and halve the result (rounding up to a whole number) to get the D3 result, as shown below.
| ||||||||||


If a rule requires a dice roll of, for example, 3 or more, this is often abbreviated to 3+. Where several consecutive dice results are relevant to a rule, these are often shown as a range (e.g. 1-3).
Re-rolls
Some rules allow you to re-roll a dice roll, which means you get to roll some or all of the dice again. If a rule allows you to re-roll a dice roll that was made by adding several dice together (e.g. 2D6, 3D6, etc.) then, unless otherwise stated, you must re-roll all of those dice again.You can never re-roll a dice more than once, and re-rolls happen before modifiers (if any) are applied. Rules that refer to the value of an ‘unmodified’ dice roll are referring to the dice result after any re-rolls, but before any modifiers are applied.
- Unmodified Dice: the result after re-rolls, but before any modifiers.
- A dice can never be re-rolled more than once.
- You must re-roll all dice if several need adding together (e.g. 2D6).
- Re-rolls are applied before any modifiers.
Roll-offs
Some rules instruct players to roll off. To do so, both players roll one D6, and whoever scores highest wins the roll-off. If there is a tie for the highest roll, roll off again. Neither player is allowed to re-roll or modify any of the D6 when making a roll-off.Hints and Tips
Dice Rolling
In a game of Warhammer 40,000 you and your opponent will be rolling, and in some cases re-rolling, lots of dice. It is good practice to always make sure your opponent knows what you are rolling dice for, and what abilities and rules are in effect that enable you to make any re-rolls.Many gamers roll their dice somewhere on the battlefield, but some roll their dice elsewhere, such as in a dice tray. Wherever you roll your dice, make sure you roll the dice where your opponent can see the results too. If a dice is rolled out of bounds (i.e. it rolls off your battlefield, out of your dice tray or ends up on the floor), it is very common to ignore the result of that dice and roll it again. Rolling an out-of-bounds dice again doesn’t count as having re-rolled that dice.
If a dice does not lie flat on your battlefield after it has been thrown, it is called a cocked dice. Some players use a house rule that unless a dice is flat after it has been rolled, or unless you can balance another dice on top of a cocked dice without it sliding off, it must be rolled again. It is more common for players to roll the dice again only if they can’t be sure of the result. In any case, rolling a cocked dice again doesn’t count as having re-rolled that dice.
Sequencing
While playing Warhammer 40,000, you’ll occasionally find that two or more rules are to be resolved at the same time. If this occurs during the battle, the player whose turn it is chooses the order. If this occurs before or after the battle, or at the start or end of a battle round, the players roll off and the winner decides the order in which those rules are resolved.The Battle Round
Minute by bloody minute the battle grinds on, from the opening volleys of shots through furious offensives and desperate counter-attacks, into the last dying moments when victory hangs by a thread.
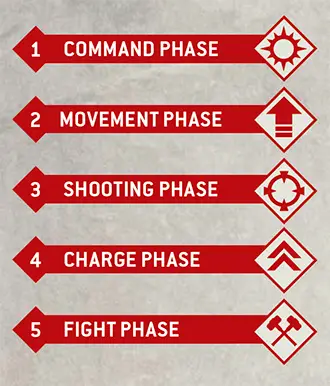
Warhammer 40,000 is played in a series of battle rounds. In each battle round, both players have a turn. The same player always takes the first turn in each battle round – the mission you are playing will tell you which player this is. Each turn consists of a series of phases, which must be resolved in the following order.Persisting Effects
Some rules apply an effect that lasts until a certain duration has passed (e.g. until the start of your next turn). Such effects are known as persisting effects. If a persisting effect applies to a unit when it embarks within a TRANSPORT, make a note of that effect and its duration; if that unit disembarks for any reason, any persisting effects continue to apply to that unit for their full duration. If a persisting effect applies to an Attached unit and that unit ceases to be an Attached unit (because either all of its Bodyguard models or all of its Leader models are destroyed), any persisting effects continue to apply to the surviving unit(s) for their full duration.Out-of-Phase Rules
Some rules allow a model or unit to move, shoot, charge or fight outside of the normal turn sequence. For example, the Fire Overwatch Stratagem enables a unit to shoot in your opponent’s turn as if it were your Shooting phase. When using out-of-phase rules to perform an action as if it were one of your phases, you cannot use any other rules that are normally triggered in that phase. COMMAND PHASE
Commanders gauge the flow of the battle, consolidating their objectives before making alterations to their battle plans and devising new tactics and strategies with which to defeat the foe.
1. Command
At the start of your Command phase, before doing anything else, both players gain 1CP. Command points are a strategic resource that you can spend during the battle to use Stratagems.Then, if you have any other rules that need to be resolved in the Command phase, you do so now before progressing to the Battle-shock step.
- Both players gain 1CP.
- Resolve any other rules that occur in the Command phase.
2. Battle-shock
In this step, you must take a Battle-shock test for each of your units on the battlefield that is Below Half-strength. To do so, roll 2D6: if the result is greater than or equal to the best Leadership characteristic in that unit, the test is passed; otherwise, the test is failed and, until the start of your next Command phase, that unit is Battle-shocked.While a unit is Battle-shocked:
- The Objective Control characteristic of all of its models is 0.
- If it Falls Back, you must take a Desperate Escape test for every model in that unit.
- Its controlling player cannot use Stratagems to affect that unit.
Once you have taken Battle-shock tests for all of your units that require them, your Command phase ends and you progress to your Movement phase.
In this step, if for any reason a unit is forced to take a Battle-shock test for being below its Starting Strength, unless otherwise stated, that unit does not also have to take a Battle-shock test for being Below Half-strength. While a unit is Battle-shocked, all models in that unit are also Battle-shocked.
- Take a Battle-shock test for each unit from your army on the battlefield that is Below Half-strength.
- Roll 2D6: if the result is greater than or equal to the unit’s Leadership, the test is passed. Otherwise, the unit is Battle-shocked until the start of your next Command phase.
- Battle-shocked units have an OC of 0 and their controlling player cannot use Stratagems to affect them.
- Battle-shocked units must take Desperate Escape tests if they Fall Back.
Gaining Command Points
Outside of the 1CP players gain at the start of the Command phase, each player can only gain a total of 1CP per battle round, regardless of the source (this includes other CP gained at the start of the Command phase).Starting Strength
The number of models a unit contains when it is added to your army is known as its Starting Strength.Below Half-strength
Some rules will refer to a unit being Below Half-strength.- If a unit has a Starting Strength of 1, then it is said to be Below Half-strength while its remaining number of wounds is less than half of its Wounds characteristic.
- For any other unit, while the number of models in that unit is less than half of its Starting Strength, that unit is said to be Below Half-strength.
Destroyed
Throughout a battle, models will suffer damage and be destroyed. When a model is destroyed, it is removed from the battlefield. When every model in a unit has been destroyed, that unit is destroyed.Attached Units
Some CHARACTER units have the Leader ability, which lets them merge with other units (known as Bodyguard units) to form an Attached unit.The Starting Strength of an Attached unit is equal to the combined Starting Strengths of all of its units (i.e. the number of models in the Leader unit added to the number of models in the Bodyguard unit). If either the Leader unit or the Bodyguard unit in an Attached unit is destroyed, the Starting Strength of the remaining unit is changed to be equal to its original Starting Strength.
For the purposes of rules that are triggered when a unit is destroyed, such rules are still triggered when one of the individual units that made up an Attached unit is destroyed (the Leader or the Bodyguard unit).
 MOVEMENT PHASE
The ground shakes to the tread of marching feet and the growl of engines as armies advance across the battlefield and vie for advantageous positions.
1. Move Units
Start your Movement phase by selecting one unit from your army that is on the battlefield to move:- Unless that unit is within Engagement Range of any enemy models, it can make a Normal move, or Advance, or Remain Stationary.
- If that unit is within Engagement Range of any enemy models, it can either Remain Stationary or Fall Back.
Each time you move a unit, you can move any of its models you choose to. The controlling player chooses the order in which to move their models. Each time you move a model (other than when a model Remains Stationary, see below), you can move it across the battlefield in any combination of straight lines and pivots (see below). While you are moving it, no part of its base can be moved through an enemy model or cross the edge of the battlefield. It can be moved through friendly models, but it cannot end its move on top of another model. The only exception to this is when moving MONSTER or VEHICLE models; such models cannot be moved through other friendly MONSTER or VEHICLE models and must be moved around them instead. While a model (excluding VEHICLE models that do not have the WALKER keyword) is moving in a straight line, it can be moved through any space its base can fit through, but it cannot end its move somewhere the model cannot be placed.
- When a unit moves it can make a Normal move, Advance or Remain Stationary.
- Units that are within Engagement Range of any enemy models can only Fall Back or Remain Stationary.
‘Surge’ Moves
Some rules enable units to make out-of-phase ‘surge’ moves when a certain trigger occurs (e.g. Khorne Berzerkers’ Blood Surge ability, triggered after one or more of their models are destroyed by enemy ranged attacks). Unless otherwise stated, the following restrictions apply to all such moves:- Each unit can only make one ‘surge’ move per phase.
- A unit cannot make a ‘surge’ move while it is Battle-shocked.
- A unit cannot make a ‘surge’ move while it is within Engagement Range of one or more enemy units.
Remain Stationary
If a unit Remains Stationary, none of its models can be moved for the rest of the phase.Normal Moves
When a unit makes a Normal move, each model in that unit can move a distance in inches less than or equal to its Move (M) characteristic, but no model can be moved within Engagement Range of any enemy models.- Normal Move: Models move up to M".
- Cannot move within Engagement Range of any enemy models.
Straight Lines
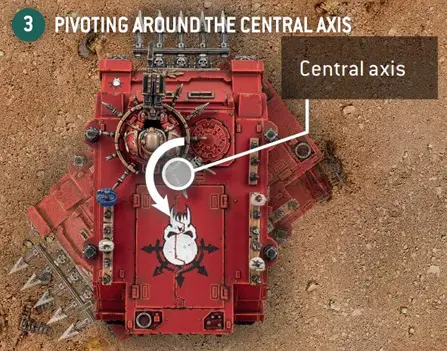
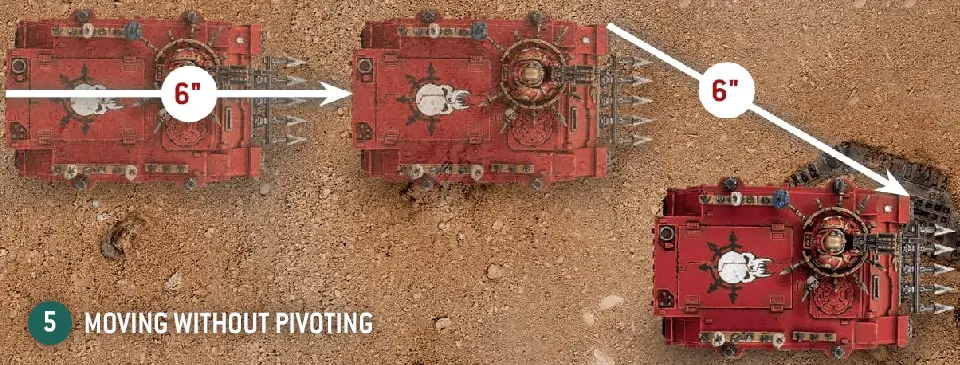
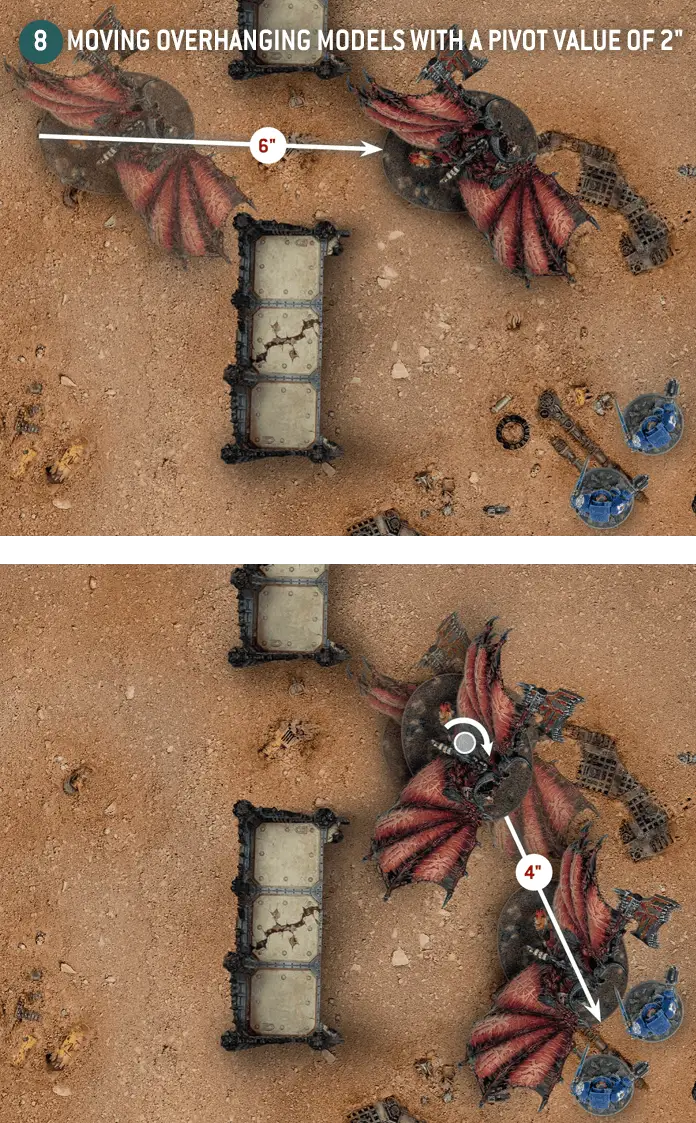
Each time you move a model in a straight line, measure the distance from the same point on its base at the start and end of that line. For example, you can measure from the ‘back’ of the model’s base, and measure the distance to the back of the model’s base at the end of that line. If a model does not have a base, measure using the same point on the model at the start and end of that line.Pivots
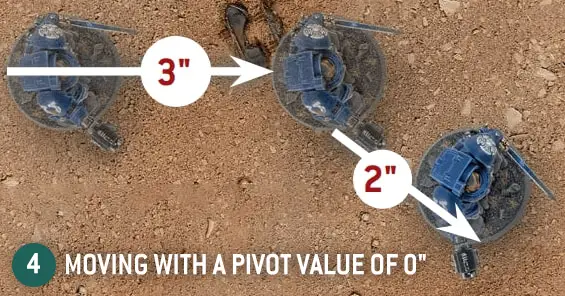
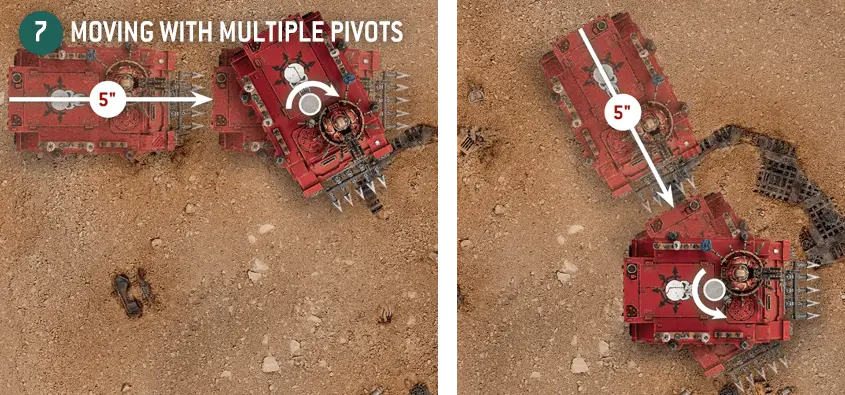
Each time you pivot a model, rotate it any amount around its central axis (perpendicular to the battlefield through the centre of its base, or through the centre of the model if it doesn’t have a base). The first time you do this during each model’s move, subtract that model’s pivot value (see below) from the remaining distance it can move during that move. If there is not enough distance left to do this, it cannot pivot. Note that the distance it can move is only reduced once for that move, regardless of how many additional times it pivots during that move.Pivot Value
Unless otherwise stated, the following pivot values apply.
|
*Note that AIRCRAFT models have separate rules for pivoting.
Advance Moves
When a unit Advances, make an Advance roll for that unit by rolling one D6. Add the result in inches to the Move characteristic of each model in that unit until the end of the phase. Each model in that unit can then make an Advance move by moving a distance in inches less than or equal to this total, but no model can be moved within Engagement Range of enemy models. A unit cannot shoot or declare a charge in the same turn that it Advanced.- Advance Move: Models move up to M+D6".
- Cannot move within Engagement Range of any enemy models.
- Units that Advance cannot shoot or charge this turn.

Fall Back Moves
A unit cannot shoot or declare a charge in the same turn that it Fell Back.
Desperate Escape Tests
Unlike when making other types of move, models can move over enemy models when making a Fall Back move as if those enemy models were not there, but you must take a Desperate Escape test for each model that will do so (excluding models that are TITANIC or can FLY) before any models in that unit are moved. In addition, if a unit is Battle-shocked when it is selected to Fall Back, you must take a Desperate Escape test for every model in that unit before any are moved.
- Fall Back Move: Models move up to M".
- Units that Fall Back cannot shoot or declare a charge in the same turn.
- Models can move over enemy models when Falling Back, but you must take Desperate Escape tests for them before they do so (excluding models that are TITANIC or can FLY).
- If a Battle-shocked unit is selected to Fall Back, take a Desperate Escape test for every model in that unit.
- Desperate Escape Test: Roll one D6. On a 1-2, one model from that unit is destroyed.
|
Moving Over Terrain
Warhammer 40,000 battlefields are strewn with a wide variety of obstacles, structures and detritus collectively known as terrain features. When a model makes any kind of move, it can be moved over a terrain feature but not through it (so models can’t move through a wall, for example, but can climb up or over it).A model can be moved over terrain features that are 2" or less in height as if they were not there. A model can be moved vertically in order to climb up or down any terrain features that are taller than this, counting the vertical distance up and/or down as part of its move. Models cannot end any kind of move mid-climb – if it is not possible to end the move as a result, that move cannot be made.
- Models can move freely over terrain features 2" or less in height.
- Models cannot move through terrain features taller than 2", but can climb up and down them.
|
Flying
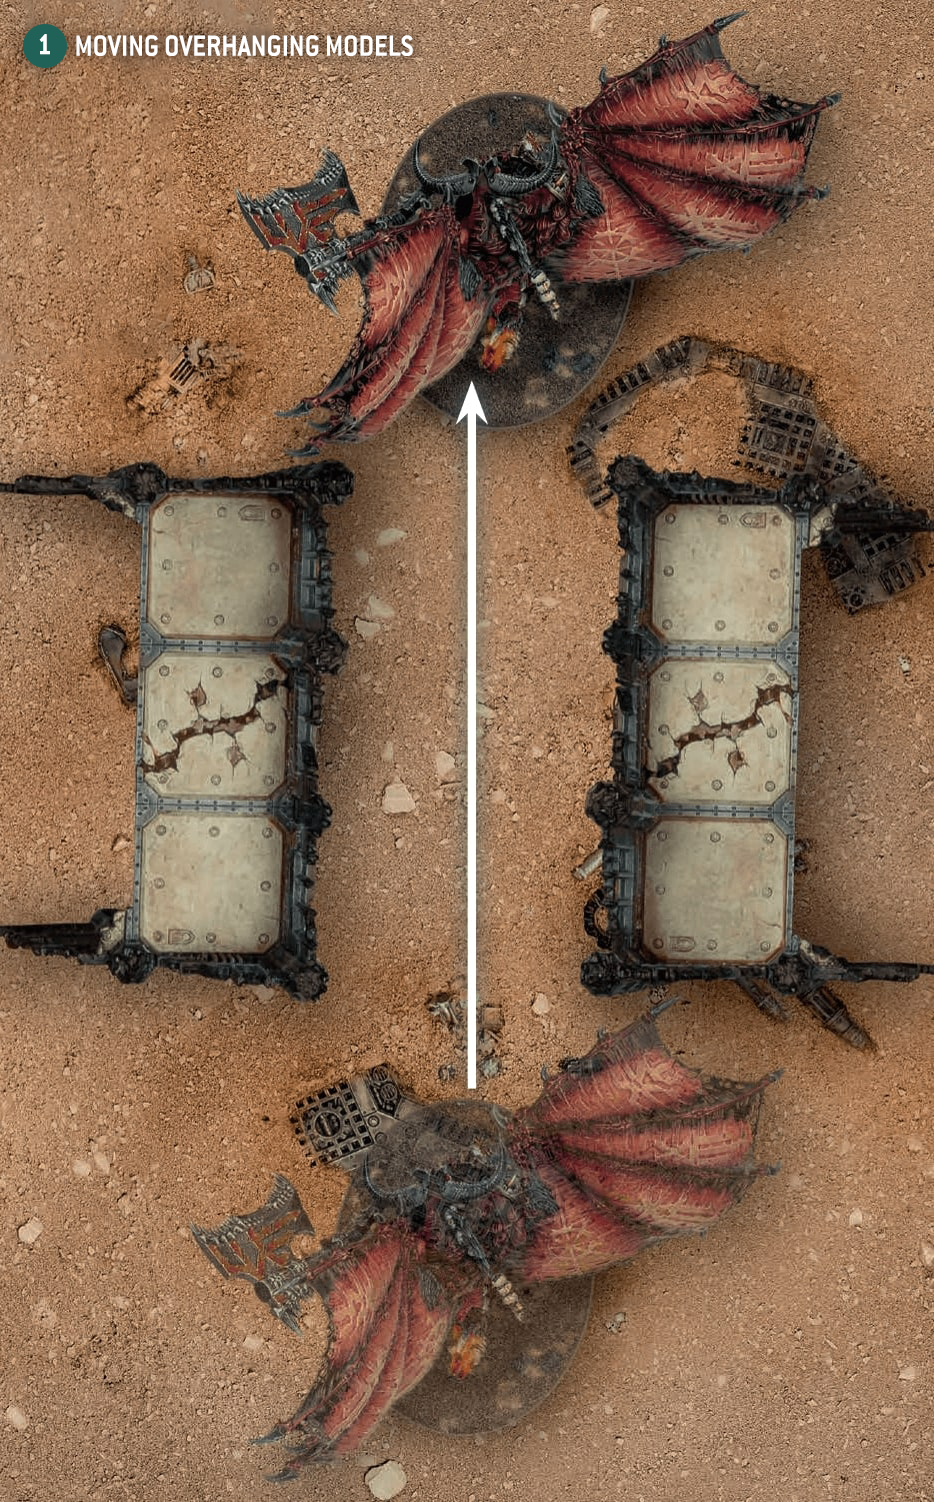
If a model can FLY, then when it makes a Normal, Advance or Fall Back move, it can be moved over enemy models as if they were not there, and can be moved within Engagement Range of enemy models when making such a move. Note this also means that MONSTER and VEHICLE models that can FLY can be moved over other MONSTER and VEHICLE models when making such a move. However, models that can FLY cannot end their move on top of any other models or within Engagement Range of any enemy models.When a model that can FLY starts or ends a move on a terrain feature, instead of measuring the path it has moved across the battlefield, you instead measure its path ‘through the air’, as shown in the diagram below.
- FLY models can move over enemy models when they make a Normal, Advance or Fall Back move.
- FLY models that start or end a move on a terrain feature measure distance moved through the air when they make a Normal, Advance or Fall Back move.
2. Reinforcements
In the Reinforcements step of your Movement phase, if you have any Reserves units in your army, you can select one or more of them and set them up on the battlefield, one at a time. Once all your Reserves units that you wish to set up this turn have been set up, your Movement phase ends and you progress to your Shooting phase.
Details of how to set up Reserves units are described in the same rules that enabled the unit to be set up in Reserves. These rules will typically specify a distance away from all enemy models; whenever such a distance is specified, it always applies to the horizontal distance, even though normally you measure to and from the closest part of a model’s base.
Reserves units always count as having made a Normal move in the turn they are set up on the battlefield, and so cannot move further during this phase. Otherwise, units set up in this way can act normally this turn (shoot, declare a charge, fight, etc.).
- Reserves Unit: A unit that starts the battle in a location other than the battlefield.
- Always count as having made a Normal move in the turn they are set up on the battlefield.
- Any specified distance from enemy models applies to horizontal distance.
- Any Reserves unit not set up on the battlefield by the end of the battle counts as destroyed.
Transports
Some units can carry others across the battlefield, providing their passengers with greater speed and protection as they are ferried to the front lines or towards vital objectives.Transport Capacity
All TRANSPORT models have a transport capacity listed on their datasheet. This determines the type and maximum number of friendly models that can embark within them.Units can start the battle embarked within a TRANSPORT model instead of being set up separately – declare which units are embarked within a TRANSPORT model before you set it up.
Some transports have firing hatches, ports or platforms from which embarked passengers can shoot.
Some TRANSPORT models have ‘Firing Deck x’ listed in their abilities. Each time such a model is selected to shoot in the Shooting phase, you can select up to ‘x’ models embarked within it whose units have not already shot this phase. Then, for each of those embarked models, you can select one ranged weapon that embarked model is equipped with (excluding weapons with the [ONE SHOT] ability). Until that TRANSPORT model has resolved all of its attacks, it counts as being equipped with all of the weapons you selected in this way, in addition to its other weapons. Until the end of the phase, those selected models’ units are not eligible to shoot.- Firing Deck ‘x’: Each time this TRANSPORT shoots, select one weapon (excluding weapons with the [ONE SHOT] ability) from up to ‘x’ models embarked within it whose units have not shot this phase; this TRANSPORT counts as being equipped with those weapons as well. Until the end of the phase, those selected models’ units are not eligible to shoot.
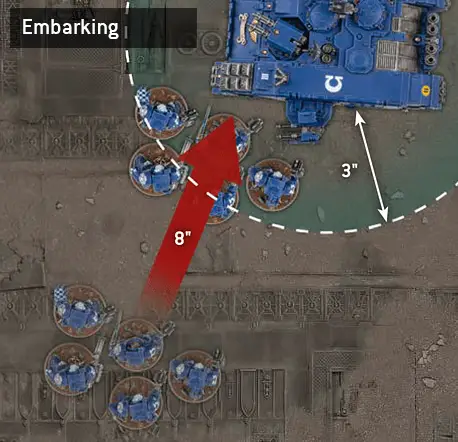
Embark
If a unit makes a Normal, Advance or Fall Back move, and every model in that unit ends that move within 3" of a friendly TRANSPORT model, they can embark within it. A unit cannot embark if it has already disembarked from a TRANSPORT model in the same phase. Remove the unit from the battlefield and place it to one side – it is now embarked within that TRANSPORT model. Unless otherwise stated, units cannot do anything or be affected in any way while they are embarked.- A unit can embark within a friendly TRANSPORT if all of its models end a Normal, Advance or Fall Back move within 3" of that TRANSPORT.
- A unit cannot embark and disembark in the same phase.
Disembark
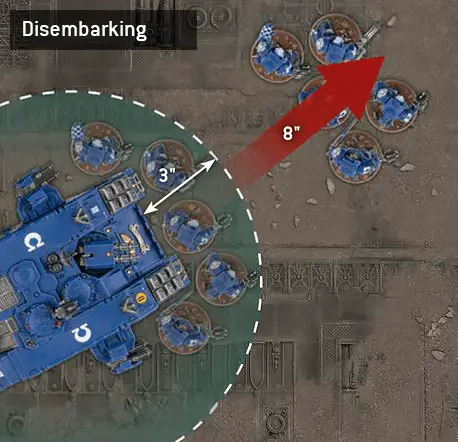
If a unit from your army starts your Movement phase embarked within a TRANSPORT model, that unit can disembark in that phase.When a unit disembarks from a TRANSPORT model, set it up on the battlefield so that it is wholly within 3" of that TRANSPORT model and not within Engagement Range of any enemy models. If, for any reason, a disembarking model cannot be set up, that model’s unit cannot disembark.
Units that disembark from a TRANSPORT model that either Remained Stationary this phase or has not yet made a Normal, Advance or Fall Back move this phase can then act normally (make a Normal move, Advance, shoot, declare a charge, fight, etc.) in the remainder of the turn. Such a disembarking unit cannot choose to Remain Stationary.
Units that disembark from a TRANSPORT model that made a Normal move this phase count as having made a Normal move themselves; they cannot move further during this phase. Such a unit also cannot declare a charge in the same turn, but can otherwise act normally in the remainder of the turn.
Units cannot disembark from a TRANSPORT model that either Advanced or Fell Back this turn.
- Units that start your Movement phase embarked within a TRANSPORT can disembark this phase, provided their TRANSPORT has not Advanced or Fallen Back.
- If a unit disembarks before its TRANSPORT moves, it can act normally.
- If a unit disembarks after its TRANSPORT moves, it cannot move or charge this turn, but can otherwise act normally.
- Disembarking units must be set up wholly within 3" of their TRANSPORT and not within Engagement Range of any enemy models (or the unit cannot disembark).
- Units that disembark this turn cannot Remain Stationary.
Destroyed Transports
If a TRANSPORT model is destroyed, any units embarked within that TRANSPORT model must immediately disembark (see below) before that TRANSPORT model is removed from the battlefield.Units that disembark from a destroyed TRANSPORT model are not affected by that model’s Deadly Demise ability. Instead, you must roll one D6 for each disembarking model. For each roll of 1, that disembarking model’s unit suffers 1 mortal wound. In addition, if a unit disembarks from a destroyed TRANSPORT model:
- Until the start of its controlling player’s next Command phase, that unit is Battle-shocked.
- Until the end of the turn, that unit counts as having made a Normal move this turn, and cannot declare a charge this turn.
- If a TRANSPORT is destroyed, any embarked units must disembark.
- Roll one D6 for each model that disembarks: for each 1, that model’s unit suffers 1 mortal wound.
- Until the start of its controlling player’s next Command phase, the disembarking unit is Battle-shocked.
- Until the end of the turn, the disembarking unit counts as having made a Normal move, and cannot declare a charge.
Emergency Disembarkation
If a TRANSPORT model is destroyed and it is not possible to set up a disembarking unit wholly within 3" of that TRANSPORT model and not within Engagement Range of any enemy models, that unit must instead perform an Emergency Disembarkation. This is performed as described for disembarking from a destroyed TRANSPORT model, except that a unit that does so must be set up wholly within 6" of the destroyed TRANSPORT model (instead of wholly within 3") and not within Engagement Range of any enemy models, and when rolling for each disembarking model, that unit suffers 1 mortal wound for each roll of 1-3 (instead of for each roll of 1). If, for any reason, a disembarking model still cannot be set up, that model is destroyed.- Units disembarking a destroyed TRANSPORT that cannot be set up wholly within 3" of it must perform an Emergency Disembarkation:
- Must be set up wholly within 6" of it instead of wholly within 3".
- Suffer 1 mortal wound for each roll of 1-3, instead of each roll of 1.
- Any disembarking model that cannot be set up is destroyed.
 SHOOTING PHASE
Guns thunder and shrapnel flies through the air. Bursts of muzzle flare and beams of las-fire illuminate the fog of war, and spent ammunition cartridges litter the battlefield.
A unit is eligible to shoot unless any of the following apply:
- That unit Advanced this turn.
- That unit Fell Back this turn.
Unless at least one model in a unit has an eligible target for one or more of its ranged weapons, that model’s unit cannot be selected to shoot.
Designer’s Note: This doesn’t change the unit’s eligibility to shoot, but it does mean that a unit can’t be selected to shoot at nothing, and therefore won’t qualify for other rules triggers (e.g. GARGOYLES’ Winged Swarm ability and Dark Pacts)
Select Targets
Each time a unit shoots, before any attacks are resolved, you must select the enemy units that will be the targets for all of the ranged weapons you wish its models to make attacks with. Each time you select a target for a model’s ranged weapon, you can only select an enemy unit as the target if at least one model in that unit is both within range of that weapon and visible to that attacking model. An enemy model is within range of a weapon if the distance between it and the attacking model is equal to or less than that weapon’s Range characteristic.If a model has more than one ranged weapon, it can shoot all of them at the same target or it can shoot each of them at a different target, but it cannot split attacks from the same weapon across more than one target. Similarly, if a unit has more than one model, those models can shoot at the same or different targets. In any case, when you select a target unit you must declare which models will target that unit with which weapons before any attacks are resolved. If any of these weapons have more than one profile that you must choose between, you must also declare which profile is being used.
- Before a unit shoots, select the targets for all of its ranged weapons.
- At least one model in the target unit must be visible to the attacking model and within range of the weapon being used.
- Models with more than one ranged weapon can shoot them at the same or different targets, but models cannot split attacks from the same weapon across more than one target.
- Models in the same unit can shoot at the same or different targets.
Assassins and other covert agents are difficult to track and pinpoint in the swirling maelstrom of battle.
Unless part of an Attached unit (see Leader), this unit can only be selected as the target of a ranged attack if the attacking model is within 12".Make Ranged Attacks
The shooting unit’s models now make attacks using their ranged weapons. Each time a model shoots with a ranged weapon, it will make a number of attacks equal to the Attacks (A) characteristic in that weapon’s profile. You make one Hit roll for each attack being made (see Making Attacks).If you selected more than one target for your unit to shoot at, you must resolve all of the attacks against one target before moving on to the next target. If your unit is shooting more than one ranged weapon at a target, and those weapons have different profiles, then after you have resolved attacks with one of those weapons you must, if any other weapons with the same profile are also being shot at that unit, resolve those attacks before resolving any other attacks against the target.
Note that, provided at least one model in the target unit was visible to an attacking model and in range of that attacking model’s weapon when that target unit was selected, that weapon’s attacks can still be made, even if no models in the target unit remain visible to or in range of it when you come to resolve those attacks (for example, because models in the target unit have already been destroyed by attacks made with other weapons in the attacking model’s unit).
- When a model shoots a weapon, it makes a number of attacks equal to that weapon’s Attacks characteristic.
- Resolve all attacks against one unit before resolving attacks against any other unit.
- Resolve all attacks made with the same weapon profile before resolving attacks with any other profile.
- If a weapon was in range and its target was visible when selected, that weapon’s attacks can always be made.
Locked in Combat
A unit is not eligible to shoot while it is within Engagement Range of one or more enemy units.While an enemy unit is within Engagement Range of one or more units from your army, you cannot select that enemy unit as a target of ranged weapons.
MONSTER and VEHICLE units are exceptions to these rules, as described in the Big Guns Never Tire section.
- Units cannot shoot while within Engagement Range of enemy units.
- Units cannot shoot at targets within Engagement Range of friendly units.
Some warriors are masters of disguise and concealment.
If every model in a unit has this ability, then each time a ranged attack is made against it, subtract 1 from that attack’s Hit roll.Big Guns Never Tire
Monsters and war engines can dispense death from afar even as they trample the masses before them.
MONSTER and VEHICLE units are eligible to shoot in their controlling player’s Shooting phase even while they are within Engagement Range of one or more enemy units. Ranged weapons equipped by MONSTER and VEHICLE units can target one or more of the enemy units they are within Engagement Range of, even if other friendly units are also within Engagement Range of the same enemy unit. Each time a MONSTER or VEHICLE unit makes a ranged attack, if that unit was within Engagement Range of one or more enemy units when it selected its targets, unless that attack is made with a Pistol, subtract 1 from that attack’s Hit roll.You can select an enemy MONSTER or VEHICLE unit within Engagement Range of one or more units from your army as a target of ranged weapons. Each time a model from your army makes a ranged attack against such a target, unless that attack is made with a Pistol, subtract 1 from that attack’s Hit roll.
Designer’s Note: A unit that is within Engagement Range of an enemy MONSTER or VEHICLE unit is still not eligible to shoot, and so cannot make ranged attacks against that MONSTER or VEHICLE unit (unless that unit is eligible to shoot even while within Engagement Range of enemy units, e.g. it is itself a MONSTER or VEHICLE unit, or its models are equipped with Pistols). Other units from your army that are eligible to shoot can, however, target and shoot that enemy MONSTER or VEHICLE unit.
- MONSTERS and VEHICLES can shoot, and be shot at, even while they are within Engagement Range of enemy units. Each time a ranged attack is made by or against such a unit, subtract 1 from that attack’s Hit roll (unless shooting with a Pistol).
 Making Attacks
Attacks are made using ranged or melee weapons. Attacks can be made one at a time or, in some cases, you can roll for multiple attacks together (see Fast Dice Rolling).
1. Hit Roll
When a model makes an attack, make one Hit roll for that attack by rolling one D6. If the result of the Hit roll is greater than or equal to the attack’s Ballistic Skill (BS) characteristic (if the attack is being made with a ranged weapon) or its Weapon Skill (WS) characteristic (if the attack is being made with a melee weapon), then that Hit roll is successful and scores one hit against the target unit. Otherwise, the attack fails and the attack sequence ends.An unmodified Hit roll of 6 is called a Critical Hit and is always successful. An unmodified Hit roll of 1 always fails. A Hit roll can never be modified by more than -1 or +1.
- Hit Roll (Ranged Attack): A hit is scored if the D6 result equals or exceeds that attack’s BS.
- Hit Roll (Melee Attack): A hit is scored if the D6 result equals or exceeds that attack’s WS.
- Critical Hit: Unmodified Hit roll of 6. Always successful.
- An unmodified Hit roll of 1 always fails.
- A Hit roll can never be modified by more than -1 or +1.
2. Wound Roll
Each time an attack scores a hit against a target unit, make a Wound roll for that attack by rolling one D6 to see if that attack successfully wounds the target unit. The result required is determined by comparing the attack’s Strength (S) characteristic with the target’s Toughness (T) characteristic, as shown below.
| ||||||||||||||
If the result of the Wound roll is greater than or equal to the required number shown in the table above, then that Wound roll is successful and scores one wound against the target unit. Otherwise, the attack fails and the attack sequence ends.
An unmodified Wound roll of 6 is called a Critical Wound and is always successful. An unmodified Wound roll of 1 always fails. A Wound roll can never be modified by more than -1 or +1.
- Critical Wound: Unmodified Wound roll of 6. Always successful.
- An unmodified Wound roll of 1 always fails.
- A Wound roll can never be modified by more than -1 or +1.
3. Allocate Attack
If an attack successfully wounds the target unit, the player controlling the target unit allocates that attack to one model in the target unit, as follows.If a model in the target unit has already lost one or more wounds, or has already had attacks allocated to it this phase, that attack must be allocated to that model. Otherwise, that attack can be allocated to any model in the target unit. Note that it does not matter if that model is visible to or within range/Engagement Range of the attacking model.
- If a model in the target unit has already lost any wounds or had other attacks allocated to it this phase, the attack must be allocated to that model.
4. Saving Throw
The player controlling the target unit then makes one saving throw. By default, this will be an armour saving throw using their model’s Save (Sv) characteristic, but some models have invulnerable saves that can be used instead (see below). To make an armour saving throw, roll one D6, then modify the result by the Armour Penetration (AP) characteristic of the attack. For example, if the attack has an AP of -1, then 1 is subtracted from the saving throw.If the result is greater than or equal to the Save characteristic of the model the attack was allocated to, then that saving throw is successful and the attack sequence ends. Otherwise, that saving throw fails and that model suffers damage.
An unmodified saving throw of 1 always fails. A saving throw can never be improved by more than +1.
- Saving Throw: Roll one D6 and modify by the attack’s AP. If the result is less than the Save of the model being rolled for, the saving throw is failed and that model suffers damage. Otherwise, that attack is saved.
- An unmodified saving throw of 1 always fails.
- A saving throw can never be improved by more than +1.
Invulnerable Saves
Whether shielded by force fields, enveloped in mystical energies or simply possessed of preternatural senses and lightning-fast reflexes, some warriors are protected by more than mere physical armour.
Some models have an invulnerable save listed on their datasheet. Each time an attack is allocated to a model with an invulnerable save, the controlling player must choose to use either that model’s Save characteristic or its invulnerable save, but not both. If a model has more than one invulnerable save, it can only use one of them – choose which it will use.Unlike armour saving throws (which use a model’s Save characteristic), invulnerable saving throws are never modified by an attack’s Armour Penetration characteristic, but otherwise follow the normal rules for saving throws.
- Invulnerable Save: Never modified by an attack’s AP.
- The controlling player can choose to use either a model’s invulnerable save or its Save characteristic.
Mortal Wounds
Some attacks are so powerful that no armour or force field can withstand their fury.
Some rules inflict mortal wounds on units. Each time mortal wounds are inflicted on a unit, each of those mortal wounds inflicts one point of damage to that unit, and they are always applied one at a time. Each mortal wound is allocated to a model in the same manner as allocating an attack. Excess damage from mortal wounds is not lost if the damage can be allocated to another model. Instead, keep allocating damage to another model in the target unit until either all the damage has been allocated or the target unit is destroyed.If an attack inflicts mortal wounds in addition to any normal damage, do not make a Wound roll or saving throw (including invulnerable saving throws) against those mortal wounds. If those mortal wounds are inflicted by an attack that has the [PRECISION] ability, the attacking model’s controlling player can allocate those mortal wounds to a CHARACTER model in that unit.
If mortal wounds are being inflicted as a result of the [HAZARDOUS] ability or by an attack with the [DEVASTATING WOUNDS] ability that scored a Critical Wound, each time those mortal wounds are allocated to a model, if that model is destroyed as a result of those mortal wounds, the remaining mortal wounds from that attack are lost, just as with a normal attack.
If, when a unit is selected to shoot or fight, one or more of its attacks can inflict mortal wounds on the target, resolve any normal damage inflicted by the attacking unit’s attacks on that target before inflicting any mortal wounds on that target. If an attack inflicts mortal wounds in addition to any normal damage, but the normal damage is subsequently saved, the target unit still suffers those mortal wounds, as described above.
- Each mortal wound inflicted on a unit causes one model in that unit to lose one wound.
- Unless the source of the mortal wounds is the [HAZARDOUS] ability or an attack with the [DEVASTATING WOUNDS] ability, damage from mortal wounds is not lost if it can be allocated to another model.
- No saving throws can be made against mortal wounds.
- Mortal wounds inflicted by attacks always apply after any normal damage, even if that damage was saved.
5. Inflict Damage
The damage inflicted is equal to the Damage (D) characteristic of the attack. A model loses one wound for each point of damage it suffers. If a model’s wounds are reduced to 0 or less, it is destroyed and removed from play. If a model loses several wounds from an attack and is destroyed, any excess damage inflicted by that attack is lost and has no effect.- A model loses a number of wounds equal to the attack’s Damage characteristic.
- If a model is destroyed by an attack, any excess damage inflicted by that attack is lost.
Some warriors refuse to be laid low, even by what should be fatal wounds.
Some models have ‘Feel No Pain x+’ listed in their abilities. Each time a model with this ability suffers damage and so would lose a wound (including wounds lost due to mortal wounds), roll one D6: if the result is greater than or equal to the number denoted by ‘x’, that wound is ignored and is not lost. If a model has more than one Feel No Pain ability, you can only use one of those abilities each time that model suffers damage and so would lose a wound.- Feel No Pain x+: Each time this model would lose a wound, roll one D6: if the result equals or exceeds ‘x’, that wound is not lost.
From detonating ammo stores to corrosive innards or frenzied death throes, some targets are deadly even in defeat.
Some models have ‘Deadly Demise x’ listed in their abilities. When such a model is destroyed, roll one D6 before removing it from play (if such a model is a TRANSPORT, roll before any embarked models disembark). On a 6, each unit within 6" of that model suffers a number of mortal wounds denoted by ‘x’ (if this is a random number, roll separately for each unit within 6").- Deadly Demise x: When this model is destroyed, roll one D6. On a 6, each unit within 6" suffers ‘x’ mortal wounds.
Hints and Tips
Fast Dice Rolling
Note that if all the models in the target unit would require the same saving throw against the attacks, and the order in which the attacks are allocated would make no difference, then your opponent can make all their saving throws at the same time, and can do so as soon as the Wound rolls have been made. If they do, they then allocate the attacks that resulted in failed saving throws one at a time, inflicting the damage as appropriate even though, strictly speaking, saving throws should be made after attacks have been allocated. In any case, remember that if the target unit contains a model that has already lost any wounds or has already had attacks allocated to it this phase, the controlling player must allocate further attacks to that model until either it is destroyed, or all the attacks have been saved or resolved.
If the attacks being allocated to a target inflict random damage, you cannot use the fast dice rolling approach exactly as stated above – you will need to roll the dice one at a time. Consider several attacks with a Damage characteristic of D3 being allocated to a target containing models with two wounds each. As excess damage is lost each time a model is destroyed, the order in which the attacks are allocated and resolved becomes important. If the results of those D3s were 1, then 2, then 3, the attacks would result in a total of two destroyed models, but applying them in the order 3, then 2, then 1 would result in two models being destroyed and a third being damaged with only one wound remaining. As such, the rolls should be made one at a time.
|
Weapon Abilities
Some weapons have additional abilities in their profiles. Often these are unique to those weapons and are written out in full, but others are common to many weapons, and may only be referenced by name on a weapon’s profile. Some notable examples of these common abilities are defined here; further weapon abilities may be found in other locations such as Codexes.
Assault
Assault weapons fire so indiscriminately that they can be shot from the hip as warriors dash forward.
Weapons with [ASSAULT] in their profile are known as Assault weapons. If a unit that Advanced this turn contains any models equipped with Assault weapons, it is still eligible to shoot in this turn’s Shooting phase. When such a unit is selected to shoot, you can only resolve attacks using Assault weapons its models are equipped with.- Can be shot even if the bearer’s unit Advanced.
Rapid Fire
Rapid fire weapons are capable of long-ranged precision shots or controlled bursts at nearby targets.
Weapons with [RAPID FIRE X] in their profile are known as Rapid Fire weapons. Each time such a weapon targets a unit within half that weapon’s range, the Attacks characteristic of that weapon is increased by the amount denoted by ‘x’.- [RAPID FIRE X]: Increase the Attacks by ‘x’ when targeting units within half range.
Ignores Cover
Some weapons are designed to root enemy formations out of entrenched positions.
Weapons with [IGNORES COVER] in their profile are known as Ignores Cover weapons. Each time an attack is made with such a weapon, the target cannot have the Benefit of Cover against that attack.Twin-linked
Dual weapons are often grafted to the same targeting system for greater lethality.
Weapons with [TWIN-LINKED] in their profile are known as Twin-linked weapons. Each time an attack is made with such a weapon, you can re-roll that attack’s Wound roll.Pistol
Pistols can be wielded even at point-blank range.
Weapons with [PISTOL] in their profile are known as Pistols. If a unit contains any models equipped with Pistols, that unit is eligible to shoot in its controlling player’s Shooting phase even while it is within Engagement Range of one or more enemy units. When such a unit is selected to shoot, it can only resolve attacks using its Pistols and can only target one of the enemy units it is within Engagement Range of. In such circumstances, a Pistol can target an enemy unit even if other friendly units are within Engagement Range of the same enemy unit.If a model is equipped with one or more Pistols, unless it is a MONSTER or VEHICLE model, it can either shoot with its Pistols or with all of its other ranged weapons. Declare whether such a model will shoot with its Pistols or its other ranged weapons before selecting targets.
- Can be shot even if the bearer’s unit is within Engagement Range of enemy units, but must target one of those enemy units.
- Cannot be shot alongside any other non-Pistol weapon (except by a MONSTER or VEHICLE).
Torrent
Torrent weapons shoot clouds of fire, gas or other lethal substances that few foes can hope to evade.
Weapons with [TORRENT] in their profile are known as Torrent weapons. Each time an attack is made with such a weapon, that attack automatically hits the target.Lethal Hits
Some weapons can inflict fatal injuries on any foe, no matter their resilience.
Weapons with [LETHAL HITS] in their profile are known as Lethal Hits weapons. Each time an attack is made with such a weapon, a Critical Hit automatically wounds the target.Lance
Lance weapons are deadly on the charge.
Weapons with [LANCE] in their profile are known as Lance weapons. Each time an attack is made with such a weapon, if the bearer made a Charge move this turn, add 1 to that attack’s Wound roll.Indirect Fire
Indirect fire weapons launch munitions over or around intervening obstacles – nowhere is safe from their fury.
Weapons with [INDIRECT FIRE] in their profile are known as Indirect Fire weapons, and attacks can be made with them even if the target is not visible to the attacking model. These attacks can destroy enemy models in a target unit even though none may have been visible to the attacking unit when you selected that target.If no models in a target unit are visible to the attacking unit when you select that target, then each time a model in the attacking unit makes an attack against that target using an Indirect Fire weapon, subtract 1 from that attack’s Hit roll, an unmodified Hit roll of 1-3 always fails, and the target has the Benefit of Cover against that attack. Weapons with the [TORRENT] ability cannot be fired using the [INDIRECT FIRE] ability.
- Can target and make attacks against units that are not visible to the attacking unit.
- If no models are visible in a target unit when it is selected, then when making an attack against that target with an Indirect Fire weapon, subtract 1 from that attack’s Hit roll, an unmodified Hit roll of 1-3 always fails, and the target has the Benefit of Cover against that attack.
Precision
Precision attacks can pick high-value targets out in a crowd, whether through the unerring aim of a sniper or the pinpoint accuracy of a blade-master’s strike.
Weapons with [PRECISION] in their profile are known as Precision weapons. Each time an attack made with such a weapon successfully wounds an Attached unit (see Leader ability), if a CHARACTER model in that unit is visible to the attacking model, the attacking model’s player can choose to have that attack allocated to that CHARACTER model instead of following the normal attack sequence.- When targeting an Attached unit, the attacking model’s player can have the attack allocated to a CHARACTER model in that unit visible to the bearer.
Blast
High-explosives can fell several warriors in a single blast, but firing them where your comrades will get caught in the ensuing detonation is simply unwise.
Weapons with [BLAST] in their profile are known as Blast weapons, and they make a random number of attacks. Each time you determine how many attacks are made with a Blast weapon, add 1 to the result for every five models that were in the target unit when you selected it as the target (rounding down). Blast weapons can never be used to make attacks against a unit that is within Engagement Range of one or more units from the attacking model’s army (including its own unit).- Add 1 to the Attacks characteristic for every five models in the target unit (rounding down).
- Can never be used against a target that is within Engagement Range of any units from the attacking model’s army (including its own).
Melta
Melta weapons are powerful heat rays whose fury is magnified at close range.
Weapons with [MELTA X] in their profile are known as Melta weapons. Each time an attack made with such a weapon targets a unit within half that weapon’s range, that attack’s Damage characteristic is increased by the amount denoted by ‘x’.- [MELTA X]: Increase the Damage by ‘x’ when targeting units within half range.
Heavy
Heavy weapons are amongst the biggest guns on the battlefield, but require bracing to fire at full effect and are unwieldy to bring to bear at close quarters.
Weapons with [HEAVY] in their profile are known as Heavy weapons. Each time an attack is made with such a weapon, if the attacking model’s unit Remained Stationary this turn, add 1 to that attack’s Hit roll.- Add 1 to Hit rolls if the bearer’s unit Remained Stationary this turn.
Hazardous
Weapons powered by unstable and dangerous energy sources pose a substantial risk to the wielder every time they are used.
Weapons with [HAZARDOUS] in their profile are known as Hazardous weapons. Each time a unit is selected to shoot or fight, after that unit has resolved all of its attacks, for each Hazardous weapon that targets were selected for when resolving those attacks, that unit must take one Hazardous test. To do so, roll one D6: on a 1, that test is failed. For each failed test you must resolve the following sequence (resolve each failed test one at a time):- If possible, select one model in that unit that has lost one or more wounds and is equipped with one or more Hazardous weapons.
- Otherwise, if possible, select one model in that unit (excluding CHARACTER models) equipped with one or more Hazardous weapons.
- Otherwise, select one CHARACTER model in that unit equipped with one or more Hazardous weapons.
If a unit from a player’s army is selected as the target of the Fire Overwatch Stratagem in their opponent’s Charge phase, any mortal wounds inflicted by Hazardous tests are allocated after the charging unit has ended its Charge move.
- After a unit shoots or fights, roll one Hazardous test (one D6) for each Hazardous weapon used. For each 1, a model equipped with a hazardous weapon suffers 3 mortal wounds, that must be allocated to the selected model.
Devastating Wounds
Weapons with [DEVASTATING WOUNDS] in their profile are known as Devastating Wounds weapons. Each time an attack is made with such a weapon, if that attack scores a Critical Wound, no saving throw of any kind can be made against that attack (including invulnerable saving throws). Such attacks are only allocated to models after all other attacks made by the attacking unit have been allocated and resolved. After that attack is allocated and after any modifiers are applied, it inflicts a number of mortal wounds on the target equal to the Damage characteristic of that attack, instead of inflicting damage normally.- A Critical Wound inflicts mortal wounds equal to the weapon’s Damage characteristic, instead of any normal damage.
Sustained Hits
Some weapons strike in a flurry of blows, tearing the foe apart with relentless ferocity.
Weapons with [SUSTAINED HITS X] in their profile are known as Sustained Hits weapons. Each time an attack is made with such a weapon, if a Critical Hit is rolled, that attack scores a number of additional hits on the target as denoted by ‘x’.- [SUSTAINED HITS X]: Each Critical Hit scores ‘x’ additional hits on the target.
Extra Attacks
Some warriors ride to battle atop trusty mounts that gore and trample nearby foes. Others wield combat weapons that deliver a frenzy of additional blows.
Weapons with [EXTRA ATTACKS] in their profile are known as Extra Attacks weapons. Each time the bearer of one or more Extra Attacks weapons fights, it makes attacks with each of the Extra Attacks melee weapons it is equipped with and it makes attacks with one of the melee weapons it is equipped with that does not have the [EXTRA ATTACKS] ability (if any). The number of attacks made with an Extra Attacks weapon cannot be modified by other rules, unless that weapon’s name is explicitly specified in that rule.- The bearer can attack with this weapon in addition to any other weapons it can make attacks with.
Anti
Certain weapons are the bane of a particular foe.
Weapons with [ANTI-KEYWORD X+] in their profile are known as Anti weapons. Each time an attack is made with such a weapon against a target with the keyword after the word ‘Anti-’, an unmodified Wound roll of ‘x+’ scores a Critical Wound.- [ANTI-KEYWORD X+]: An unmodified Wound roll of ‘x+’ against a target with the matching keyword scores a Critical Wound.
 CHARGE PHASE
Warriors hurl themselves into battle to slay with blade, hammer and claw. Strident war cries and frantic screams echo through the whirling smoke as the moment of cataclysmic violence draws near.
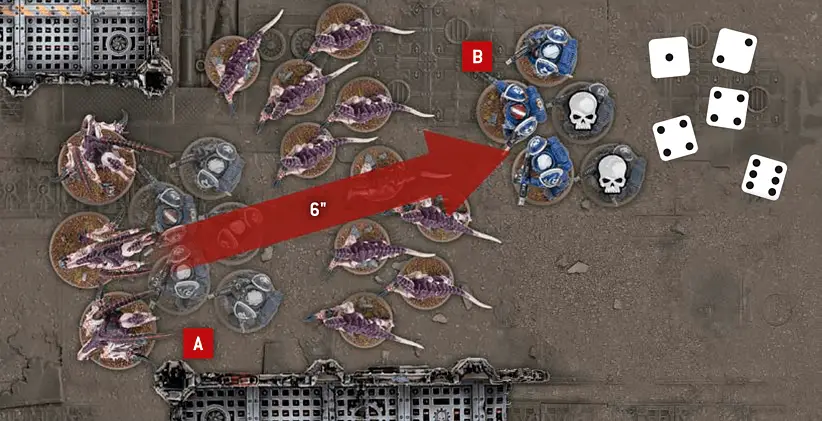
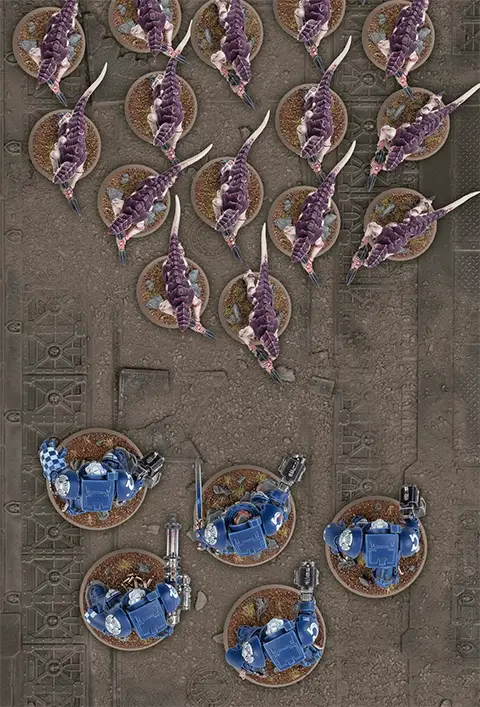
A unit is eligible to charge if it is within 12" of one or more enemy units in your Charge phase, unless any of the following apply:
- That unit Advanced or Fell Back this turn.
- That unit is within Engagement Range of any enemy models.
- That unit is an AIRCRAFT unit.
Charge Bonus
Many warriors thunder headlong into combat, using the impetus of their charge to bring swift death to their foes.
Each time a unit makes a Charge move, until the end of the turn, that unit has the Fights First ability.Charging with a Unit
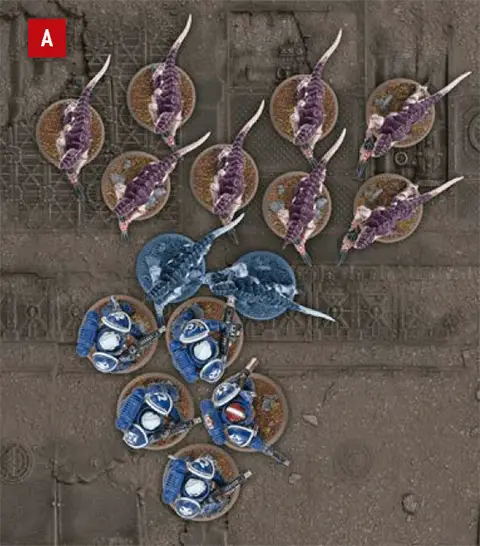
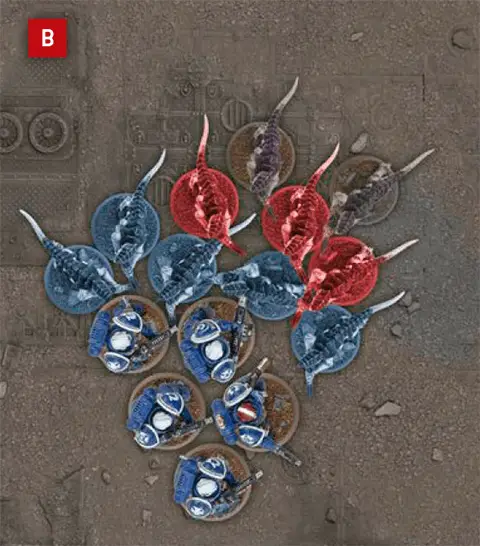
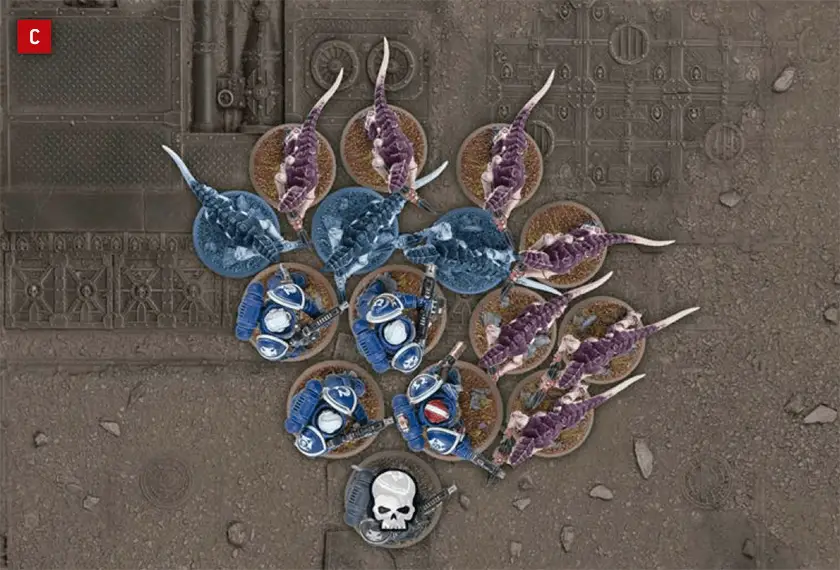
Once you have selected an eligible unit to declare a charge, you must select one or more enemy units within 12" of it as the targets of that charge. The targets of a charge do not need to be visible to the charging unit.You then make a Charge roll for the charging unit by rolling 2D6. The result is the maximum number of inches each model in that unit can be moved if a Charge move is possible. For a Charge move to be possible, the Charge roll must be sufficient to enable the charging unit to end that move:
- Within Engagement Range of every unit that you selected as a target of the charge.
- Without moving within Engagement Range of any enemy units that were not a target of the charge.
- In Unit Coherency.
- Charge Roll: 2D6".
- Targets of a charge must be within 12" but do not need to be visible.
- If the distance rolled is insufficient to move within Engagement Range of all targets while maintaining Unit Coherency, the charge fails.
- Cannot move within Engagement Range of any unit that was not a target of the charge.
- If the charge is successful, each model makes a Charge move less than or equal to the Charge roll, and must move into base-to-base contact with an enemy model if possible.
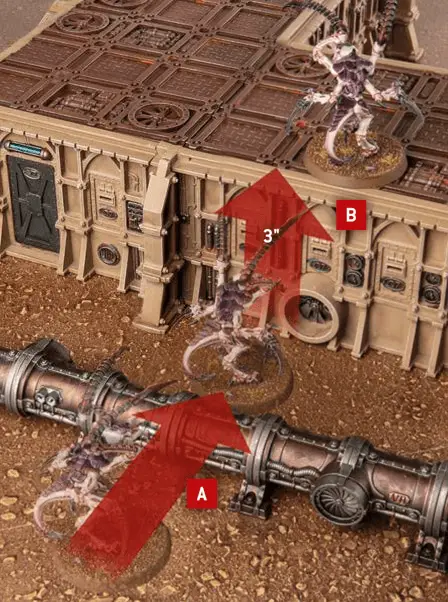
Charging Over Terrain
Unless otherwise stated, a model can be moved over a terrain feature when it makes a Charge move, but not through it.A model can be moved over terrain features that are 2" or less in height as if they were not there. A model can be moved vertically in order to climb up, down and over any terrain features that are taller than this, counting the vertical distance up and/or down as part of its Charge move. Models cannot end a Charge move mid-climb – if it is not possible to make a Charge move as a result, the charge fails.
- Models can be moved freely over terrain features 2" or less in height.
- Models cannot move through terrain features taller than 2", but can climb up and down them.
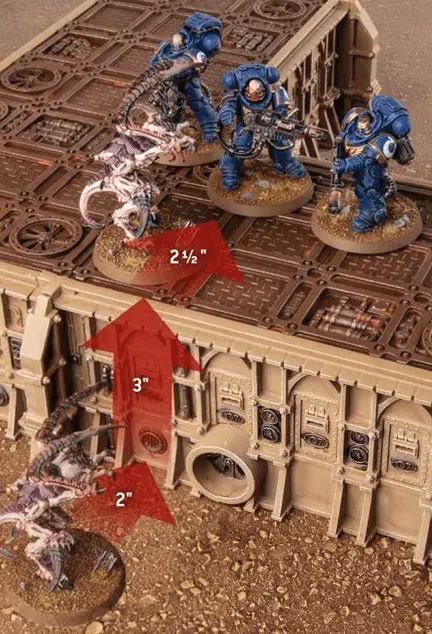
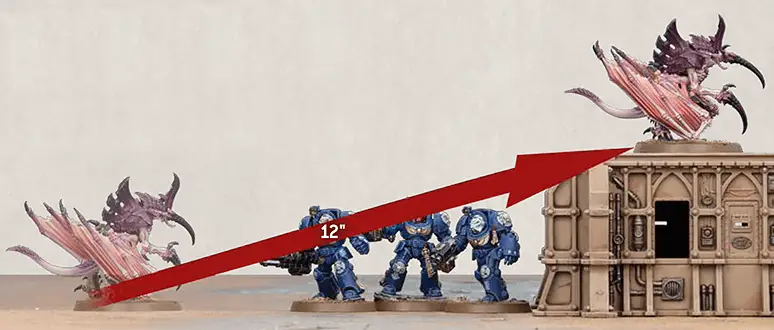
Charging with Flying Models
When a model that can FLY starts or ends a Charge move on a terrain feature, instead of measuring the path it has moved across the battlefield, you instead measure its path ‘through the air’. In addition, it can be moved over other models as if they were not there. A model that can FLY cannot end any move on top of another model.- FLY models can move over other models when they make a Charge move.
- FLY models that start or end a Charge move on a terrain feature measure distance moved through the air when they make a Charge move.
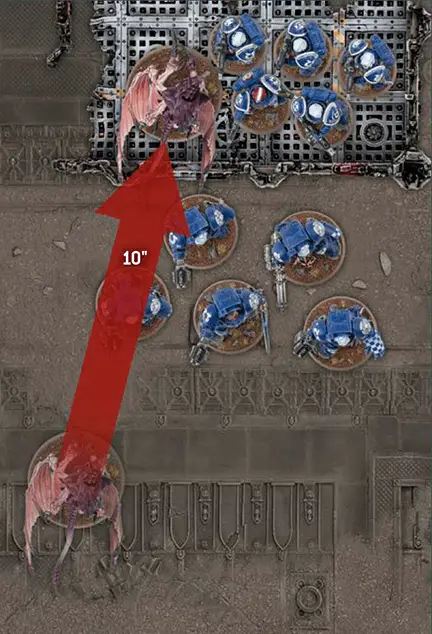
Note that as the Tyranid Prime can FLY, it can move over the Terminators, and the distance moved is the diagonal distance through the air.
FIGHT PHASE
Carnage engulfs the battlefield as the warring armies meet head-on. Fangs and claws crunch through bone. Blades ring like hammers on anvils. Blood spurts and flesh tears as hate-filled foes tear one another apart.
In both steps, a unit is eligible to fight if either or both of the following apply:
- It is within Engagement Range of one or more enemy units.
- It made a Charge move this turn.
Note that after an enemy unit has fought and finished its Consolidation move, it might be that previously ineligible units are now eligible – these units can then be selected to fight during the Remaining Combats step.
1. Fights First
In this step, all eligible units with the Fights First ability fight. Remember that this will include units that made a Charge move this turn and that have a Charge bonus.Some warriors attack with blinding speed, landing their blows before their foes can react.
Units with this ability that are eligible to fight do so in the Fights First step, provided every model in the unit has this ability.2. Remaining Combats
In this step, all remaining eligible units fight. This includes any units with the Fights First ability that were not eligible to fight at the start of the Fight phase, but have since become eligible to fight.Fight
When you select a unit to fight, it first Piles In, then its models make melee attacks, then the unit Consolidates.
1. Pile In
When a unit Piles In, you can move each model in that unit that is not already in base-to-base contact with an enemy model up to 3" – this is a Pile-in move. For a Pile In to be possible, a unit must be able to end these moves within Engagement Range of one or more enemy units and in Unit Coherency. If these conditions cannot be met, no models in the unit can make Pile-in moves this phase and you progress to making melee attacks with that unit. Otherwise, the unit can make Pile-in moves.Each time a model makes a Pile-in move, it must end that move closer to the closest enemy model. If it can also end that move in base-to-base contact with one or more enemy models while still satisfying all of the conditions above, it must do so. The controlling player chooses the order in which to move their models.
- Pile-in Move: Up to 3".
- Every model that moves must end closer to the closest enemy model, and in base-to-base contact with an enemy model if possible. The unit must end in Unit Coherency and within Engagement Range of at least one enemy unit (or no models can Pile In).
2. Make Melee Attacks
When a unit makes its melee attacks, before resolving those attacks you must first determine which models can fight, then select which melee weapon each of those models will make attacks with, then select the targets for those attacks.Which Models Fight
When a unit makes its melee attacks, only models in that unit that are either within Engagement Range of an enemy unit, or in base-to-base contact with another model from their own unit that is itself in base-to-base contact with an enemy unit, can fight.- A model can fight if it is within Engagement Range of an enemy unit.
- A model can fight if it is in base-to-base contact with another model from its own unit that is itself in base-to-base contact with an enemy unit.
Select Weapon
When a model fights, it must do so using a melee weapon it is equipped with. The weapons a model is equipped with are described on its datasheet. If a model has more than one melee weapon, it can only use one of them to make attacks with each time it fights, so you must now declare which it will use before resolving any of its attacks.If the selected weapon has more than one profile to choose between, a model can only use one of them to make attacks with each time it fights, so you must also declare which profile it will use before resolving any of its attacks.
When a model fights, it will make a number of melee attacks determined by the Attacks (A) characteristic of the melee weapon it is using.
- Each model that can fight does so using one of its melee weapons.
- Each model makes a number of attacks equal to the Attacks characteristic of its selected weapon.
Select Targets
Before you resolve any melee attacks, you must first select the enemy units that will be the targets for all of those attacks. In order to select an enemy unit as the target of a melee attack, the attacking model must be either within Engagement Range of that enemy unit, or in base-to-base contact with another model in its own unit that is itself in base-to-base contact with that enemy unit.If the melee weapon a model is using to fight with can make more than one attack, those attacks can all be made against the same target, or they can be split between different targets. Similarly, if a unit has more than one model, each model can make its attacks at the same, or different, targets. In either case, declare which attacks will target which units before any attacks are resolved.
If there are no eligible targets (because there are no enemy units within Engagement Range, for example) then that unit cannot make melee attacks this phase, but it can still Consolidate.
- Select targets for all attacks before any are resolved.
- Attacking model must either be within Engagement Range of an enemy unit to target it, or in base-to-base contact with another model in its unit that is itself in base-to-base contact with that enemy unit.
Make Attacks
Melee attacks follow the same attack sequence as ranged attacks (see Making Attacks), and you make one Hit roll for each attack being made.If more than one enemy unit has been targeted by an attacking unit’s melee attacks, resolve all of the attacks against one target before moving onto the next.
If your unit is making attacks with more than one melee weapon against a unit, and those weapons have different profiles, then after you have resolved an attack with one of those weapons, if any other weapons with the same profile are also being used to make attacks against that unit, you must resolve those attacks before resolving any other attacks against the target.
Note that all of the attacks you have declared targets for are always resolved against the target units, even if, when you come to resolve an attack, no models in the target unit of that attack remain within Engagement Range of the attacking model’s unit (because of models being destroyed as the result of other attacks made by the attacking model’s unit, for example).
- Resolve all attacks against one unit before moving onto the next.
- Resolve all attacks with the same weapon profile before resolving any made with a different weapon profile.
- All attacks declared against a target unit are resolved, even if no models in that unit remain within Engagement Range.
3. Consolidate
After a unit has finished making all of its melee attacks, it Consolidates. Each time a unit Consolidates, you can move each model in that unit that is not already in base-to-base contact with an enemy model up to 3" – this is a Consolidation move. For a Consolidation to be possible, a unit must be able to end these moves within Engagement Range of one or more enemy units and in Unit Coherency. If these conditions cannot be met, then each model in that unit can instead make a Consolidation move towards the closest objective marker, but only if, after doing so, that unit is within range of that objective marker and in Unit Coherency. If these conditions also cannot be met, no models in the unit can make Consolidation moves this phase and that unit’s fight ends.If a unit can end its Consolidation within Engagement Range of one or more enemy units, then each time one of its models makes a Consolidation move, it must end that move closer to the closest enemy model. If it can also end that move in base-to-base contact with one or more enemy models while still satisfying all of the conditions above, it must do so. The controlling player chooses the order in which to move their models.
- Consolidation Move: Up to 3".
- Every model that moves must end closer to the closest enemy model, and in base-to-base contact with an enemy model if possible. The unit must end in Unit Coherency and within Engagement Range of at least one enemy unit if possible.
- If the above is not possible, each model can move towards the closest objective marker, but this must result in the unit being within range of it and in Unit Coherency.
- If the above is also not possible, no models can Consolidate.
|
|
|
Datasheets
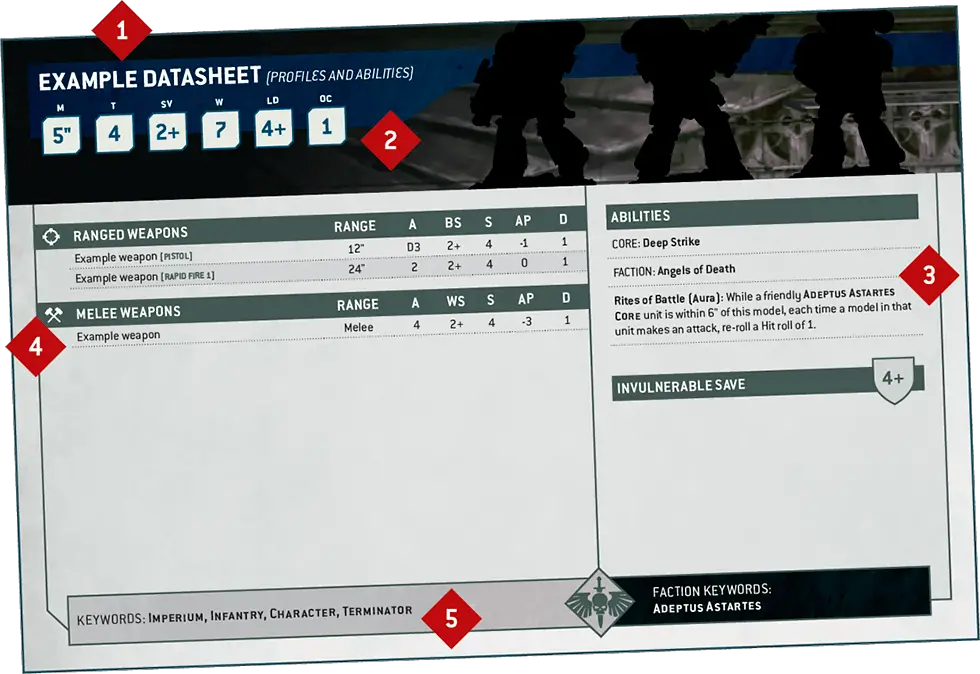
Each unit has a datasheet that lists the characteristics, wargear, abilities and keywords of its models. This section presents a summary of these elements and how they relate to playing the game.
Datasheet Name
Here you will find the name of the unit.Profiles
These contain the following characteristics that tell you how mighty the models in the unit are:Move (M): This is the speed at which a model moves across the battlefield. If a model has a Move of ‘-’ it is unable to move at all. After all modifiers are applied, this cannot be less than 1".
Toughness (T): This reflects the model’s resilience against physical harm. After all modifiers are applied, this cannot be less than 1.
Save (Sv): This indicates the protection a model’s armour gives them. After all modifiers are applied, this cannot be 1+ or better.
Wounds (W): Wounds represent how much damage a model can sustain before it succumbs to its injuries. If a model’s Wounds characteristic is reduced to 0, that model is destroyed.
Leadership (Ld): This reveals how courageous, determined or self-controlled a model is. The lower this number, the better a model’s Leadership is. After all modifiers are applied, this cannot be 4+ (or better), or 9+ (or worse).
Objective Control (OC): This shows how effectively a model can exert control over an objective on the battlefield. After all modifiers are applied, this cannot be less than 0.
Abilities
Many units have special abilities and rules that may apply during the game, from Core Rules shared by many units to bespoke Psychic abilities and invulnerable saves. These will be described here, along with any rules that apply when larger models such as vehicles have suffered sufficient damage.Some abilities are bestowed by items of wargear that models in a unit can be equipped with, and are known as Wargear abilities. These only apply while a model in the unit is equipped with the relevant item of wargear.
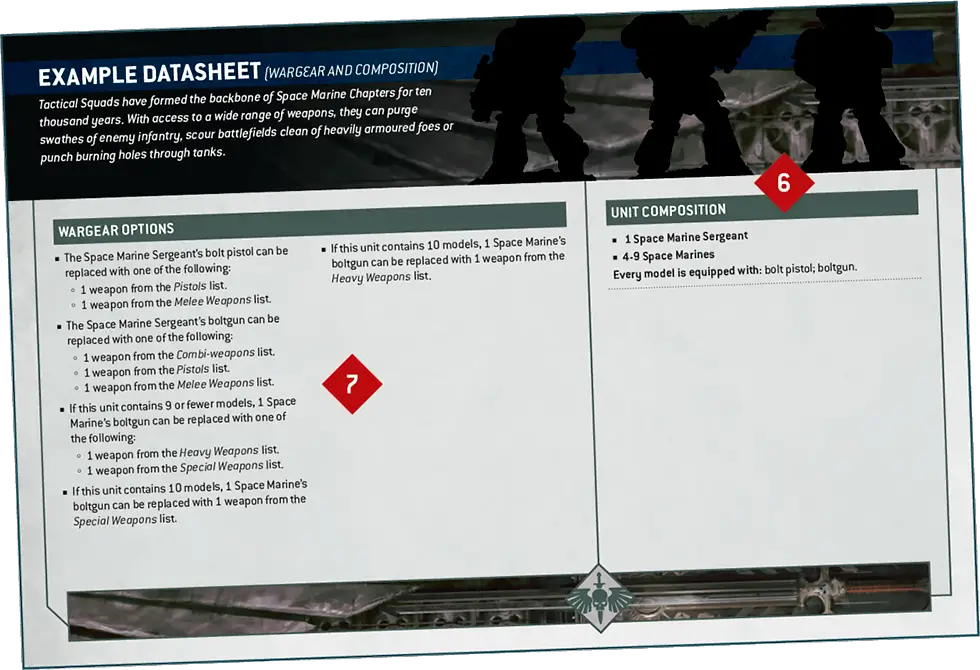
Weapons
Weapons are described with the following characteristics:Range: How far the weapon can shoot. Weapons with a range of ‘Melee’ are melee weapons and can only be used in close combat. All other weapons are ranged weapons. For ranged weapons, after all modifiers are applied, this cannot be less than 1".
Attacks (A): This tells you how many attacks are made each time that weapon is used. After all modifiers are applied, this cannot be less than 1.
Weapon Skill (WS): This reflects the bearer’s skill in wielding the relevant melee weapon. After all modifiers are applied, this cannot be 1+ or better.
Ballistic Skill (BS): This shows how accurate the bearer is when shooting with the relevant ranged weapon. After all modifiers are applied, this cannot be 1+ or better.
Strength (S): How likely the weapon is to wound a foe. After all modifiers are applied, this cannot be less than 1.
Armour Penetration (AP): This represents the weapon’s ability to cut through the target’s defences. After all modifiers are applied, this cannot be worse than 0.
Damage (D): The amount of damage inflicted by a successful wound. After all modifiers are applied, this cannot be less than 1. The exception to this is where a rule specifies that you can change the Damage characteristic to 0.
Keywords
Datasheets have a list of keywords, separated into Faction keywords and other keywords. The former are used when deciding which models to include in your army, but otherwise both sets of keywords are functionally the same.Unit Composition and Other Rules
This section details the number and types of models in the unit, and the default weapons and wargear those models are equipped with. It may also describe other interactions, such as how units with the Leader ability can attach to other units, and passenger restrictions that may apply to TRANSPORT models.Wargear Options
Some datasheets have a bullet-pointed list of wargear options. When you include such a unit in your army, you can use these options to change the weapons and other wargear of models in the unit. The order you use these options in does not matter, but each can only be used once.Leadership Tests
If a rule requires you to take a Leadership test for a unit, roll 2D6: if the total is greater than or equal to the best Leadership characteristic in that unit, that test is passed. Otherwise, it is failed.Random Characteristics
Some characteristics are a random value instead of a number. For example, a model’s Move characteristic might be 2D6", or a weapon’s Attacks characteristic might be D6. When a unit with a random Move characteristic is selected to move, determine the entire unit’s move distance by rolling the indicated number of dice. For all other characteristics, roll to determine the value on an individual, per-model or per-weapon basis each time that characteristic is required.Aura Abilities
Some abilities affect multiple models or units in a given range. These are known as Aura abilities and are tagged with the word ‘Aura’. A model with an Aura ability is always within range of its own Aura ability. A unit can be affected by more than one Aura ability at a time, but if a unit is within range of the same Aura ability more than once, that Aura ability only applies to that unit once.Psychic Weapons and Abilities
Some weapons and abilities can only be used by PSYKERS. Such weapons and abilities are tagged with the word ‘Psychic’. If a Psychic weapon or ability causes any unit to suffer one or more wounds, each of those wounds is considered to have been inflicted by a Psychic Attack.Deployment Abilities
Some abilities are used during deployment, or when setting a unit up – either on the battlefield or into Reserves. These are known as Deployment abilities, and some widespread examples of these are presented below.
Some units make their way to battle via tunnelling, teleportation, high-altitude descent or other extraordinary means that allow them to appear suddenly in the thick of the fighting.
During the Declare Battle Formations step, if every model in a unit has this ability, you can set it up in Reserves instead of setting it up on the battlefield. If you do, in the Reinforcements step of one of your Movement phases you can set up this unit anywhere on the battlefield that is more than 9" horizontally away from all enemy models. If a unit with the Deep Strike ability arrives from Strategic Reserves, the controlling player can choose for that unit to be set up either using the rules for Strategic Reserves or using the Deep Strike ability.- Unit can be set up in Reserves instead of on the battlefield.
- Unit can be set up in your Reinforcements step, more than 9" horizontally away from all enemy models.
Scouts form the vanguard of many armies. Unnoticed by the enemy, they range ahead of the main force.
Some units have ‘Scouts x"’ listed in their abilities. If every model in a unit has this ability, then at the start of the first battle round, before the first turn begins, it can make a Normal move of up to x", with the exception that, while making that move, the distance moved by each model in that unit can be greater than that model's Move characteristic, as long as it is not greater than x".DEDICATED TRANSPORT models can make use of any Scouts x" ability listed in their abilities, or a Scouts x" ability that a unit that starts the battle embarked within that DEDICATED TRANSPORT model has (provided only models with this ability are embarked within that DEDICATED TRANSPORT model), regardless of how that embarked unit gained this ability (e.g. listed in their abilities, conferred by an Enhancement or by an attached CHARACTER, etc.).
A unit that moves using this ability must end that move more than 9" horizontally away from all enemy models. If both players have units that can do this, the player who is taking the first turn moves their units first.
- Scouts x": Unit can make a Normal move of up to x" before the first turn begins.
- If embarked in a DEDICATED TRANSPORT, that DEDICATED TRANSPORT can make this move instead.
- Must end this move more than 9" horizontally away from all enemy models.
Many armies employ reconnaissance units who can sit concealed, waiting for the right moment to strike.
During deployment, if every model in a unit has this ability, then when you set it up, it can be set up anywhere on the battlefield that is more than 9" horizontally away from the enemy deployment zone and all enemy models.Mighty heroes fight at the forefront of battle.
Some CHARACTER units have ‘Leader’ listed on their datasheets. Such CHARACTER units are known as Leaders, and the units they can lead – known as their Bodyguard units – are listed on their datasheet.During the Declare Battle Formations step, for each Leader in your army, if your army also includes one or more of that Leader’s Bodyguard units, you can select one of those Bodyguard units. That Leader will then attach to that Bodyguard unit for the duration of the battle and is said to be leading that unit. Each Bodyguard unit can only have one Leader attached to it.
While a Bodyguard unit contains a Leader, it is known as an Attached unit and, with the exception of rules that are triggered when units are destroyed, it is treated as a single unit for all rules purposes. Each time an attack targets an Attached unit, until the attacking unit has resolved all of its attacks, you must use the Toughness characteristic of the Bodyguard models in that unit, even if a Leader in that unit has a different Toughness characteristic. Each time an attack sucessfully wounds an Attached unit, that attack cannot be allocated to a CHARACTER model in that unit, even if that CHARACTER model has lost one or more wounds or has already had attacks allocated to it this phase. As soon as the last Bodyguard model in an Attached unit has been destroyed, any attacks made against that unit that have yet to be allocated can then be allocated to CHARACTER models in that unit.
Each time the last model in a Bodyguard unit is destroyed, each CHARACTER unit that is part of that Attached unit is no longer part of an Attached unit. It becomes a separate unit, with its original Starting Strength. If this happens as the result of an attack, they become separate units after the attacking unit has resolved all of its attacks.
Each time the last model in a CHARACTER unit that is attached to a Bodyguard unit is destroyed and there is not another CHARACTER unit attached, that Attached unit’s Bodyguard unit is no longer part of an Attached unit. It becomes a separate unit, with its original Starting Strength. If this happens as the result of an attack, they become separate units after the attacking unit has resolved all of its attacks.
Each time a unit that is part of an Attached unit is destroyed, it does not have the keywords of any other units that make up that Attached unit (unless it has those keywords on its own datasheet) for the purposes of any rules that would be triggered when that unit is destroyed.
- Before the battle, CHARACTER units with the Leader ability can be attached to one of their Bodyguard units to form an Attached unit.
- Attached units can only contain one Leader.
- Attacks cannot be allocated to CHARACTER models in Attached units.
Stratagems
Command points can be spent during the battle to use Stratagems. All players can use the Core Stratagems presented here. Additional Stratagems can be found in Codexes and other publications.
- To use a Stratagem you must pay the CP specified.
- The same Stratagem cannot be used more than once in the same phase.
Stratagems Key
|
Stratagem Categories
Each Stratagem belongs to one of four categories, as described below. There are some rules (especially in Crusade games) that interact with Stratagems of a particular category.BATTLE TACTIC: These Stratagems bolster a unit’s efficacy in battle, boosting their attacks or defensive capabilities at a critical moment.
EPIC DEED: These Stratagems are used by individual models or units to perform mighty feats of heroism.
STRATEGIC PLOY: These Stratagems enable units to gain new strategic insights, granting them a small but valuable window of opportunity.
WARGEAR: These Stratagems represent the effects of using specialised items of equipment in battle.
") Stratagems That Allow a Closer Set Up Range*
Stratagems That Allow a Closer Set Up Range*
If a Stratagem has an effect that allows the targeted unit to be set up ‘more than 3" horizontally away’ from all enemy models/units (e.g. Cosmic Precision, Prognosticated Arrival, Denizens of the Warp, etc.), that part of that effect is changed to say ‘more than 6" horizontally away’.Stratagems That Worsen Armour Penetration*
If a Stratagem has an effect that says ‘until the end of the phase, each time an attack targets your unit, worsen the Armour Penetration characteristic of that attack by 1’ (e.g. Armour of Contempt, Shield of Aversion, Unfailingly Obdurate, Reinforced Hive Node, etc.), that effect is changed to say ‘until the attacking unit has finished making its attacks, each time an attack targets your unit, worsen the Armour Penetration characteristic of that attack by 1.’Modifying a Stratagem’s CP Cost*
Rules that enable you to target a unit from your army with a Stratagem for 0CP, but that do not specify the name of the Stratagem (e.g. a Captain’s Rites of Battle ability), instead reduce the CP cost of that use of that Stratagem by 1CP.If a model has a rule that would, once per battle, increase the CP cost of an opponent’s Stratagem (Callidus Assassin’s Reign of Confusion ability), that rule is replaced with the following ability:
‘Lord of Deceit (Aura): Each time your opponent targets a unit from their army with a Stratagem, if that unit is within 12" of this model, increase the cost of that use of that Stratagem by 1CP.’
Stratagems that can be Used More Than Once per Phase/Turn*
Parts of a rule that allow a player to use a Stratagem even if they have already targeted another unit with that Stratagem in the same phase can only be used if the name of the Stratagem is specified in that rule. Similarly, if a Stratagem is limited to one use per player per turn (e.g. Fire Overwatch), per battle round or per battle, such parts of that rule can only be used if the name of the Stratagem is specified in that rule.As this ability does not specify the name of the Stratagem, the part of this ability that modifies the CP cost of the Stratagem follows the ‘Modifying a Stratagem’s CP Cost’ rules, and the part of this ability that would have let you use the same Stratagem more than once in the same phase cannot be used at all.
Together, these changes mean the effect of the Rites of Battle ability becomes: ‘Once per battle round, one unit from your army with this ability can use it when its unit is targeted with a Stratagem. If it does, reduce the CP cost of that use of that Stratagem by 1CP.
Stratagems that Prevent Units From Being Targeted*
If a Stratagem has an effect that says the target unit ‘can only be selected as the target of a ranged attack if the attacking model is within 12"’, or ‘cannot be targeted by ranged attacks unless the attacking model is within 12"’ (e.g. Haloed in Soulfire), that effect is changed to say ‘can only be selected as the target of a ranged attack if the attacking model is within 18".Stratagems that add New Units to Your Army*
If a Stratagem has the effect of adding ‘a new unit to your army that is identical to your destroyed unit’ (e.g. Join the Hunt, Unending Waves, Reinforcements!, etc.), add the following Restriction to that Stratagem: ‘RESTRICTIONS: You can only use this Stratagem once per battle.’TARGET: That unit or model from your army.
EFFECT: You re-roll that roll, test or saving throw. If you are using fast dice rolling, select one of those rolls or saving throws to re-roll.
TARGET: One unit from your army that is within Engagement Range of one or more enemy units and that has not already been selected to fight this phase.
EFFECT: Your unit fights next.
TARGET: One CHARACTER model in your unit.
EFFECT: Until the end of the phase, all melee attacks made by that model have the [PRECISION] ability.
TARGET: That unit from your army.
EFFECT: Your unit automatically passes that Battle-shock test.
RESTRICTIONS: You cannot use this Stratagem more than once per battle.
TARGET: One GRENADES unit from your army (excluding units that Advanced, Fell Back or have shot this turn) that is not within Engagement Range of one or more enemy units.
EFFECT: Select one GRENADES model in your unit and one enemy unit that is not within Engagement Range of any units from your army and is within 8" of and visible to your GRENADES model. Roll six D6: for each 4+, that enemy unit suffers 1 mortal wound.
TARGET: That VEHICLE unit.
EFFECT: Select one enemy unit within Engagement Range of your unit, and select one VEHICLE model in your unit that is within Engagement Range of that enemy unit. Roll a number of D6 equal to the Toughness characteristic of the selected VEHICLE model. For each 5+, that enemy unit suffers 1 mortal wound (to a maximum of 6 mortal wounds).
TARGET: One unit from your army that is in Reserves.
EFFECT: Your unit can arrive on the battlefield as if it were the Reinforcements step of your Movement phase, and if every model in that unit has the Deep Strike ability, you can set that unit up as described in the Deep Strike ability (even though it is not your Movement phase).
RESTRICTIONS: You cannot use this Stratagem to enable a unit to arrive on the battlefield during a battle round it would not normally be able to do so in.
TARGET: One unit from your army that is within 24" of that enemy unit and that would be eligible to shoot if it were your Shooting phase.
EFFECT: If that enemy unit is visible to your unit, your unit can shoot that enemy unit as if it were your Shooting phase.
RESTRICTIONS: You cannot target a TITANIC unit with this Stratagem. Until the end of the phase, each time a model in your unit makes a ranged attack, an unmodified Hit roll of 6 is required to score a hit, irrespective of the attacking weapon’s Ballistic Skill or any modifiers. You can only use this Stratagem once per turn.
TARGET: One INFANTRY unit from your army that was selected as the target of one or more of the attacking unit’s attacks.
EFFECT: Until the end of the phase, all models in your unit have a 6+ invulnerable save and have the Benefit of Cover.
TARGET: One SMOKE unit from your army that was selected as the target of one or more of the attacking unit’s attacks.
EFFECT: Until the end of the phase, all models in your unit have the Benefit of Cover and the Stealth ability.
TARGET: One unit from your army that is within 6" of that enemy unit and would be eligible to declare a charge against that enemy unit if it were your Charge phase.
EFFECT: Your unit now declares a charge that targets only that enemy unit, and you resolve that charge as if it were your Charge phase.
RESTRICTIONS: You can only select a VEHICLE unit from your army if it is a WALKER. Note that even if this charge is successful, your unit does not receive any Charge bonus this turn.
Strategic Reserves
Strategic Reserves are forces that one or both players have chosen not to deploy at the start of the battle. These rules explain how to place units into Strategic Reserves, as well as how and when they arrive on the battlefield.
Placing Units into Strategic Reserves
Before the battle, when you are instructed to Declare Battle Formations, you can select one or more units from your army to be placed into Strategic Reserves (excluding FORTIFICATIONS).The combined points value of all the units you wish to place into Strategic Reserves before the battle (including those embarked within TRANSPORT models that are themselves placed into Strategic Reserves) cannot exceed 25% of your total points limit for your chosen battle size, as shown in the table below.
| ||||||||||
- Strategic Reserves: Units that are not deployed at the start of the battle.
- Combined points value cannot exceed 25% of your army’s total.
- Cannot put FORTIFICATIONS into Strategic Reserves.
Arriving from Strategic Reserves
Units that are placed into Strategic Reserves are called Strategic Reserves units, and can arrive later in the battle during the Reinforcements step of any of your Movement phases except during the first battle round.Any Strategic Reserves units that are not on the battlefield at the end of the battle count as destroyed.
- Strategic Reserves units can arrive in the Reinforcements step of your Movement phase, from the second battle round onwards.
- Those not on the battlefield at the end of the battle count as destroyed.
Setting Up Strategic Reserve Units
Where on the battlefield a Strategic Reserves unit can be set up when it arrives depends on the battle round, as follows:- During the second battle round, Strategic Reserves units that arrive must be set up wholly within 6" of any battlefield edge, but no model in those units can be set up within the enemy deployment zone.
- Starting from the third battle round, Strategic Reserves units that arrive must be set up wholly within 6" of any battlefield edge.
- During the second battle round, set up wholly within 6" of any battlefield edge (not in enemy deployment zone).
- From the third battle round onwards, set up wholly within 6" of any battlefield edge.
- Cannot be set up within 9" of any enemy models.
Terrain Features
This section provides rules for using a range of terrain features that can transform your gaming table into an interactive, thematic battlefield set in the 41st Millennium. These rules help to bring your battlefield to life and introduce a new tactical dimension to your games.
Many terrain features follow the normal rules for determining visibility between models, but some interact differently; in either case, this is stated below. Terrain features cannot be selected as the target of an attack.
Benefit of Cover
Shattered ruins and twisted wreckage afford much-needed shelter from enemy salvoes. Even heavily armoured warriors unfazed by small arms fire are thankful for such cover when foes bring their biggest guns to bear.
Models can sometimes gain a measure of protection from terrain features. The rules below detail the conditions under which a terrain feature confers the Benefit of Cover on a model.Each time a ranged attack is allocated to a model that has the Benefit of Cover, add 1 to the saving throw made for that attack (excluding invulnerable saving throws). Models with a Save characteristic of 3+ or better cannot have the Benefit of Cover against attacks with an Armour Penetration characteristic of 0. Multiple instances of the Benefit of Cover are not cumulative – a model cannot benefit from this rule more than once at any one time.
- Benefit of Cover: Add 1 to armour saving throws against ranged attacks.
- Does not apply to models with a Save of 3+ or better against attacks with an AP of 0.
- Multiple instances are not cumulative.
Craters and Rubble
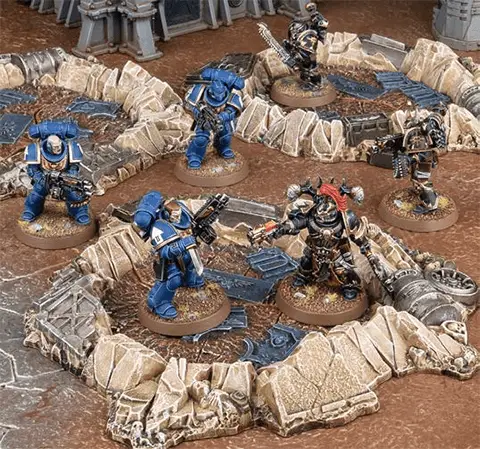
Barricades and Fuel Pipes
- In the Charge phase, if an enemy unit is within 1" of this terrain feature, a charging unit on the opposite side of this terrain feature can still make a Charge move against that enemy unit provided it ends that Charge move as close as possible to this terrain feature and within 2" of that enemy unit.
- In the Fight phase, units are eligible to fight – and models can make attacks – if their target is on the opposite side of this terrain feature and within 2" of them.
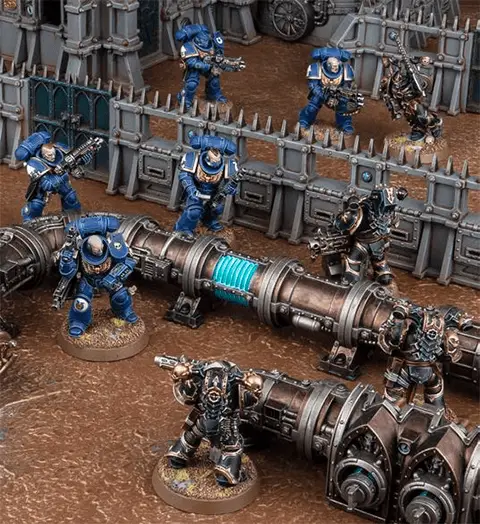
Battlefield Debris and Statuary
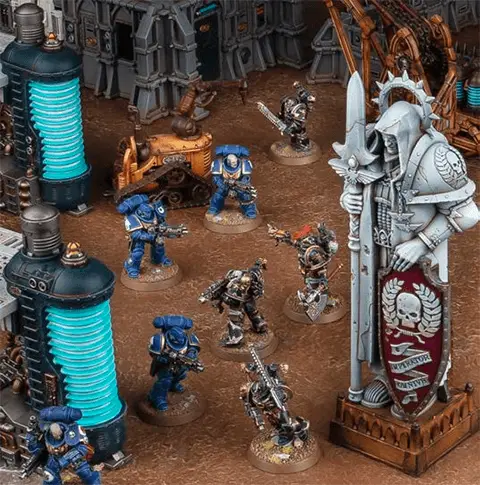
Hills, Industrial Structures, Sealed Buildings and Armoured Containers

Woods
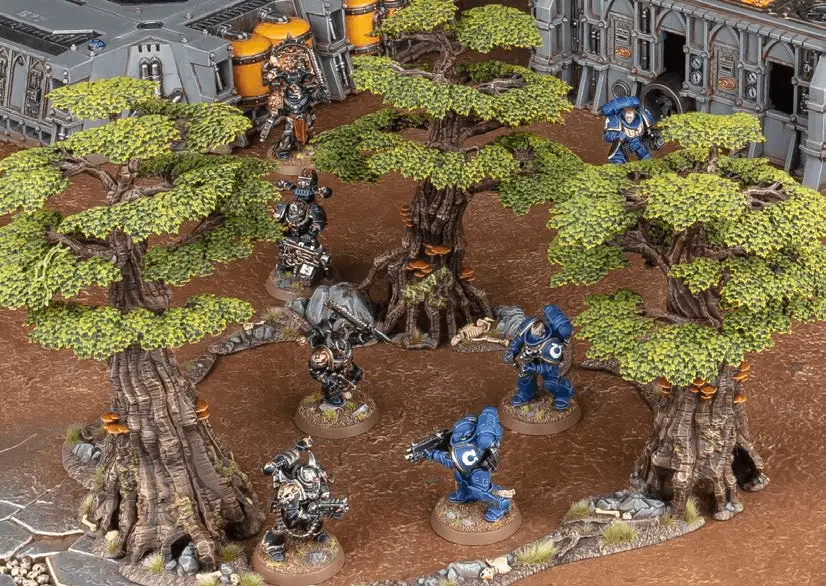
Ruins
- INFANTRY, IMPERIUM PRIMARCH, BELISARIUS CAWL, and BEAST models can move through this terrain feature (walls, floors, ceilings, gantries, chains, etc.) as if it were not there. A model cannot end a move within a wall, a floor, etc.
- INFANTRY, IMPERIUM PRIMARCH, BELISARIUS CAWL, BEASTS and FLY models can be set up or end a move on any floor level of this terrain feature, but if that level is not the ground floor, such models can only do so if their base does not overhang the floor at that level (if a model does not have a base, no part of that model that would be in contact with the battlefield at ground level can overhang that floor). All other models can only be set up or end a move on the ground floor of this terrain feature.
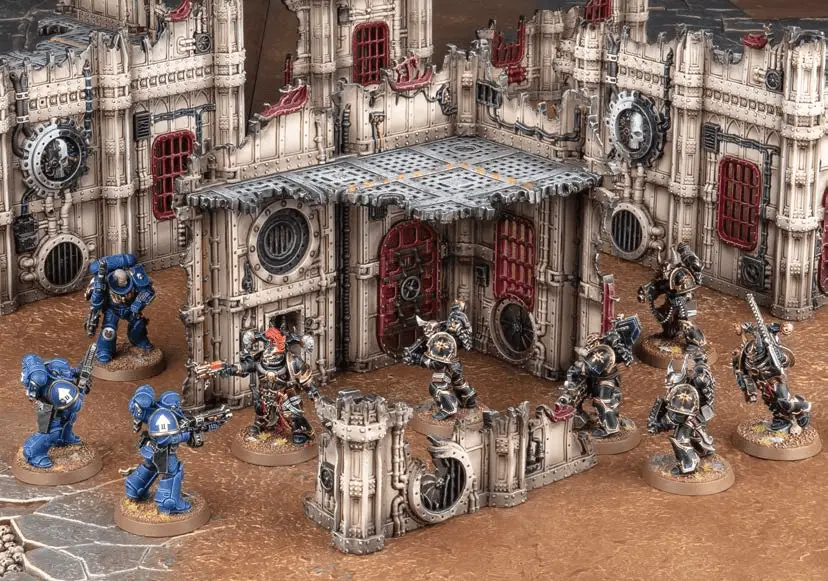
Example Battlefields
In the far future, battles are fought across an infinite variety of strange and alien planets where no land is left untouched by the tempest of war. Crystal moons, derelict space hulks, carnivorous death worlds and war-ravaged cityscapes are just a few of the fantastical landscapes that can be recreated.
Below is an example of a battlefield set up for a Strike Force battle, with a good mixture of different terrain features fairly distributed across the battlefield. Their placement will create a dynamic gaming experience that doesn’t favour one player over the other.
Importantly, some terrain features that block visibility have been placed near the middle of the battlefield, ensuring that it is not easy to see from one side of the battlefield to the other. Battlefields where this is not the case can advantage armies that rely on shooting, or disadvantage armies that rely on melee. There is also sufficient room for larger models such as vehicles to manoeuvre around the terrain features, especially near the edges, without getting trapped.
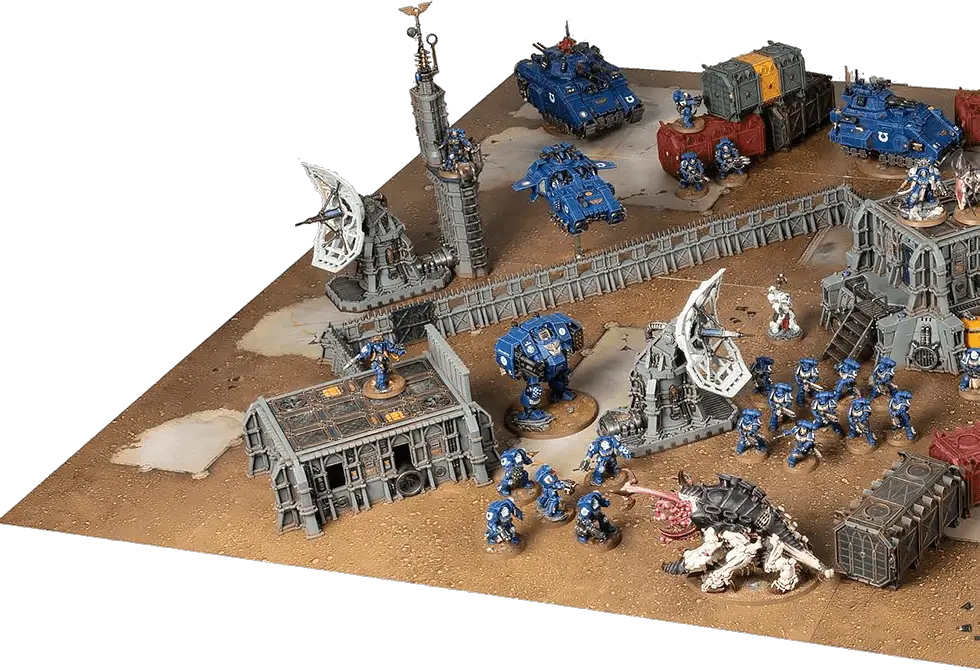
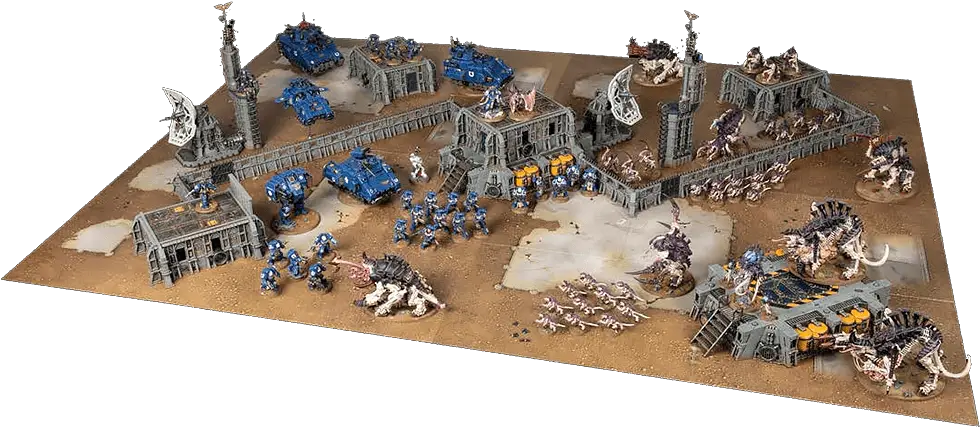
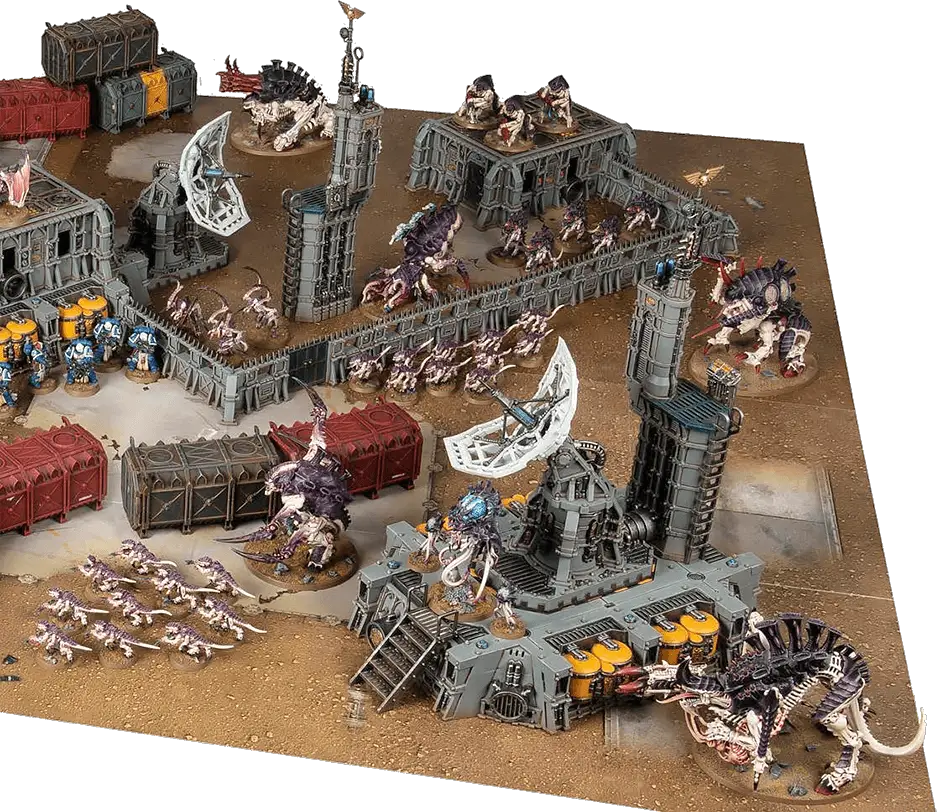
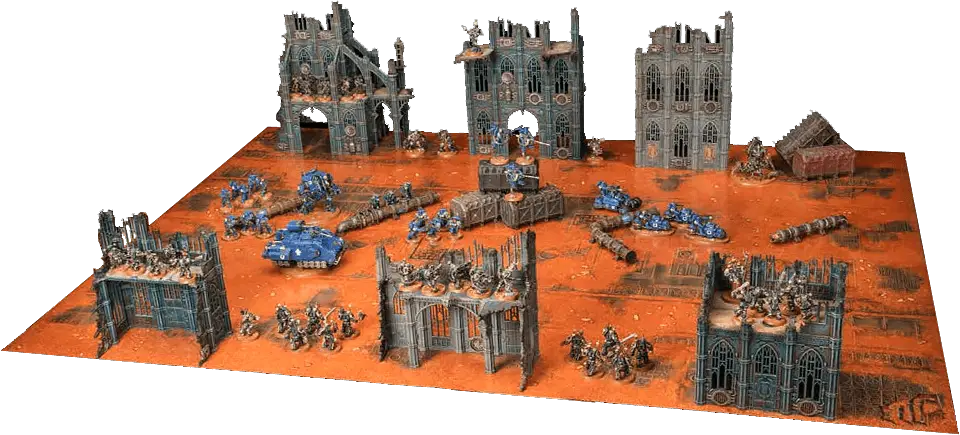
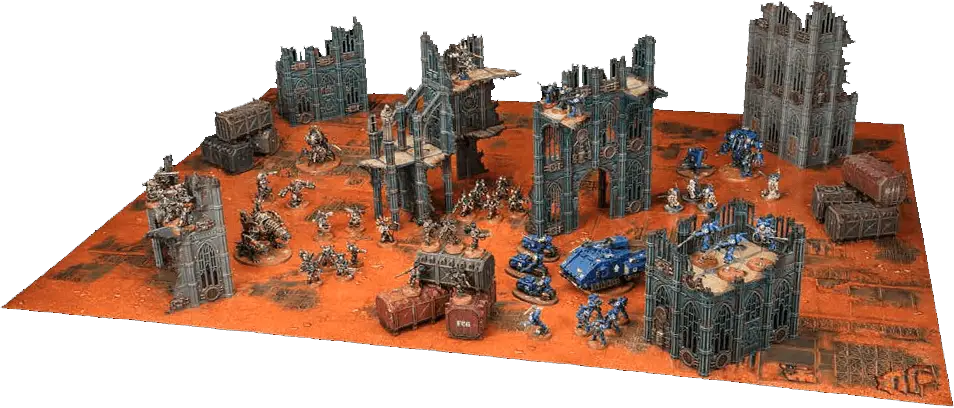
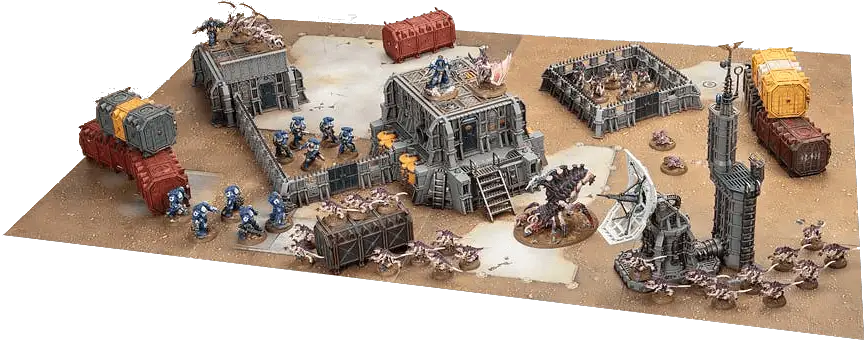
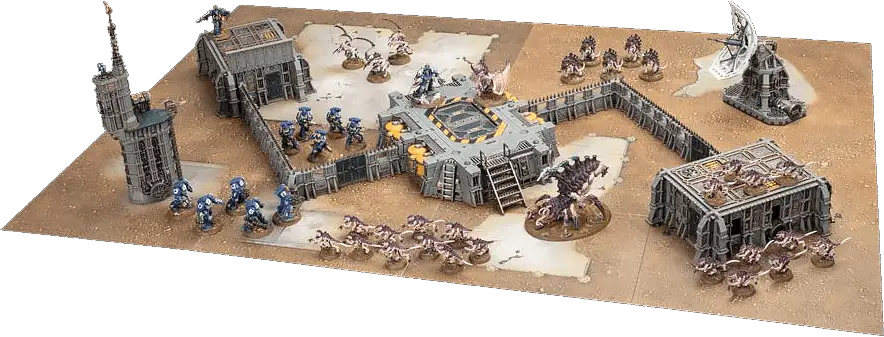
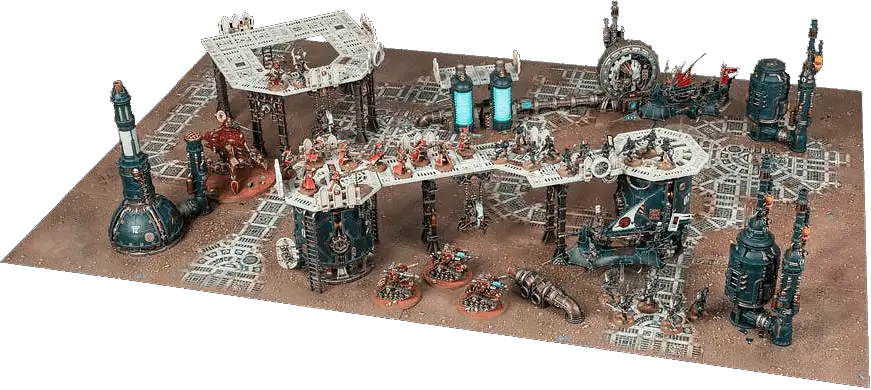
Aircraft
The airspace above a battle is often thronged with activity. Fighters and bomber craft hurtle through the skies, duelling with one another and strafing enemy formations on the ground.
Deploying Aircraft
When you are instructed to Declare Battle Formations, AIRCRAFT models must start the battle in Reserves instead of being set up on the battlefield. Once the battle has started, AIRCRAFT models are then treated as Strategic Reserves units for all rules purposes. Only units that are themselves placed into Reserves can start the battle embarked within AIRCRAFT TRANSPORT models that are in Reserves.Some aircraft can use vectored thrusters or anti-grav technology to hover over the battlefield, the better to hunt their prey or deploy embarked troops.
Some AIRCRAFT models have ‘Hover’ listed in their abilities. When you are instructed to Declare Battle Formations, before doing anything else, you must first declare which models from your army with this ability will be in Hover mode.If a model is in Hover mode, then until the end of the battle, its Move characteristic is changed to 20", it loses the AIRCRAFT keyword and it loses all associated rules for being an AIRCRAFT model. Models in Hover mode do not start the battle in Reserves, but you can choose to place them into Strategic Reserves following the normal rules if you wish.
Aircraft in the Movement Phase
AIRCRAFT models cannot Advance, Fall Back or Remain Stationary. If, when an AIRCRAFT model is selected to move in the Movement phase, any enemy units are within Engagement Range of it, that AIRCRAFT model can still make a Normal move.Each time an AIRCRAFT model makes a Normal move, first move the model straight forward, and it must move a minimum of 20" – all parts of the model’s base must end the move at least this far from where they started. After it has moved, it can pivot on the spot up to 90° – this does not contribute to how far the model moves. If, when making a Normal move, any part of an AIRCRAFT model’s base crosses the edge of the battlefield, or it cannot move a minimum of 20", that model’s move ends and it is placed into Strategic Reserves. There is no upper limit to how far AIRCRAFT models can move, and their Move characteristic is therefore 20+".
If placed into Strategic Reserves, an AIRCRAFT model will always arrive from Strategic Reserves in your next turn.
- AIRCRAFT can only make a Normal move, and can do so even when within Engagement Range of enemy models.
- AIRCRAFT must move straight forward at least 20", and can then make one pivot of up to 90°.
- AIRCRAFT that cross the edge of the battlefield, or that cannot make their minimum move, are placed into Strategic Reserves.
Aircraft and the Movement of Other Models
When a unit is selected to move in the Movement phase, if the only enemy models that are within Engagement Range of that unit are AIRCRAFT models, then that unit can still make a Normal or Advance move.Whenever a model makes any kind of move, it can be moved over enemy AIRCRAFT models as if they were not there, and can be moved within Engagement Range of enemy AIRCRAFT models, but it cannot end that move on top of another model or within Engagement Range of any enemy AIRCRAFT models.
- Units can still make a Normal or Advance move if they are only within Engagement Range of enemy AIRCRAFT.
- Models can move within Engagement Range of enemy AIRCRAFT, but cannot end a move within Engagement Range of enemy AIRCRAFT.
- Models can move over AIRCRAFT when they make any kind of move.
Aircraft in the Charge and Fight Phases
AIRCRAFT units cannot declare a charge, and only units that can FLY can select an AIRCRAFT unit as a target of their charge. Such units can end their Charge move within Engagement Range of one or more enemy AIRCRAFT units.An AIRCRAFT model is only eligible to fight if it is within Engagement Range of one or more enemy units that can FLY, and it can only make melee attacks against units that can FLY. Only models that can FLY can make melee attacks against AIRCRAFT units.
AIRCRAFT models cannot make Pile-in or Consolidation moves. Each time a model makes a Pile-in or Consolidation move, unless that model can FLY, AIRCRAFT models are ignored for the purposes of moving closer to the closest enemy model.
- Only units that can FLY can charge at or make melee attacks against AIRCRAFT.
- AIRCRAFT cannot charge, Pile In or Consolidate, and can only make melee attacks against units that can FLY.
- When a model Piles In or Consolidates, unless it can FLY, ignore AIRCRAFT when determining the closest enemy model.
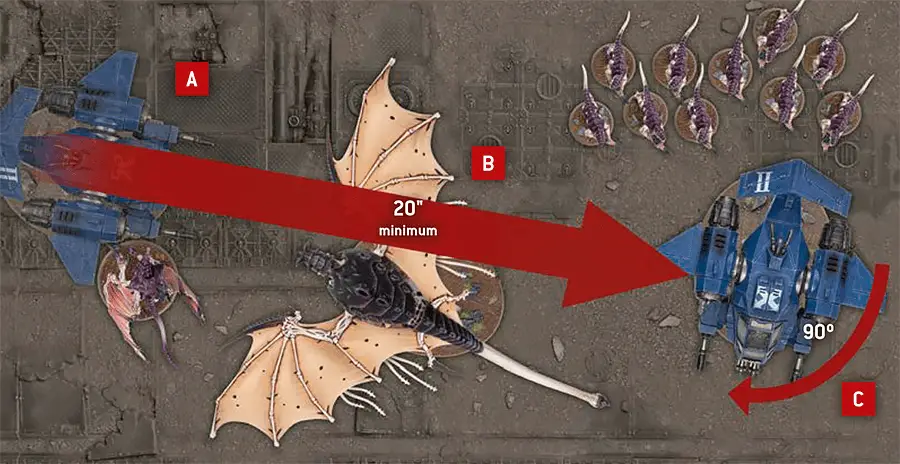
|
| ||||
Muster Your Army
In order to play a game of Warhammer 40,000, you will need to muster an army. To do so, follow the sequence below.
1. Select Battle Size
With your opponent, select one of the battle sizes below. This will determine the total number of points each player can spend to build their army and, as a result, how long the battle will last. Points are a measure of a unit’s power on the battlefield; the higher a unit’s points value, the more powerful that unit is. The points values for units are presented in other publications, such as Codexes and the Munitorum Field Manual. You will need to refer to these when building your army.
| ||||||||||||||||||||||
2. Start Your Army Roster
The details of your army must be recorded on an Army Roster. This can be written on a piece of paper or recorded using the Warhammer 40,000 app. Players must show their finished Army Roster to their opponent before battle commences.You can download blank Army Roster following this link.
3. Select Army Faction
Note on your Army Roster one Faction keyword to be your army faction.4. Select Detachment Rules
Note on your Army Roster one set of Detachment rules for your army. Some Detachment rules list units that you either must include or cannot include in your army; you must follow all such rules when building your army.5. Select Units
Select all the units you want to include in your army. Your army must include at least one CHARACTER model that is eligible to be your WARLORD. Some rules grant the BATTLELINE keyword to additional units from your army – typically if you select a particular Detachment or if your WARLORD is a specific model. When mustering your army, treat such units as BATTLELINE units for the purposes of this step, even though the Select Warlord step comes afterwards. Each time you include a unit in your army, it can take any upgrade, Enhancement or options it has access to. Note on your Army Roster the number of models in the unit, any weapons, wargear, upgrades and any Enhancement it has, and its points value. Subtract this points value from the total permitted for your battle size.You can only include a unit in your army if:
- That unit has the Faction keyword you chose for your army in step 3.
- You have enough points remaining.
- Your army does not already contain three units with the same datasheet name as that unit – or six units with the same datasheet name as that unit if it is a BATTLELINE or DEDICATED TRANSPORT* unit.
* Every DEDICATED TRANSPORT unit from your army must start the battle with at least one unit embarked within it, or it cannot be deployed for that battle and will instead count as having been destroyed during the first battle round.
6. Select Warlord
Select one CHARACTER model from your army to be your Warlord – this will be the leader of your army – and make a note of this on your Army Roster. Your Warlord gains the WARLORD keyword.Missions
Before you can wage war in a game of Warhammer 40,000, you must first select a mission. The Core Rules include a single mission – Only War – that is ideal to get the action started quickly. Others can be found elsewhere in this or other books, or you could play a mission of your own creation. If you and your opponent can’t agree which mission to play, you must roll off, and the winner decides.
- Which of their Leader units will start the battle attached (they must specify which Leader unit is attached to which Bodyguard unit).
- Which of their units will start the battle embarked within TRANSPORT models (they must specify which units are embarked within which models).
- Which of their units will start the battle in Reserves (including Strategic Reserves).
Objective Markers
Objective markers represent objects of tactical or strategic import that both sides are attempting to secure, such as valuable artefacts, vital supplies or communications nodes. If a mission uses objective markers, it will state where they are located on the battlefield. These can be represented using any suitable marker, but we recommend using round markers that are 40mm in diameter.When setting objective markers up on the battlefield, place them so they are centred on the point specified by the mission. When measuring distances to and from objective markers, measure to and from the closest part of them. Models can move over objective markers as if they were not there, but they cannot end a move on top of an objective marker.
At the start of the battle, each objective marker on the battlefield is said to be contested, and so is not controlled by either player. To control an objective marker, a player will first need to move models within range of it. A model is within range of an objective marker if it is within 3" horizontally and 5" vertically of that objective marker.
Every model has an Objective Control (OC) characteristic listed on its datasheet. To determine a player’s Level of Control over an objective marker, add together the OC characteristics of all the models from that player’s army that are within range of that objective marker. A player will control an objective marker at the end of any phase or turn if their Level of Control over it is greater than their opponent’s. If both players have the same Level of Control over an objective marker, that objective marker is contested.
- A model is within range of an objective marker if within 3" horizontally and 5" vertically.
- Level of Control: Add together the OC characteristics of all of a player’s models within range of the objective marker.
- An objective marker is controlled by the player with the highest Level of Control over it (in a tie, it is contested).
- Models cannot end a move on top of an objective marker.
Hints and Tips
Objective Markers and Terrain Features
Many players choose to bring the narrative of their missions to life by positioning objective markers within exciting terrain features on the battlefield. When setting up terrain features, you can place them where an objective marker would be, so long as you can reposition that objective marker directly on top of that terrain feature and it lies flat, without overhanging any part of it. That objective marker should still be more than 1" away from all impassable parts of that terrain feature (such as the walls of a ruin) so that there is sufficient room for models to move around it.If it is not possible to set up terrain features or objective markers in this way, and both players agree, you can nudge the positions of any terrain feature or objective marker so that these conditions are satisfied. Of course, the final position of an objective marker should still be as close as possible to the location indicated on your mission’s deployment map, but if both players are happy to tweak the battlefield arrangement to forge a stronger narrative, you should feel free to do so.
Mission Map Key
|

|

|

|

|

|

|

Only War
The time has come to prove your worth as the greatest commander in the galaxy! All that stands between you and ultimate glory is an opposing force bent upon your destruction. Destroy the enemy army and secure strategic sites littered across the battlefield while stopping your foe from doing likewise.First, players will need to muster armies based on the battle size they have selected, as described in Muster Your Army section. This mission is designed for Incursion, Strike Force and Onslaught battle sizes.
|
Starting from the second battle round, at the end of each player’s Command phase, the player whose turn it is scores 1 Victory point (VP) for each objective marker they control (to a maximum of 3VP per turn).
Players now create the battlefield and set up terrain features using the guidelines in Example Battlefields section. The minimum size of your battlefield depends on the battle size you have selected, as shown in the table below.
| ||||||||
Players must then alternate setting up objective markers on the battlefield, starting with whichever player wins a roll-off, until a total of four have been placed. Objective markers cannot be placed within 6" of any battlefield edge, or within 9" of any other objective markers.
Players roll off and the winner is the Attacker – their opponent is the Defender.
In the order stated below, both players now secretly note down:
- Which of their Leader units will start the battle attached (they must specify which Leader unit is attached to which Bodyguard unit).
- Which of their units will start the battle embarked within Transport models (they must specify which units are embarked within which models).
- Which of their units will start the battle in Reserves (including Strategic Reserves).
Players then alternate deploying their units, one at a time, starting with the Attacker. Models must be set up wholly within their controlling player’s deployment zone. Continue setting up units until both players have set up all the units from their armies, or you have run out of room to set up more units. If one player has finished setting up their army, their opponent continues to set up the remaining units from their army.
If both players have units with abilities that allow them to be set up after both armies have deployed, the players must roll off after all other units have been set up and alternate setting up those units, starting with the winner.
Players should roll off again, and the winner takes the first turn.
Players now resolve any pre-battle rules their armies have.
The first battle round begins. Players continue to resolve battle rounds until the battle ends.
The battle ends when all of the models in one player’s army have been destroyed, or once the fifth battle round has ended (whichever comes first).
If, at the end of the battle, one army has been destroyed, the player commanding the opposing army is the victor. Otherwise, the player with the most Victory points is the victor (in the case of a tie, the battle is a draw).
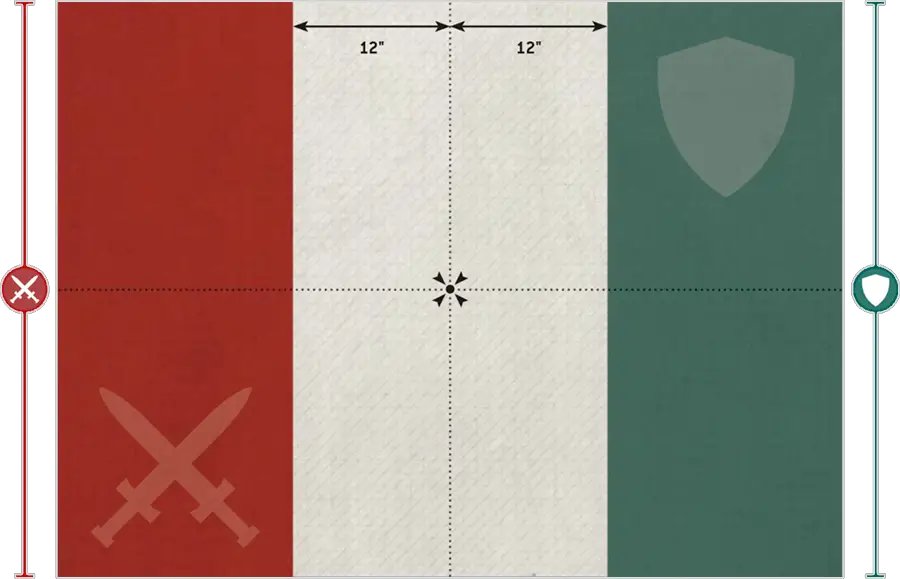
Many armies employ reconnaissance units who can sit concealed, waiting for the right moment to strike.
During deployment, if every model in a unit has this ability, then when you set it up, it can be set up anywhere on the battlefield that is more than 9" horizontally away from the enemy deployment zone and all enemy models.- Normal Move: Models move up to M".
- Cannot move within Engagement Range of any enemy models.
- Advance Move: Models move up to M+D6".
- Cannot move within Engagement Range of any enemy models.
- Units that Advance cannot shoot or charge this turn.
A unit cannot shoot or declare a charge in the same turn that it Fell Back.
Desperate Escape Tests
Unlike when making other types of move, models can move over enemy models when making a Fall Back move as if those enemy models were not there, but you must take a Desperate Escape test for each model that will do so (excluding models that are TITANIC or can FLY) before any models in that unit are moved. In addition, if a unit is Battle-shocked when it is selected to Fall Back, you must take a Desperate Escape test for every model in that unit before any are moved.
- Fall Back Move: Models move up to M".
- Units that Fall Back cannot shoot or declare a charge in the same turn.
- Models can move over enemy models when Falling Back, but you must take Desperate Escape tests for them before they do so (excluding models that are TITANIC or can FLY).
- If a Battle-shocked unit is selected to Fall Back, take a Desperate Escape test for every model in that unit.
- Desperate Escape Test: Roll one D6. On a 1-2, one model from that unit is destroyed.
Some units make their way to battle via tunnelling, teleportation, high-altitude descent or other extraordinary means that allow them to appear suddenly in the thick of the fighting.
During the Declare Battle Formations step, if every model in a unit has this ability, you can set it up in Reserves instead of setting it up on the battlefield. If you do, in the Reinforcements step of one of your Movement phases you can set up this unit anywhere on the battlefield that is more than 9" horizontally away from all enemy models. If a unit with the Deep Strike ability arrives from Strategic Reserves, the controlling player can choose for that unit to be set up either using the rules for Strategic Reserves or using the Deep Strike ability.- Unit can be set up in Reserves instead of on the battlefield.
- Unit can be set up in your Reinforcements step, more than 9" horizontally away from all enemy models.
- A unit can embark within a friendly TRANSPORT if all of its models end a Normal, Advance or Fall Back move within 3" of that TRANSPORT.
- A unit cannot embark and disembark in the same phase.
When a unit disembarks from a TRANSPORT model, set it up on the battlefield so that it is wholly within 3" of that TRANSPORT model and not within Engagement Range of any enemy models. If, for any reason, a disembarking model cannot be set up, that model’s unit cannot disembark.
Units that disembark from a TRANSPORT model that either Remained Stationary this phase or has not yet made a Normal, Advance or Fall Back move this phase can then act normally (make a Normal move, Advance, shoot, declare a charge, fight, etc.) in the remainder of the turn. Such a disembarking unit cannot choose to Remain Stationary.
Units that disembark from a TRANSPORT model that made a Normal move this phase count as having made a Normal move themselves; they cannot move further during this phase. Such a unit also cannot declare a charge in the same turn, but can otherwise act normally in the remainder of the turn.
Units cannot disembark from a TRANSPORT model that either Advanced or Fell Back this turn.
- Units that start your Movement phase embarked within a TRANSPORT can disembark this phase, provided their TRANSPORT has not Advanced or Fallen Back.
- If a unit disembarks before its TRANSPORT moves, it can act normally.
- If a unit disembarks after its TRANSPORT moves, it cannot move or charge this turn, but can otherwise act normally.
- Disembarking units must be set up wholly within 3" of their TRANSPORT and not within Engagement Range of any enemy models (or the unit cannot disembark).
- Units that disembark this turn cannot Remain Stationary.
The Starting Strength of an Attached unit is equal to the combined Starting Strengths of all of its units (i.e. the number of models in the Leader unit added to the number of models in the Bodyguard unit). If either the Leader unit or the Bodyguard unit in an Attached unit is destroyed, the Starting Strength of the remaining unit is changed to be equal to its original Starting Strength.
For the purposes of rules that are triggered when a unit is destroyed, such rules are still triggered when one of the individual units that made up an Attached unit is destroyed (the Leader or the Bodyguard unit).
You then make a Charge roll for the charging unit by rolling 2D6. The result is the maximum number of inches each model in that unit can be moved if a Charge move is possible. For a Charge move to be possible, the Charge roll must be sufficient to enable the charging unit to end that move:
- Within Engagement Range of every unit that you selected as a target of the charge.
- Without moving within Engagement Range of any enemy units that were not a target of the charge.
- In Unit Coherency.
- Charge Roll: 2D6".
- Targets of a charge must be within 12" but do not need to be visible.
- If the distance rolled is insufficient to move within Engagement Range of all targets while maintaining Unit Coherency, the charge fails.
- Cannot move within Engagement Range of any unit that was not a target of the charge.
- If the charge is successful, each model makes a Charge move less than or equal to the Charge roll, and must move into base-to-base contact with an enemy model if possible.
An unmodified Hit roll of 6 is called a Critical Hit and is always successful. An unmodified Hit roll of 1 always fails. A Hit roll can never be modified by more than -1 or +1.
- Hit Roll (Ranged Attack): A hit is scored if the D6 result equals or exceeds that attack’s BS.
- Hit Roll (Melee Attack): A hit is scored if the D6 result equals or exceeds that attack’s WS.
- Critical Hit: Unmodified Hit roll of 6. Always successful.
- An unmodified Hit roll of 1 always fails.
- A Hit roll can never be modified by more than -1 or +1.
TARGET: One unit from your army that is within 24" of that enemy unit and that would be eligible to shoot if it were your Shooting phase.
EFFECT: If that enemy unit is visible to your unit, your unit can shoot that enemy unit as if it were your Shooting phase.
RESTRICTIONS: You cannot target a TITANIC unit with this Stratagem. Until the end of the phase, each time a model in your unit makes a ranged attack, an unmodified Hit roll of 6 is required to score a hit, irrespective of the attacking weapon’s Ballistic Skill or any modifiers. You can only use this Stratagem once per turn.
While a unit is Battle-shocked:
- The Objective Control characteristic of all of its models is 0.
- If it Falls Back, you must take a Desperate Escape test for every model in that unit.
- Its controlling player cannot use Stratagems to affect that unit.
Once you have taken Battle-shock tests for all of your units that require them, your Command phase ends and you progress to your Movement phase.
In this step, if for any reason a unit is forced to take a Battle-shock test for being below its Starting Strength, unless otherwise stated, that unit does not also have to take a Battle-shock test for being Below Half-strength. While a unit is Battle-shocked, all models in that unit are also Battle-shocked.
- Take a Battle-shock test for each unit from your army on the battlefield that is Below Half-strength.
- Roll 2D6: if the result is greater than or equal to the unit’s Leadership, the test is passed. Otherwise, the unit is Battle-shocked until the start of your next Command phase.
- Battle-shocked units have an OC of 0 and their controlling player cannot use Stratagems to affect them.
- Battle-shocked units must take Desperate Escape tests if they Fall Back.
- If a unit has a Starting Strength of 1, then it is said to be Below Half-strength while its remaining number of wounds is less than half of its Wounds characteristic.
- For any other unit, while the number of models in that unit is less than half of its Starting Strength, that unit is said to be Below Half-strength.
Mighty heroes fight at the forefront of battle.
Some CHARACTER units have ‘Leader’ listed on their datasheets. Such CHARACTER units are known as Leaders, and the units they can lead – known as their Bodyguard units – are listed on their datasheet.During the Declare Battle Formations step, for each Leader in your army, if your army also includes one or more of that Leader’s Bodyguard units, you can select one of those Bodyguard units. That Leader will then attach to that Bodyguard unit for the duration of the battle and is said to be leading that unit. Each Bodyguard unit can only have one Leader attached to it.
While a Bodyguard unit contains a Leader, it is known as an Attached unit and, with the exception of rules that are triggered when units are destroyed, it is treated as a single unit for all rules purposes. Each time an attack targets an Attached unit, until the attacking unit has resolved all of its attacks, you must use the Toughness characteristic of the Bodyguard models in that unit, even if a Leader in that unit has a different Toughness characteristic. Each time an attack sucessfully wounds an Attached unit, that attack cannot be allocated to a CHARACTER model in that unit, even if that CHARACTER model has lost one or more wounds or has already had attacks allocated to it this phase. As soon as the last Bodyguard model in an Attached unit has been destroyed, any attacks made against that unit that have yet to be allocated can then be allocated to CHARACTER models in that unit.
Each time the last model in a Bodyguard unit is destroyed, each CHARACTER unit that is part of that Attached unit is no longer part of an Attached unit. It becomes a separate unit, with its original Starting Strength. If this happens as the result of an attack, they become separate units after the attacking unit has resolved all of its attacks.
Each time the last model in a CHARACTER unit that is attached to a Bodyguard unit is destroyed and there is not another CHARACTER unit attached, that Attached unit’s Bodyguard unit is no longer part of an Attached unit. It becomes a separate unit, with its original Starting Strength. If this happens as the result of an attack, they become separate units after the attacking unit has resolved all of its attacks.
Each time a unit that is part of an Attached unit is destroyed, it does not have the keywords of any other units that make up that Attached unit (unless it has those keywords on its own datasheet) for the purposes of any rules that would be triggered when that unit is destroyed.
- Before the battle, CHARACTER units with the Leader ability can be attached to one of their Bodyguard units to form an Attached unit.
- Attached units can only contain one Leader.
- Attacks cannot be allocated to CHARACTER models in Attached units.
Models cannot be set up or end a Normal, Advance or Fall Back move within Engagement Range of any enemy models. If for any reason a model cannot meet this condition, that model is destroyed.
- Engagement Range: Within 1" horizontally and 5" vertically.
- Models cannot be set up or end a Normal, Advance or Fall Back move within Engagement Range of any enemy models.
Pivot Value
Unless otherwise stated, the following pivot values apply.
|
*Note that AIRCRAFT models have separate rules for pivoting.
When a model that can FLY starts or ends a move on a terrain feature, instead of measuring the path it has moved across the battlefield, you instead measure its path ‘through the air’, as shown in the diagram below.
- FLY models can move over enemy models when they make a Normal, Advance or Fall Back move.
- FLY models that start or end a move on a terrain feature measure distance moved through the air when they make a Normal, Advance or Fall Back move.
Weapons powered by unstable and dangerous energy sources pose a substantial risk to the wielder every time they are used.
Weapons with [HAZARDOUS] in their profile are known as Hazardous weapons. Each time a unit is selected to shoot or fight, after that unit has resolved all of its attacks, for each Hazardous weapon that targets were selected for when resolving those attacks, that unit must take one Hazardous test. To do so, roll one D6: on a 1, that test is failed. For each failed test you must resolve the following sequence (resolve each failed test one at a time):- If possible, select one model in that unit that has lost one or more wounds and is equipped with one or more Hazardous weapons.
- Otherwise, if possible, select one model in that unit (excluding CHARACTER models) equipped with one or more Hazardous weapons.
- Otherwise, select one CHARACTER model in that unit equipped with one or more Hazardous weapons.
If a unit from a player’s army is selected as the target of the Fire Overwatch Stratagem in their opponent’s Charge phase, any mortal wounds inflicted by Hazardous tests are allocated after the charging unit has ended its Charge move.
- After a unit shoots or fights, roll one Hazardous test (one D6) for each Hazardous weapon used. For each 1, a model equipped with a hazardous weapon suffers 3 mortal wounds, that must be allocated to the selected model.
- A Critical Wound inflicts mortal wounds equal to the weapon’s Damage characteristic, instead of any normal damage.
Some attacks are so powerful that no armour or force field can withstand their fury.
Some rules inflict mortal wounds on units. Each time mortal wounds are inflicted on a unit, each of those mortal wounds inflicts one point of damage to that unit, and they are always applied one at a time. Each mortal wound is allocated to a model in the same manner as allocating an attack. Excess damage from mortal wounds is not lost if the damage can be allocated to another model. Instead, keep allocating damage to another model in the target unit until either all the damage has been allocated or the target unit is destroyed.If an attack inflicts mortal wounds in addition to any normal damage, do not make a Wound roll or saving throw (including invulnerable saving throws) against those mortal wounds. If those mortal wounds are inflicted by an attack that has the [PRECISION] ability, the attacking model’s controlling player can allocate those mortal wounds to a CHARACTER model in that unit.
If mortal wounds are being inflicted as a result of the [HAZARDOUS] ability or by an attack with the [DEVASTATING WOUNDS] ability that scored a Critical Wound, each time those mortal wounds are allocated to a model, if that model is destroyed as a result of those mortal wounds, the remaining mortal wounds from that attack are lost, just as with a normal attack.
If, when a unit is selected to shoot or fight, one or more of its attacks can inflict mortal wounds on the target, resolve any normal damage inflicted by the attacking unit’s attacks on that target before inflicting any mortal wounds on that target. If an attack inflicts mortal wounds in addition to any normal damage, but the normal damage is subsequently saved, the target unit still suffers those mortal wounds, as described above.
- Each mortal wound inflicted on a unit causes one model in that unit to lose one wound.
- Unless the source of the mortal wounds is the [HAZARDOUS] ability or an attack with the [DEVASTATING WOUNDS] ability, damage from mortal wounds is not lost if it can be allocated to another model.
- No saving throws can be made against mortal wounds.
- Mortal wounds inflicted by attacks always apply after any normal damage, even if that damage was saved.
From detonating ammo stores to corrosive innards or frenzied death throes, some targets are deadly even in defeat.
Some models have ‘Deadly Demise x’ listed in their abilities. When such a model is destroyed, roll one D6 before removing it from play (if such a model is a TRANSPORT, roll before any embarked models disembark). On a 6, each unit within 6" of that model suffers a number of mortal wounds denoted by ‘x’ (if this is a random number, roll separately for each unit within 6").- Deadly Demise x: When this model is destroyed, roll one D6. On a 6, each unit within 6" suffers ‘x’ mortal wounds.
Beseeching the Chaos Gods with fanatical fervour, the profane champions of the Heretic Astartes pray for diabolic boons, promising the vilest of offerings in return for their power.
If your Army Faction is HERETIC ASTARTES, each time a unit with this ability is selected to shoot or fight, it can make a Dark Pact. If it does, it must first take a Leadership test before any effects of that Dark Pact are resolved; if that test is failed, that unit suffers D3 mortal wounds. Then, select one of the following abilities for that unit’s weapons to gain until the end of the phase:Monsters and war engines can dispense death from afar even as they trample the masses before them.
MONSTER and VEHICLE units are eligible to shoot in their controlling player’s Shooting phase even while they are within Engagement Range of one or more enemy units. Ranged weapons equipped by MONSTER and VEHICLE units can target one or more of the enemy units they are within Engagement Range of, even if other friendly units are also within Engagement Range of the same enemy unit. Each time a MONSTER or VEHICLE unit makes a ranged attack, if that unit was within Engagement Range of one or more enemy units when it selected its targets, unless that attack is made with a Pistol, subtract 1 from that attack’s Hit roll.You can select an enemy MONSTER or VEHICLE unit within Engagement Range of one or more units from your army as a target of ranged weapons. Each time a model from your army makes a ranged attack against such a target, unless that attack is made with a Pistol, subtract 1 from that attack’s Hit roll.
Designer’s Note: A unit that is within Engagement Range of an enemy MONSTER or VEHICLE unit is still not eligible to shoot, and so cannot make ranged attacks against that MONSTER or VEHICLE unit (unless that unit is eligible to shoot even while within Engagement Range of enemy units, e.g. it is itself a MONSTER or VEHICLE unit, or its models are equipped with Pistols). Other units from your army that are eligible to shoot can, however, target and shoot that enemy MONSTER or VEHICLE unit.
- MONSTERS and VEHICLES can shoot, and be shot at, even while they are within Engagement Range of enemy units. Each time a ranged attack is made by or against such a unit, subtract 1 from that attack’s Hit roll (unless shooting with a Pistol).
Pistols can be wielded even at point-blank range.
Weapons with [PISTOL] in their profile are known as Pistols. If a unit contains any models equipped with Pistols, that unit is eligible to shoot in its controlling player’s Shooting phase even while it is within Engagement Range of one or more enemy units. When such a unit is selected to shoot, it can only resolve attacks using its Pistols and can only target one of the enemy units it is within Engagement Range of. In such circumstances, a Pistol can target an enemy unit even if other friendly units are within Engagement Range of the same enemy unit.If a model is equipped with one or more Pistols, unless it is a MONSTER or VEHICLE model, it can either shoot with its Pistols or with all of its other ranged weapons. Declare whether such a model will shoot with its Pistols or its other ranged weapons before selecting targets.
- Can be shot even if the bearer’s unit is within Engagement Range of enemy units, but must target one of those enemy units.
- Cannot be shot alongside any other non-Pistol weapon (except by a MONSTER or VEHICLE).
| ||||||||||||||
If the result of the Wound roll is greater than or equal to the required number shown in the table above, then that Wound roll is successful and scores one wound against the target unit. Otherwise, the attack fails and the attack sequence ends.
An unmodified Wound roll of 6 is called a Critical Wound and is always successful. An unmodified Wound roll of 1 always fails. A Wound roll can never be modified by more than -1 or +1.
- Critical Wound: Unmodified Wound roll of 6. Always successful.
- An unmodified Wound roll of 1 always fails.
- A Wound roll can never be modified by more than -1 or +1.
If a model in the target unit has already lost one or more wounds, or has already had attacks allocated to it this phase, that attack must be allocated to that model. Otherwise, that attack can be allocated to any model in the target unit. Note that it does not matter if that model is visible to or within range/Engagement Range of the attacking model.
- If a model in the target unit has already lost any wounds or had other attacks allocated to it this phase, the attack must be allocated to that model.
If the result is greater than or equal to the Save characteristic of the model the attack was allocated to, then that saving throw is successful and the attack sequence ends. Otherwise, that saving throw fails and that model suffers damage.
An unmodified saving throw of 1 always fails. A saving throw can never be improved by more than +1.
- Saving Throw: Roll one D6 and modify by the attack’s AP. If the result is less than the Save of the model being rolled for, the saving throw is failed and that model suffers damage. Otherwise, that attack is saved.
- An unmodified saving throw of 1 always fails.
- A saving throw can never be improved by more than +1.
- A model loses a number of wounds equal to the attack’s Damage characteristic.
- If a model is destroyed by an attack, any excess damage inflicted by that attack is lost.
Whether shielded by force fields, enveloped in mystical energies or simply possessed of preternatural senses and lightning-fast reflexes, some warriors are protected by more than mere physical armour.
Some models have an invulnerable save listed on their datasheet. Each time an attack is allocated to a model with an invulnerable save, the controlling player must choose to use either that model’s Save characteristic or its invulnerable save, but not both. If a model has more than one invulnerable save, it can only use one of them – choose which it will use.Unlike armour saving throws (which use a model’s Save characteristic), invulnerable saving throws are never modified by an attack’s Armour Penetration characteristic, but otherwise follow the normal rules for saving throws.
- Invulnerable Save: Never modified by an attack’s AP.
- The controlling player can choose to use either a model’s invulnerable save or its Save characteristic.
Precision attacks can pick high-value targets out in a crowd, whether through the unerring aim of a sniper or the pinpoint accuracy of a blade-master’s strike.
Weapons with [PRECISION] in their profile are known as Precision weapons. Each time an attack made with such a weapon successfully wounds an Attached unit (see Leader ability), if a CHARACTER model in that unit is visible to the attacking model, the attacking model’s player can choose to have that attack allocated to that CHARACTER model instead of following the normal attack sequence.- When targeting an Attached unit, the attacking model’s player can have the attack allocated to a CHARACTER model in that unit visible to the bearer.
Shattered ruins and twisted wreckage afford much-needed shelter from enemy salvoes. Even heavily armoured warriors unfazed by small arms fire are thankful for such cover when foes bring their biggest guns to bear.
Models can sometimes gain a measure of protection from terrain features. The rules below detail the conditions under which a terrain feature confers the Benefit of Cover on a model.Each time a ranged attack is allocated to a model that has the Benefit of Cover, add 1 to the saving throw made for that attack (excluding invulnerable saving throws). Models with a Save characteristic of 3+ or better cannot have the Benefit of Cover against attacks with an Armour Penetration characteristic of 0. Multiple instances of the Benefit of Cover are not cumulative – a model cannot benefit from this rule more than once at any one time.
- Benefit of Cover: Add 1 to armour saving throws against ranged attacks.
- Does not apply to models with a Save of 3+ or better against attacks with an AP of 0.
- Multiple instances are not cumulative.
Some warriors attack with blinding speed, landing their blows before their foes can react.
Units with this ability that are eligible to fight do so in the Fights First step, provided every model in the unit has this ability.If for any reason a model cannot be set up in Unit Coherency, or cannot be set up following any restrictions stated by other rules (e.g. while setting up using the Deep Strike ability), that unit cannot be set up. If a unit cannot end a move in Unit Coherency, it cannot make that move and its models are returned to their previous positions.
At the end of every turn, each player must remove models, one at a time, from any of the units from their armies that are no longer in Unit Coherency, until only a single group of models from each of those units remains in play and in Unit Coherency. Models removed in this way count as having been destroyed, but they never trigger any rules that apply when a model is destroyed.
- Unit Coherency: Within 2" horizontally and 5" vertically of:
- One other model from the same unit (in units of 2-6 models).
- Two other models from the same unit (in units of 7+ models).
- At the end of every turn, if a unit is not in Unit Coherency, the controlling player must remove models until that unit is in Unit Coherency again.
If a unit can end its Consolidation within Engagement Range of one or more enemy units, then each time one of its models makes a Consolidation move, it must end that move closer to the closest enemy model. If it can also end that move in base-to-base contact with one or more enemy models while still satisfying all of the conditions above, it must do so. The controlling player chooses the order in which to move their models.
- Consolidation Move: Up to 3".
- Every model that moves must end closer to the closest enemy model, and in base-to-base contact with an enemy model if possible. The unit must end in Unit Coherency and within Engagement Range of at least one enemy unit if possible.
- If the above is not possible, each model can move towards the closest objective marker, but this must result in the unit being within range of it and in Unit Coherency.
- If the above is also not possible, no models can Consolidate.
Many warriors thunder headlong into combat, using the impetus of their charge to bring swift death to their foes.
Each time a unit makes a Charge move, until the end of the turn, that unit has the Fights First ability.Each time a model makes a Pile-in move, it must end that move closer to the closest enemy model. If it can also end that move in base-to-base contact with one or more enemy models while still satisfying all of the conditions above, it must do so. The controlling player chooses the order in which to move their models.
- Pile-in Move: Up to 3".
- Every model that moves must end closer to the closest enemy model, and in base-to-base contact with an enemy model if possible. The unit must end in Unit Coherency and within Engagement Range of at least one enemy unit (or no models can Pile In).
When setting objective markers up on the battlefield, place them so they are centred on the point specified by the mission. When measuring distances to and from objective markers, measure to and from the closest part of them. Models can move over objective markers as if they were not there, but they cannot end a move on top of an objective marker.
At the start of the battle, each objective marker on the battlefield is said to be contested, and so is not controlled by either player. To control an objective marker, a player will first need to move models within range of it. A model is within range of an objective marker if it is within 3" horizontally and 5" vertically of that objective marker.
Every model has an Objective Control (OC) characteristic listed on its datasheet. To determine a player’s Level of Control over an objective marker, add together the OC characteristics of all the models from that player’s army that are within range of that objective marker. A player will control an objective marker at the end of any phase or turn if their Level of Control over it is greater than their opponent’s. If both players have the same Level of Control over an objective marker, that objective marker is contested.
- A model is within range of an objective marker if within 3" horizontally and 5" vertically.
- Level of Control: Add together the OC characteristics of all of a player’s models within range of the objective marker.
- An objective marker is controlled by the player with the highest Level of Control over it (in a tie, it is contested).
- Models cannot end a move on top of an objective marker.
The MONSTER keyword is used in the following Necrons datasheets:
Employing fractal corridors, dolmen gates and ancient translocation science, the Necrons are able to phase in and out of existence. Nowhere is safe for the terrified foe as mechanoid hunters appear from unfolding planar lattices to slaughter or escape retribution into gulfs of darkness, only to materialise elsewhere to kill anew.
At the end of your opponent’s turn, you can select a number of NECRONS units from your army (excluding units that are within Engagement Range of one or more enemy units). The maximum number of units you can select depends on the battle size, as follows:
|
Once you have made your selections, remove those units from the battlefield and place them into Strategic Reserves.
TARGET: One NECRONS unit from your army (excluding MONSTER units) that is arriving using the Deep Strike or Hyperphasing abilities this phase.
EFFECT: Your unit can be set up anywhere on the battlefield that is more than 6" horizontally away from all enemy models.
RESTRICTIONS: A unit targeted with this Stratagem is not eligible to declare a charge in the same turn.
TARGET: One LEGIONES DAEMONICA unit from your army that is arriving using the Deep Strike ability this phase.
EFFECT: Your unit can be set up anywhere on the battlefield that is more than 6" horizontally away from all enemy models.
TARGET: One ADEPTUS ASTARTES unit from your army that was selected as the target of one or more of the attacking unit’s attacks.
EFFECT: Until the attacking unit has finished making its attacks, each time an attack targets your unit, worsen the Armour Penetration characteristic of that attack by 1.
TARGET: One ADEPTA SORORITAS unit from your army that was selected as the target of one or more of the attacking unit’s attacks.
EFFECT: Until the attacking unit has finished making its attacks, each time an attack targets your unit, worsen the Armour Penetration characteristic of that attack by 1.
The DAMNED keyword is used in the following Chaos Space Marines datasheets:
TARGET: One HERETIC ASTARTES unit from your army (excluding DAMNED units) that was selected as the target of one or more of the attacking unit’s attacks.
EFFECT: Until the attacking unit has finished making its attacks, each time an attack targets your unit, worsen the Armour Penetration characteristic of that attack by 1.
The SYNAPSE keyword is used in the following Tyranids datasheets:
TARGET: One SYNAPSE unit from your army that was selected as the target of one or more of the attacking unit’s attacks.
EFFECT: Until the attacking unit has finished making its attacks, each time an attack targets your unit, worsen the Armour Penetration characteristic of that attack by 1.
The GREY KNIGHTS and PSYKER keywords are used in the following Grey Knights datasheets:
The soul of the Grey Knights is sacrosanct, and their purity is incorruptible. The silvered armour of this Chapter’s warriors is bound with incantations, engraved with sigils of warding. Their blades shine with the inner light of their sanctity, for each of these Space Marines is a psychic warrior, in empyric communion with his battle-brothers. Empowered by minds constantly on guard, they can cut steel with bare hands, their eyes blaze with fire and even the power of their words flays the otherworldly skin of daemons. They are the Imperium’s foremost sword and shield against the daemonic. Guided by the foresight and prophecies of the Chapter’s Prognosticars, a Grey Knight can adapt to the most irrational of foes and, in a flare of teleportation energies, emerge at exactly the right location to unleash their devastating power.
If your Army Faction is GREY KNIGHTS, at the end of your opponent’s turn, you can select a number of GREY KNIGHTS units from your army with this ability (excluding units that are within Engagement Range of one or more enemy units). The maximum number of units you can select depends on the battle size, as follows:
|
Once you have made your selections, remove those units from the battlefield. In the Reinforcements step of your next Movement phase, set each of those units up anywhere on the battlefield that is more than 9" horizontally away from all enemy models. Any units that are not on the battlefield at the end of the battle count as destroyed.
TARGET: One GREY KNIGHTS PSYKER unit from your army that is arriving using the Deep Strike or Teleport Assault abilities this phase.
EFFECT: Until the start of your next Movement phase, your unit can only be selected as the target of a ranged attack if the attacking model is within 18".
The KROOT and INFANTRY keywords are used in the following T’au Empire datasheets:
The CHARACTER keyword is used in the following T’au Empire datasheets:
TARGET: One KROOT INFANTRY or KROOT HOUNDS unit from your army that was just destroyed. You can use this Stratagem on that unit even though it was just destroyed.
EFFECT: Add a new unit to your army identical to your destroyed unit, in Strategic Reserves, at its Starting Strength.
RESTRICTIONS: This Stratagem cannot be used to return destroyed CHARACTER units to Attached units. You can only use this Stratagem once per battle.
The ENDLESS MULTITUDE keyword is used in the following Tyranids datasheets:
The CHARACTER keyword is used in the following Tyranids datasheets:
TARGET: One ENDLESS MULTITUDE unit from your army that was just destroyed. You can use this Stratagem on that unit even though it was just destroyed.
EFFECT: Add a new unit to your army identical to your destroyed unit, in Strategic Reserves, at its Starting Strength.
RESTRICTIONS: Any destroyed CHARACTER units that were attached to your unit are not returned. You can only use this Stratagem once per battle.
The INFANTRY and REGIMENT keywords are used in the following Astra Militarum datasheets:
TARGET: One INFANTRY REGIMENT unit from your army that was just destroyed. You can target that unit with this Stratagem even though it was just destroyed.
EFFECT: Add a new unit to your army identical to your destroyed unit, in Strategic Reserves, at its Starting Strength and with all of its wounds remaining.
RESTRICTIONS: This Stratagem cannot be used to return destroyed CHARACTER units to Attached units. You can only use this Stratagem once per battle.
You can never re-roll a dice more than once, and re-rolls happen before modifiers (if any) are applied. Rules that refer to the value of an ‘unmodified’ dice roll are referring to the dice result after any re-rolls, but before any modifiers are applied.
- Unmodified Dice: the result after re-rolls, but before any modifiers.
- A dice can never be re-rolled more than once.
- You must re-roll all dice if several need adding together (e.g. 2D6).
- Re-rolls are applied before any modifiers.
Some warriors are masters of disguise and concealment.
If every model in a unit has this ability, then each time a ranged attack is made against it, subtract 1 from that attack’s Hit roll.A model can be moved over terrain features that are 2" or less in height as if they were not there. A model can be moved vertically in order to climb up or down any terrain features that are taller than this, counting the vertical distance up and/or down as part of its move. Models cannot end any kind of move mid-climb – if it is not possible to end the move as a result, that move cannot be made.
- Models can move freely over terrain features 2" or less in height.
- Models cannot move through terrain features taller than 2", but can climb up and down them.
The PRIMARCH and IMPERIUM keywords are used in the following Space Marines datasheets:
The datasheets using AIRCRAFT keyword can be found in the following Factions:
Chaos: Chaos Space Marines, Death Guard, Emperor’s Children, Thousand Sons, World Eaters.Imperium: Adeptus Custodes, Adeptus Mechanicus, Astra Militarum, Grey Knights, Imperial Agents, Space Marines.
Xenos: Aeldari, Drukhari, Necrons, Orks, T’au Empire, Tyranids.
The AIRCRAFT keyword is used in the following datasheets:
and others...
The datasheets using TOWERING keyword can be found in the following Factions:
Unaligned: Unaligned Forces.Chaos: Chaos Daemons, Chaos Knights, Chaos Space Marines, World Eaters.
Imperium: Adepta Sororitas, Adeptus Titanicus, Imperial Knights.
Xenos: Aeldari, Necrons, Orks, T’au Empire, Tyranids.
The TOWERING keyword is used in the following datasheets:
Some aircraft can use vectored thrusters or anti-grav technology to hover over the battlefield, the better to hunt their prey or deploy embarked troops.
Some AIRCRAFT models have ‘Hover’ listed in their abilities. When you are instructed to Declare Battle Formations, before doing anything else, you must first declare which models from your army with this ability will be in Hover mode.If a model is in Hover mode, then until the end of the battle, its Move characteristic is changed to 20", it loses the AIRCRAFT keyword and it loses all associated rules for being an AIRCRAFT model. Models in Hover mode do not start the battle in Reserves, but you can choose to place them into Strategic Reserves following the normal rules if you wish.